Most screen recording tools let you record up to two and sometimes even four hours, but they often end up crashing without recording all the data. This is where open source OBS Studio comes in.

Image: OBS Studio
There are plenty of tools for screen recording–some are even now included in your favorite operating system: QuickTime Player for macOS and the Xbox Game Bar in Windows 10, for example. Yet the Xbox Game Bar allows only up to four hours of recording. QuickTime Player allows more (the limit is in theory the space available on the storage device), but it is sometimes tricky to make it work nicely, depending on the configuration, especially for the audio part.
After doing several tests and asking communities about it, I found the best tool for doing long screen recordings is OBS Studio.
What is OBS Studio?
OBS Studio is open source software that works on Windows, Mac and Linux (most distributions). It is sponsored by YouTube, Twitch and Facebook, since it is massively used by those creating video/streaming content shared on these platforms.
The main features of the tool are:
- High-performance real-time video and audio capturing and mixing.
- Audio mixer including filters, such as noise suppression, etc.
- VST plugin support.
- Live streaming on a wide range of streaming platforms.
SEE: Video and online conferencing policy (TechRepublic Premium)
How to install OBS Studio on Windows
From the main page of the website, select Windows. The download starts immediately (Figure A).
Figure A
” data-credit>
Selecting Windows download from the main OBS Studio page
Select where to download the file, then double-click it when downloaded to execute the installer (Figure B).
Figure B
” data-credit>
Launching the OBS Studio installer
Click Next, then Next again to accept the GNU General Public License, then choose the folder in which the software will be installed (Figure C).
Figure C
” data-credit>
Selecting the installation folder and launching the installation
Now, click Install. Once the installation is done, click Finish to launch the software.
OBS Studio first execution
The first time the software is launched, it runs an Auto-configuration wizard aimed at optimizing the software for the computer hardware and internet connection, but also for your needs.
It starts by asking you what kind of usage you’ll have for the tool (Figure D).
Figure D
” data-credit>
Auto-configuration wizard
You need to specify whether you’ll mostly use the tool for streaming, for recording or for using the virtual camera. Since we want to do video recording, I’m choosing to optimize the tool for recording. Once you’ve made your choice, click Next to bring up the screen shown in Figure E.
Figure E
” data-credit>
Configuring the video settings from the Auto-configuration wizard
Now you can choose the resolution you want and the number of frames per seconds. For longer records and to save resources, I chose 30 FPS. When more quality is needed, 60 would be a good choice.
Once it is done, you’ll be invited to click on Apply Settings (Figure F).
Figure F
” data-credit>
The results of the Auto-configuration wizard and accepting it
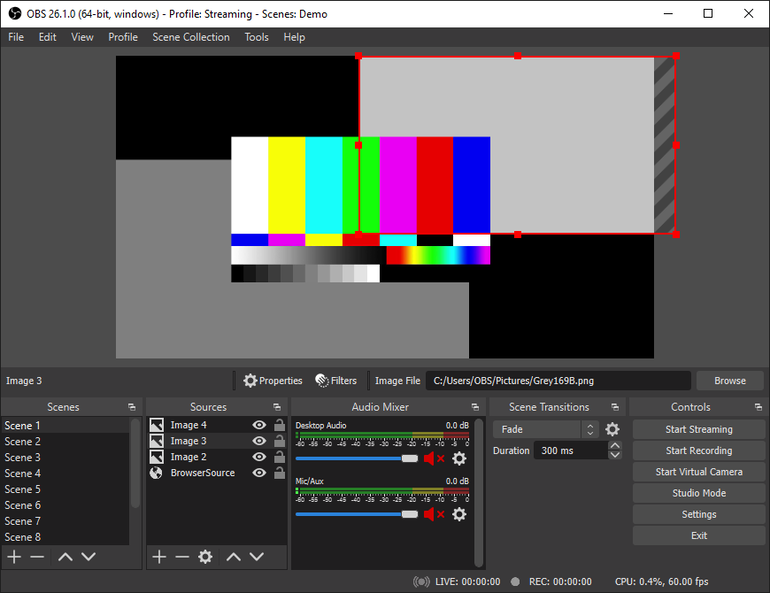
OBS Studio is now ready for use and shows its main window (Figure G).
Figure G
” data-credit>
The main OBS Studio window
SEE: Electronic communication policy (TechRepublic Premium)
How to record the screen
First, you need to select the source of the data you want to record. In the Sources panel, select + to add a source (Figure H).
Figure H
” data-credit>
The sources for recording
It is possible to choose between several sources, such as only audio input/output or browser.
We’ll go for the wider choice and choose Window Capture, which allows capturing just about anything we might want to record on the screen (Figure I). Click the + button, then choose Window Capture.
Figure I
” data-credit>
Creating a new Window Capture
OBS Studio now shows one of the windows that is opened on the computer (in our example, a browser) and offers several options (Figure J).
Figure J
” data-credit>
Choosing the window to capture
With the Window Capture options, it is possible to choose any window that is opened on the computer: a browser window, an instant messaging application window, etc. Change the options according to your needs, then click OK.
The tool is ready to record. You can now click Start Recording in the controls panel (Figure K).
Figure K
” data-credit>
Showing the control panel
Once the recording starts, you can even do other activities on the computer, as long as it’s not in the captured window. You might keep reading emails while recording what happens in a web conferencing window, for example.
Conclusion
The focus of this guide is to achieve screen recording, though OBS Studio contains a lot more tooling and options (e.g., options for streaming or using OBS as virtual camera). During my tests, I successfully recorded a single video that lasted for more than five hours without noticing any performance issue. The only limitation here would be the remaining space on the hard drive where the video is recorded.

Executive Briefing Newsletter
Discover the secrets to IT leadership success with these tips on project management, budgets, and dealing with day-to-day challenges. Delivered Tuesdays and Thursdays
Also see
Source of Article


