If you’ve ever wanted to create a custom Linux image to be used in your data center deployments, Cubic is here to make that job considerably easier.

Image: Getty Images/iStockphoto
At this point, you most likely use Linux in your data center. It’s an inevitability that you cannot fight these days. And that’s a very good thing because Linux is incredibly powerful, flexible and (without question) powers so much of what we depend on.
If you’re deploying to a lot of servers in your data center, the idea of installing a base server distribution and then adding everything you need, one server at a time, can be a bit of a daunting task. That’s understandable, especially when those servers might number in the hundreds. And if you’re not using virtual machines for those deployments, you’re probably looking for a way to make those rollouts a bit easier.
Cubic might be the answer.
SEE: 5 Linux server distributions you should be using (TechRepublic Premium)
Cubic makes it easy to roll up your own Linux custom image, based on a known distribution, and create a bootable ISO so you can install the exact version of Linux you need. Cubic is a very easy to use GUI tool.
I want to demonstrate how this is done, so you can create your own image to be installed on your data center servers. I’ll demonstrate by creating an ISO image based on Ubuntu Server 21.10, but you can use whatever image you like.
What you’ll need
The only things you’ll need for this are a running instance of a Debian-based Linux desktop, a downloaded ISO image of a Linux distribution to base your image on, and a user with sudo privileges.
How to install Cubic
The first thing we must do is install Cubic. To do this, log into a Debian-based desktop and add the necessary repository with:
sudo add-apt-repository ppa:cubic-wizard/release
Next, update apt and then install Cubic with:
sudo apt-get update
sudo apt-get install cubic -y
Once Cubic is installed, you’ll find the launcher in your desktop menu. Click to launch it, and you’re ready to create your image.
How to create your custom image
From the main Cubic window (Figure A), click the folder icon and then, from within your file manager, create and select a new directory to be used by the application to create and house your custom images.
Figure A
” data-credit>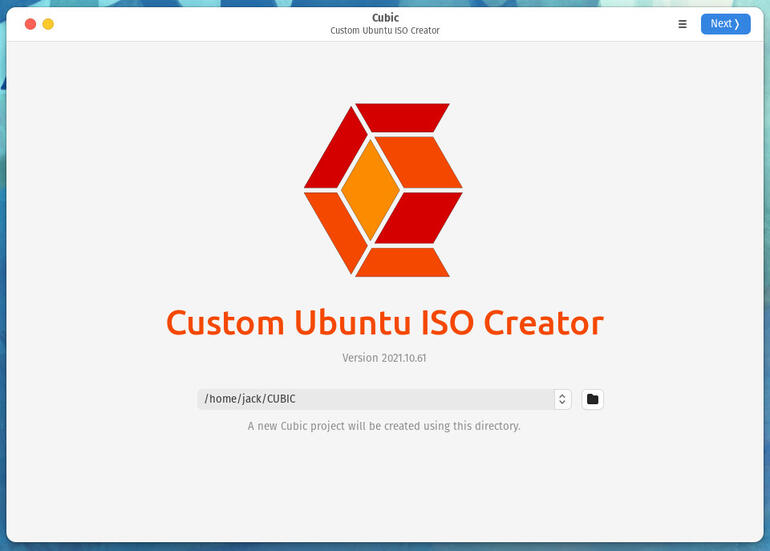
Select a project directory for Cubic to use.
Click Next and then, in the next window (Figure B), you must select the ISO image the custom version will be based on. After selecting the image, all fields will be auto-populated. You can then customize those on the right side.
Figure B
” data-credit>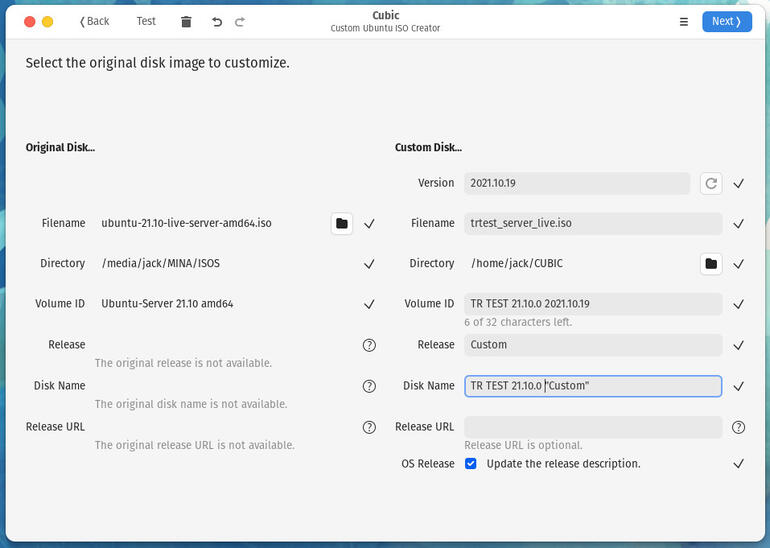
Select the base image for Cubic to use to build your custom ISO.
Click Next and you will eventually end up at a chroot terminal prompt (Figure C).
Figure C
” data-credit>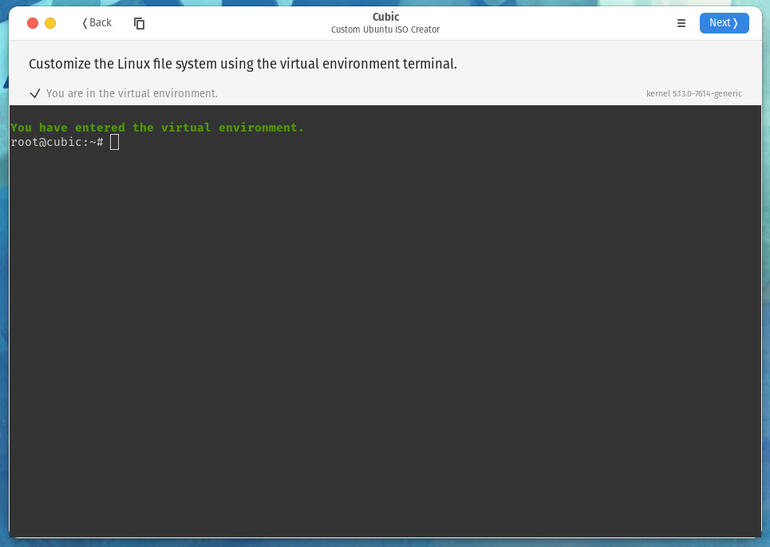
Cubic dumps you into a terminal window, where you can customize the image.
At this point, you can start adding software and customize the image to your exact specifications. Everything here is done from the terminal window. Say, for example, you want the ISO to include a complete LAMP server. First, issue the command:
apt-get update
Then install the LAMP server with:
apt-get install lamp-server^
You might want to install a specific version of PHP or take care of any number of other customizations for your image. One thing to note is that the chroot environment is not booted with systemd initialized, so you can’t start or enable services. Because of that, you can’t do any work within databases. You can, however, drag and drop files from your file manager to the chroot environment and edit any configuration files (with the nano editor).
Once you’ve completed this step, click Next and Cubic will then present you with a window that allows for the removal of packages for a minimal installation (Figure D).
Figure D
” data-credit>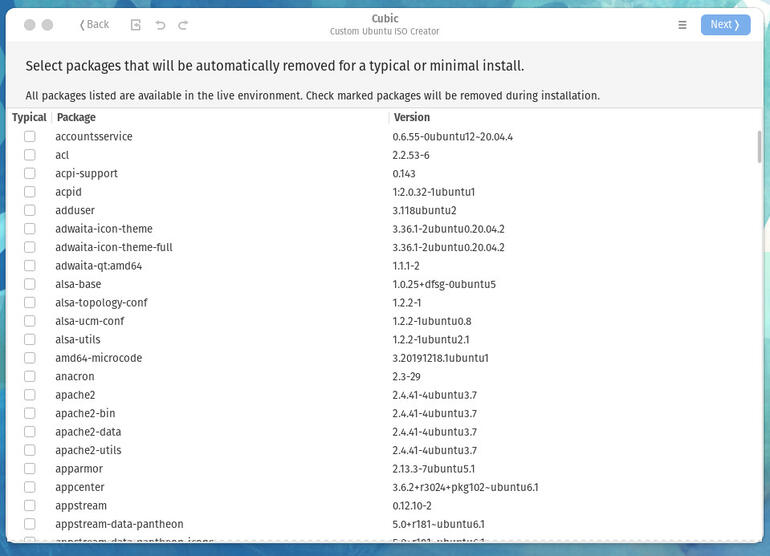
Selecting packages for removal so Cubic can also create a minimal installation.
Once you’ve selected the packages to be removed (if any), click Next and then select which kernel will be used for the image. You’ll then be required to select the compression used for the image (Figure E).
Figure E
” data-credit>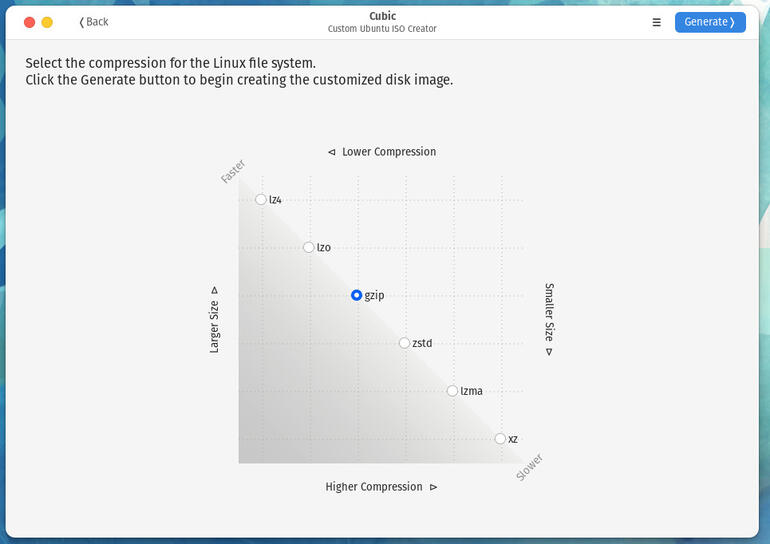
Choose your compression wisely.
I would suggest going with the default compression (gzip) to be certain the live image will function properly. Click Generate and Cubic will create your custom ISO image. When the process completes, you’ll be presented with a window (Figure F) that details what Cubic has done and where you can find your new custom ISO image.
Figure F
” data-credit>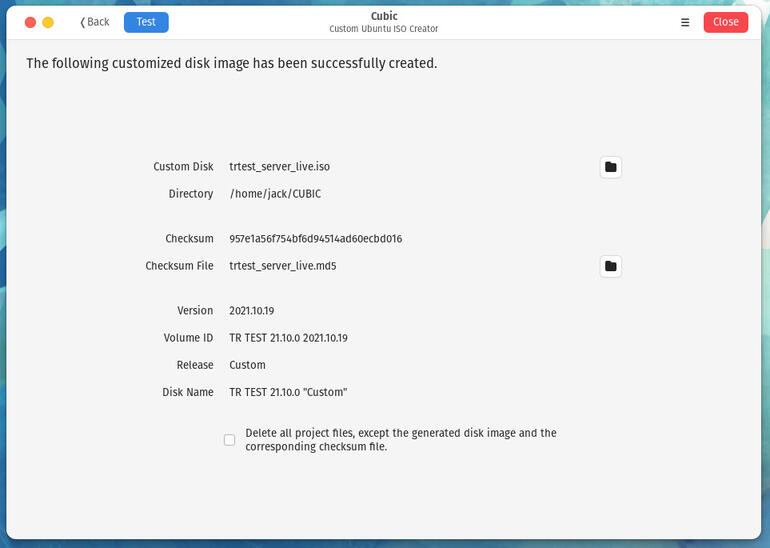
Your custom image has been created by Cubic.
At this point, you can either copy that image to a server to be downloaded at will, or to a USB drive and start deploying it to your data center servers.
Congratulations, you’ve just made your Linux deployments a bit more efficient.
Subscribe to TechRepublic’s How To Make Tech Work on YouTube for all the latest tech advice for business pros from Jack Wallen.

Open Source Weekly Newsletter
You don’t want to miss our tips, tutorials, and commentary on the Linux OS and open source applications. Delivered Tuesdays
Also see
Source of Article


