
If you’re looking for one of the best networkable Linux backup solutions, you cannot go wrong with Bacula. Jack Wallen walks you through the installation and setup of the server portion.

Image: iStockphoto/5432action
Your server backups are critical to keeping your servers from permanently losing their data. This can happen due to a server crash, a hacker, a misconfigured service and plenty of other reasons. You don’t want to ever have to depend on a backup, but you’ll be thankful it’s there when you do.
On Linux servers, you have a number of options for backups. One choice that’s been around for a very long time (and is the go-to option for most Linux admins) is Bacula. This particular backup option is outstanding for backing up machines locally or over the network. Bacula can be installed on most Linux servers and the client (for backing up desktops and remote servers over your LAN) is supported on Linux, macOS and Windows.
I want to walk you through installing the Bacula server on Ubuntu Server 20.04, so you can back up your local data. Later, we’ll focus on backing up to the Bacula server from remote clients over your local network.
What you’ll need
SEE: Linux service control commands (TechRepublic Premium)
How to install Bacula Server
In order to install Bacula Server, log in to your Ubuntu instance and issue the command:
sudo apt-get install bacula -y
You will be prompted for the following:
-
Mail server configuration (unless you need email alerts, you can configure this as local only)
-
System mail name (this is the email domain for the server, if applicable)
-
Configure database for bacula-directory-pgsql (you want to do this and set it as localhost)
-
Configure a password for the Bacula PostgreSQL database
Once you’ve completed the above, you’ll get your prompt back and can continue on with the configuration.
How to configure the Bacula Server
Before we actually dive into the configuration of Bacula, let’s create a directory to house our local backups. Let’s assume you have an external drive, attached to the server, which is mounted at /data. That directory will be our Archive Device. You need to make sure that directory is owned by the bacula user/group with the command:
sudo chown -R bacula:bacula /data
Next, we’ll configure our Archive Device within the default Bacula configuration file. Open that file with the command:
sudo nano /etc/bacula/bacula-sd.conf
In that file, locate the Device and Autochanger sections and comment them completely out (by adding a # character before each line). Next, we’ll add a new Device section:
Device {
Name = Local-device
Media Type = File
Archive Device = /data
LabelMedia = yes; # lets Bacula label unlabeled media
Random Access = Yes;
AutomaticMount = yes; # when device opened, read it
RemovableMedia = no;
AlwaysOpen = no;
Maximum Concurrent Jobs = 5
}
Note: If your backup location is different than /data, make sure to use the correct path for your setup.
Before you save and close the file, scroll back to the top and copy the password string in the line (from the Director section):
Password =
You’ll need that password to configure the Director.
How to start and and enable Bacula
We now can start and enable the Bacula service with the following commands:
sudo systemctl start bacula-sd
sudo systemctl enable bacula-sd
The server is now running.
How to configure the Bacula Director
With the Bacula server up and running, we now have to configure the Director (which supervises all backup, restore, verify and archive operations). Open the Director configuration file with the command:
sudo nano /etc/bacula/bacula-dir.conf
At the bottom of that file, add the following:
Storage {
Name = fossaserver-dir Address = 127.0.0.1
Password = "PASSWORD"
Device = Local-device
Media Type = File
}
FileSet {
Name = "Local-file"
Include {
Options {
signature = MD5
}
File = /var/www/html
}
}
Schedule {
Name = "LocalDaily"
Run = Full daily at 06:00
}
Job {
Name = "LocalBackup"
JobDefs = "DefaultJob"
Enabled = yes
Level = Full
FileSet = "Local-file"
Schedule = "LocalDaily"
Storage = ubuntu2004-sd
Write Bootstrap = "/var/lib/bacula/LocalhostBackup.bsr"
}
Note: The fossaserver-dir option (in Name =) must match the “Name” parameter in the “Storage” section of the /etc/bacula/bacula-sd.conf file. If the server configuration includes:
Name = fossaserver-sd
The director configuration will be:
Name = fossaserver-dir
The above configuration will back up the /var/www/html/ directory. If you want to back up a different directory, make sure to change the File = line to meet your needs.
Save and close the file. Restart the Bacula Director with the command:
sudo systemctl restart bacula-dir
How to verify the backup job
Bacula is now configured to run a daily backup of /var/www/html at 6AM. We can confirm that with the command:
sudo bconsole
At the Bacula console, issue the command (Figure A):
run
Figure A
” data-credit>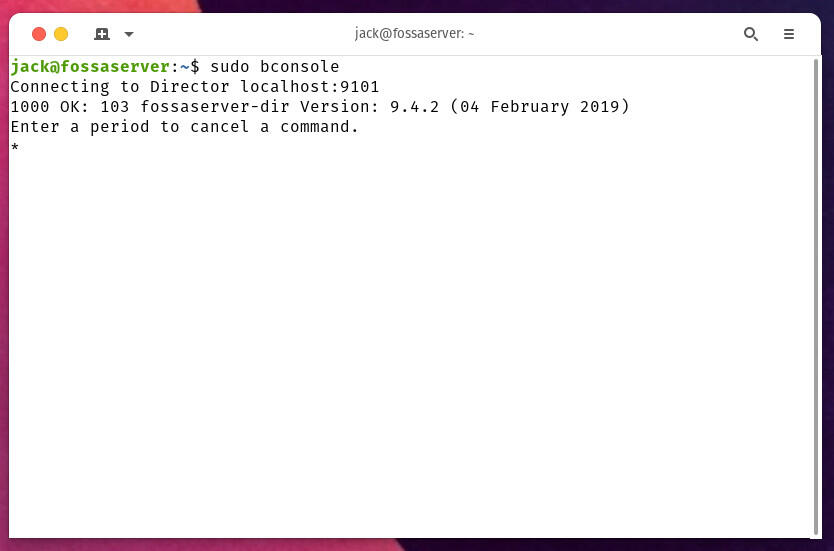
The Bacula console in action.
Select the LocalBackup option and then type yes to queue the job. Type status and then select Director and you should see the backup job completed (Figure B).
Figure B
” data-credit>
Our first backup successfully completed.
Type exit to leave the console. If you then type ls /data, you’ll see Vol-001 in the directory, confirming the backup ran.
That’s it. We’ve installed and configured Bacula server. Next time around, we’ll install the Bacula client on a remote machine and back up over the network to the server.
Subscribe to TechRepublic’s How To Make Tech Work on YouTube for all the latest tech advice for business pros from Jack Wallen.

Open Source Weekly Newsletter
You don’t want to miss our tips, tutorials, and commentary on the Linux OS and open source applications. Delivered Tuesdays
Also see
Source of Article


