If you’re a Git user, and you’d like to integrate your Linux file manager into the tool, Jack Wallen has just the thing for you.

Image: iStock/deagreez
I’m a GNOME user, so the Nautilus file manager is my tool of choice, when I’m not working in the terminal, for file and directory management. When I have to work with Git, I’m comfortable with the command line. However, there are times when I prefer to use a GUI. In the case of Git, what’s one to do?
There are plenty of third-party tools to be had, but why not go for full-on efficiency and integrate Git and Nautilus? That would obviously be the way to go for anyone working in the GNOME desktop environment.
Since this is Linux, you shouldn’t be surprised when I tell you that integrating these two tools is quite easy. Once you’ve taken care of the integration, you can do the following from within the GUI file manager:
-
Initialize repositories
-
Clone
-
Delete
-
Checkout
-
Export
-
Update
-
Push
-
Commit
-
Merge
-
Manage branches
This integration also works with SVN and Mercurial (Hg).
Let’s get this integration working in your Nautilus file manager.
SEE: Top 5 programming languages for systems admins to learn (free PDF) (TechRepublic)
What you’ll need
Obviously, you’ll need a Linux desktop that uses the Nautilus file manager. If you’re using GNOME, you’re good to go. If you’re using a Debian-based distribution that doesn’t have the GNOME desktop environment, you can install Nautilus with a command like:
sudo apt-get install nautilus
Just make sure installing Nautilus won’t cause any problems with your desktop of choice.
You’ll also need a user with sudo privileges and (for use with GitHub) a GitHub account.
How to integrate Git with Nautilus
To make this work, we’re going to install the rabbitvcs package for Nautilus. Log in to your desktop, open a terminal window, and issue the command:
sudo apt-get install rabbitvcs-nautilus -y
When the installation completes, you can either log out and log back in, or restart Nautilus with the command:
nautilus -q
At this point, Git integration is ready to use.
How to use the Git integration
I’ll show you how to use this new integration, by walking through creating a new project, all from within the file manager.
Open Nautilus and right-click an empty spot in the current directory. Select New Folder and name it MYPROJECT (or whatever you prefer). Once the folder is ready, right-click it and select RabbitVCS Git | Initialize Repository (Figure A).
Figure A
” data-credit>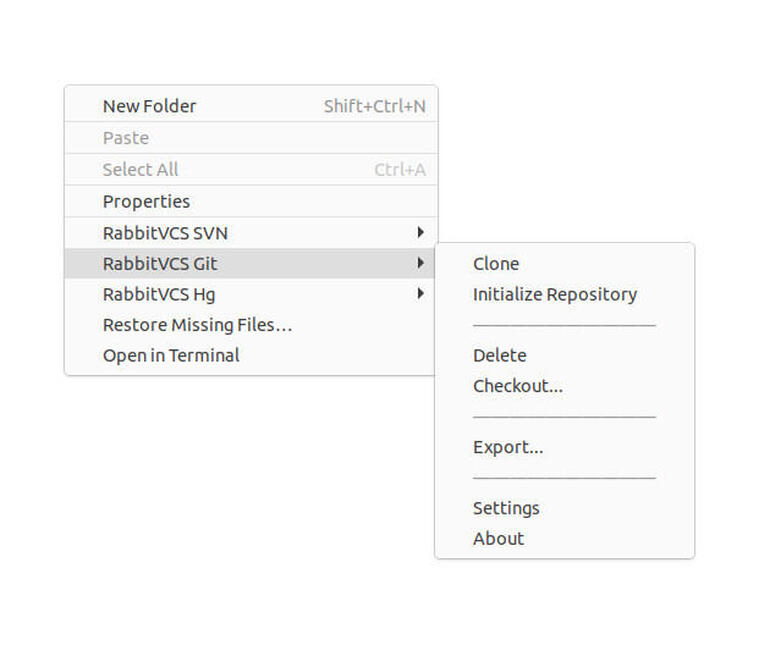
Initializing our new project from within Nautilus.
In order to create a file within the new directory, you’ll have had to create a template file in the ~/Templates directory. Let’s say we’re going to start off by creating a README.txt file in the project folder. Before you can do that, you need to issue the command:
nano ~/Templates/touch text_template.txt
Now you can create a blank .txt file from within Nautilus. Double-click the MYPROJECT folder and then right-click anywhere inside and select New Document | text_template. Right-click the new file and rename it README.txt.
Next, right-click in the folder and select RabbitVCS | Commit. In the resulting window, type a message for your commit and click OK (Figure B).
Figure B
” data-credit>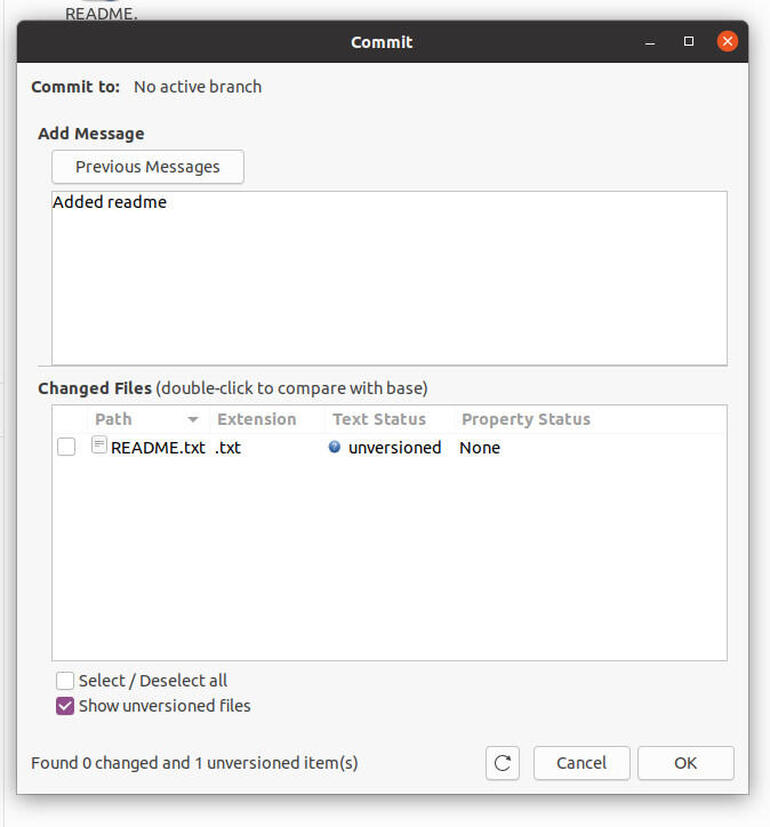
Committing our new README.txt file.
Before you continue, if you want to integrate RabbitVCS with GitHub, you’ll need to locate the SSH URL for your repository. Once you have that, right-click anywhere in the folder and select Update. In the resulting window, you’ll paste the repository URL in the Repository section, type master in the Branch, and click OK (Figure C).
Figure C
” data-credit>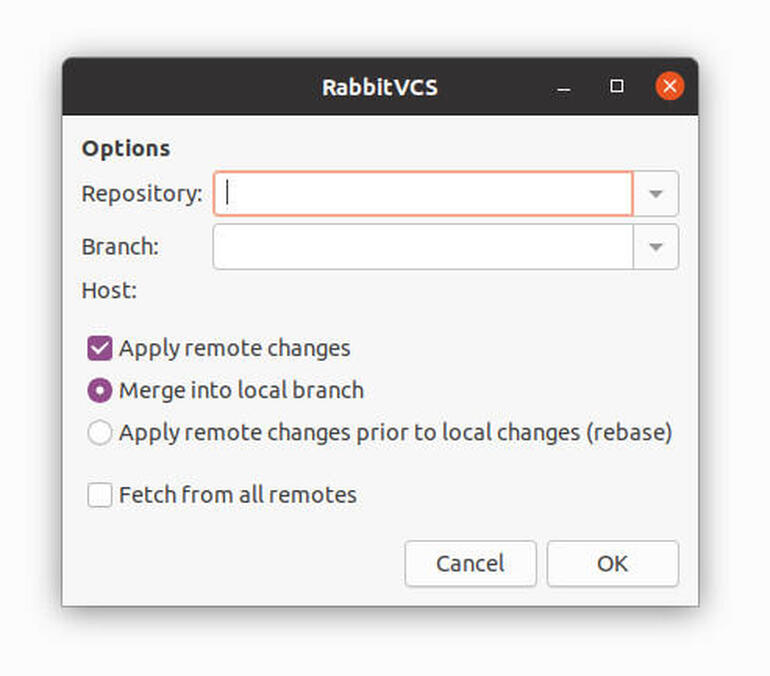
Adding your GitHub repository URL.
This should not only update the remote repository, but it will also pull down any files you have on the GitHub remote.
Note: If you have problems with this, you might need to log in to Git from the command line first. How you do this will depend on what type of authentication you have set up for your GitHub account. Given that they are deprecating standard password authentication soon, you’ll need to set up either SSH or HTTPS authentication.
Make some changes to your code and then add a new commit and update. Once you’ve taken care of that, right-click inside the folder and select Push. You will be prompted for the URL of your GitHub repository (Figure D).
Figure D
” data-credit>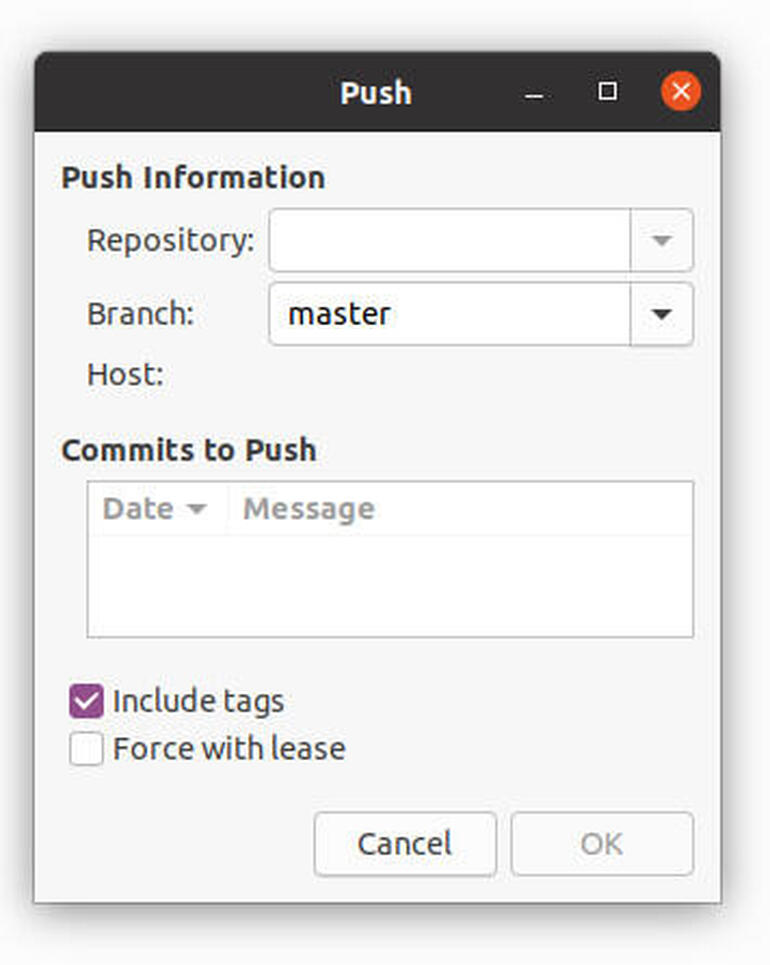
Pushing your changes to the remote repository.
If you add or edit files within GitHub, you can then do an Update from with Nautilus to pull them down.
And that’s the gist of integrating Nautilus with Git. If you find a GUI a bit more efficient than the command line, this tool might make your daily workflow a bit easier. It might take a bit of time to figure out the workflow with this integration, but it’s simply enough that any developer can employ.
Subscribe to TechRepublic’s How To Make Tech Work on YouTube for all the latest tech advice for business pros from Jack Wallen.

Open Source Weekly Newsletter
You don’t want to miss our tips, tutorials, and commentary on the Linux OS and open source applications. Delivered Tuesdays
Also see
Source of Article


