Jack Wallen shows you how to effortlessly deploy the powerful project management platform, OpenProject, as a Docker container.

Image: iStock/Kerkez
OpenProject is an outstanding platform for project management. With OpenProject you can manage meetings, control project budgets, run reports on your projects, communicate with a project team, schedule your projects from the top-down, create forms for a project, work with agile boards, customize the theme and workflow and manage nearly every aspect of your project via a beautiful web-based interface.
If you’ve ever attempted to install the software, you know how problematic it can be. Although I’ve successfully deployed the tool manually, the installation is about as flaky as they come. You might nail it once, but the next time around (using the same process), it might fail.
Fortunately, there’s a much easier and more reliable method of getting OpenProject up and running. Said method is by way of a Docker container. Using this route, I’ve never had a deployment fail on me. I’m going to show you how to do just that.
SEE: 5 Linux server distributions you should be using (TechRepublic Premium)
What you’ll need
I’ll be demonstrating this deployment on Ubuntu Server 20.04, but you can deploy OpenProject on any platform that supports Docker and Docker Compose. You’ll also need a user with sudo privileges.
How to install Docker and Docker-Compose
The first thing we must do is install Docker and Docker-Compose. Log in to your Ubuntu server and install Docker with the command:
sudo apt-get install docker.io -y
After the installation completes, add your user to the docker group with the command:
sudo usermod -aG docker $USER
Log out and log back in, so the changes take effect.
To install Docker Compose, run the following two commands:
sudo curl -L "https://github.com/docker/compose/releases/download/1.23.1/docker-compose-$(uname -s)-$(uname -m)" -o /usr/local/bin/docker-compose
sudo chmod +x /usr/local/bin/docker-compose
When you’ve finished installing Docker Compose, you’re ready to deploy. I’ll demonstrate two different methods of deploying OpenProject:
- docker-compose: A pre-configured deployment
- docker: Allows you to create volumes for persistent data, should the container have to be restarted
How to deploy OpenProject with Docker Compose
This method will use docker-compose and is the simplest method of deploying OpenProject. From the terminal window, clone the OpenProject source with the command:
git clone https://github.com/opf/openproject-deploy --depth=1 --branch=stable/11 openproject
Change into the directory housing the docker-compose.yaml file with the command:
cd openproject/compose
Make sure to update your Docker images with the command:
docker-compose pull
Once the pull finishes, deploy the necessary containers for OpenProject with the command:
docker-compose up -d
You now need to wait a few minutes (as many as five), until everything is up and running and ready. Open a web browser and point it to http://SERVER:8080 (where SERVER is the IP address of the server hosting Docker). You should see the OpenProject main page (Figure A), where you can log in with the default credentials of admin/admin.
Figure A
” data-credit>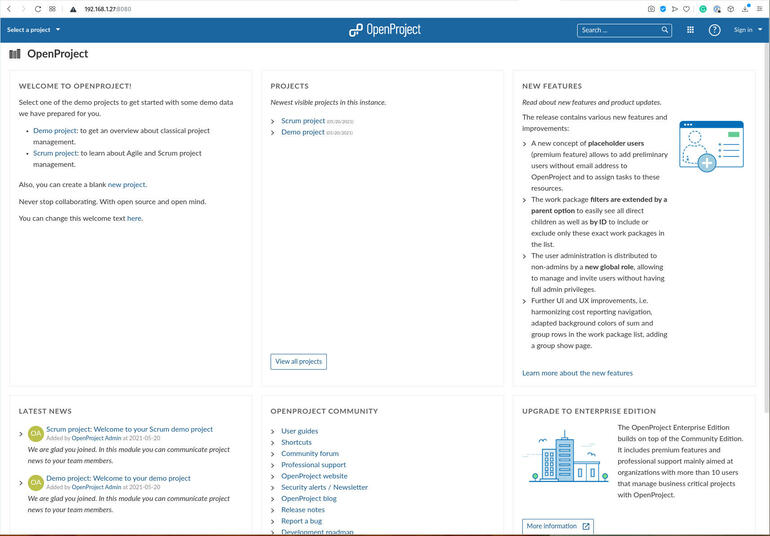
The main OpenProject page is ready for you to get to work.
How to deploy with docker
Now that you know how simple it can be to deploy OpenProject, let’s make it just as easy, but give you the power of creating directories on the host system, which will house all of the OpenProject data. This is the recommended method of deploying OpenProject via containers, as your data will remain persistent.
To deploy in this manner, you must first create the directories to house the data. Create those directories with the command:
sudo mkdir -p /var/lib/openproject/{pgdata,assets}
With your directories ready, let’s create a random string, to be used as the SECRET_KEY_BASE variable. This can be done with the command:
head /dev/urandom | tr -dc A-Za-z0-9 | head -c 32 ; echo ''
Copy the output of that command.
You can then deploy the OpenProject containers with the command:
docker run -d -p 8080:80 --name openproject -e SECRET_KEY_BASE=secret -v /var/lib/openproject/pgdata:/var/openproject/pgdata -v /var/lib/openproject/assets:/var/openproject/assets openproject/community:11
Where “secret” is the random key generated by the head command.
Once again, you’ll need to wait a few minutes before the site comes up. I would highly recommend you deploying OpenProject with this second method, as it ensures you can stop and start the container, without losing your data.
Enjoy the power of OpenProject, quickly and effortlessly deployed via Docker.
Subscribe to TechRepublic’s How To Make Tech Work on YouTube for all the latest tech advice for business pros from Jack Wallen.

Open Source Weekly Newsletter
You don’t want to miss our tips, tutorials, and commentary on the Linux OS and open source applications. Delivered Tuesdays
Also see
Source of Article


