Jack Wallen walks you through the process of setting up NGINX such that it will direct incoming port 80 traffic to Apache, listening on port 8080.

NGINX is an incredibly fast web server. Apache is an incredibly powerful web server. Both have pros and cons, so sometimes it can be a challenge to decide which one to choose.
What if I told you that you can get the best of both worlds? The speed of NGINX and the power of Apache.
You do that by configuring NGINX as a reverse proxy for Apache. With this setup, NGINX will listen for all incoming requests to port 80 and pass them on to Apache, which is listening in on port 8080.
I’m going to show you how to do that very thing on Ubuntu Server 20.04. I’ll be demonstrating a very basic setup.
SEE: Linux service control commands (TechRepublic Premium)
What you’ll need
- A running instance of Ubuntu Server 20.04
- A user with sudo privileges
How to install and configure Apache
The first thing we’ll do is install and configure Apache. To install the web server, log in to Ubuntu and issue the command:
sudo apt-get install apache2 -y
Once the server is installed, you’ll need to configure it to listen to port 8080 (instead of the default 80). To do that, issue the command:
sudo nano /etc/apache2/ports.conf
In that file, look for the line:
Listen 80
Change that line to:
Listen 8080
Save and close the file.
Now you can start and enable Apache with the commands:
sudo systemctl start apache2
sudo systemctl enable apache2
How to install and configure NGINX
We can now install NGINX with the command:
sudo apt-get install nginx -y
Once NGINX has been installed, we’ll create a proxy configuration with the command:
sudo nano /etc/nginx/conf.d/proxy.conf
In that file, paste the following:
server { listen 80; server_name test.example.com; location ~ \.php$ { proxy_pass http://SERVER:8080; proxy_set_header Host $host; proxy_set_header X-Real-IP $remote_addr; proxy_set_header X-Forwarded-For $proxy_add_x_forwarded_for; proxy_set_header X-Forwarded-Proto $scheme; }
}
Where SERVER is the IP address of your hosting server. Save and close the file.
Start and enable NGINX with the commands:
sudo systemctl start nginx
sudo systemctl enable nginx
Create a test HTML file with the command:
sudo nano /var/www/html/test.html
In that file, paste the following:
!DOCTYPE html>
<html>
<body>
<h1>Apache</h1>
<p>by way of NGINX</p>
</body>
</html>
Save and close the file.
Remember, NGINX is listening to port 80 and Apache is listening to port 8080. If you open a browser and point it to http://SERVER:8080/test.html (where SERVER is the IP address of the hosting server) you’ll see the test page (Figure A).
Figure A
” data-credit>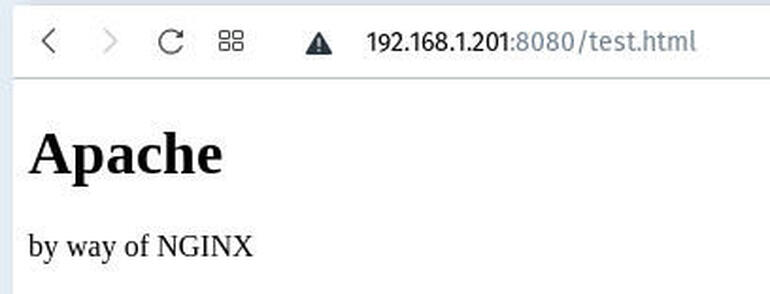
Our test.html page in all it’s basic glory, served by Apache on port 8080.
If you point the browser to http://SERVER/test.html (where SERVER is the IP address of the hosting server), you’ll see the same page. NGINX is successfully passing incoming port 80 traffic to port 8080.
And that’s all there is to setting up a basic NGINX reverse proxy for Apache.
Subscribe to TechRepublic’s How To Make Tech Work on YouTube for all the latest tech advice for business pros from Jack Wallen.

Open Source Weekly Newsletter
You don’t want to miss our tips, tutorials, and commentary on the Linux OS and open source applications. Delivered Tuesdays
Also see
Source of Article


