Nextcloud Mail users will be thrilled with the new AI-driven inboxes. Learn the ins and outs of this new feature.
Image: Jack Wallen
Nextcloud continues to push the boundaries of what its on-premise cloud solution offers. This open source platform is a great addition to data centers large and small. With the release of Nextcloud 19 (aka Nextcloud Hub), the developers have put considerable effort into making the platform even more efficient and user-friendly. In particular, one feature that might raise some eyebrows for many admins and users is the AI-driven inbox.
The latest iteration of the Nextcloud Mail app introduces a Priority Inbox. This new machine learning-focused feature builds on the recent Nextcloud introduction of a message cache system to not only improve performance of the mail app, but to learn from your email habits. The new app can track those you frequently email (along with other factors) to present your email as:
-
Important
-
Favorites
-
Other
You can manually classify an email as either a favorite or important and the AI will learn from those you’ve tagged.
I want to show you how to use this new feature with Nextcloud. On the off-chance your installation doesn’t offer the feature, we’ll see to it that it does.
What you’ll need
You’ll need a Nextcloud installation, version 18 or newer. You’ll also need a Nextcloud account that has admin privileges for your deployment and an email account setup within Nextcloud.
How to upgrade the Mail app
In order to use the new AI-driven Mail app, you must upgrade it to version 1.4.0. To do that, log in to your Nextcloud instance with an admin user and then click your profile image in the top-right corner. From the popup menu, select Apps.
In the resulting window, scroll down until you see the mail entry. If you see a blue oval, stating Update To 1.4.0, click it (Figure A). Since you just logged in as the admin user, you shouldn’t be prompted for your admin password. If you are, type that password and once you successfully authenticate, the upgrade will begin and complete.
Figure A
” data-credit rel=”noopener noreferrer nofollow”>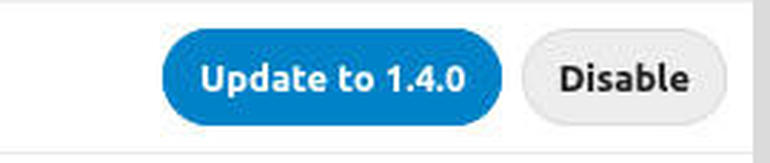
Upgrading the Nextcloud Mail app to the AI-driven version.
Once you’ve upgraded, there’s nothing more to configure–the AI inbox just works.
How to use the new Mail app
Again, I’ll assume you already have your email account connected to Nextcloud. If you haven’t taken care of that, read How to add email to your Nextcloud server and you shouldn’t have any problem getting your email account setup with Nextcloud.
With that taken care of, click the Mail app in the Nextcloud toolbar. Once the new mail scans through your inbox, you’ll see a different layout in the left sidebar (Figure B).
Figure B
” data-credit rel=”noopener noreferrer nofollow”>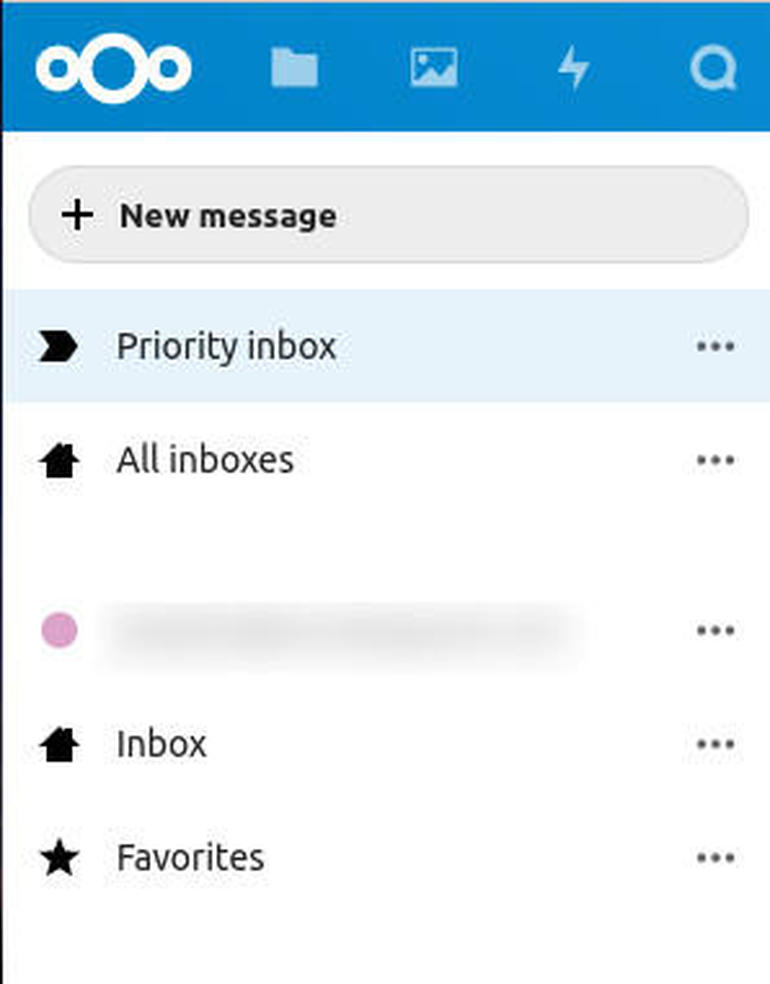
The new Mail 1.4.0 inbox layout.
To view the AI-driven inbox, click Priority Inbox. To view only the inbox associated with the account you want to read, click Inbox. To view all inboxes for all accounts, click All Inboxes.
How to manually tag emails
One of the best ways you can help the Nextcloud Mail AI is to manually tag emails. Yes, it will learn from those you frequently email, but you should still get in the habit of marking those contacts or companies you don’t frequently interact with.
To do this, click on Inbox, search for an email to tag, and click the associated menu button (three horizontal dots). From the popup menu, select either Favorite or Mark Important (Figure C).
Figure C
” data-credit rel=”noopener noreferrer nofollow”>
Manually tagging an email to assist the Mail AI learning process.
How to enable the learning feature
If you find the Priority, Favorite, and Other inboxes not receiving new emails, you might have to go in and actually enable the feature. It should be enabled by default, but it could be possible that your instance failed to automatically set this feature up.
To enable the Mail app data collection (the AI), open Mail and then click the Settings cog at the bottom-right of the app. Make sure Allow The App To Collect Data is checked (Figure D).
Figure D
” data-credit rel=”noopener noreferrer nofollow”>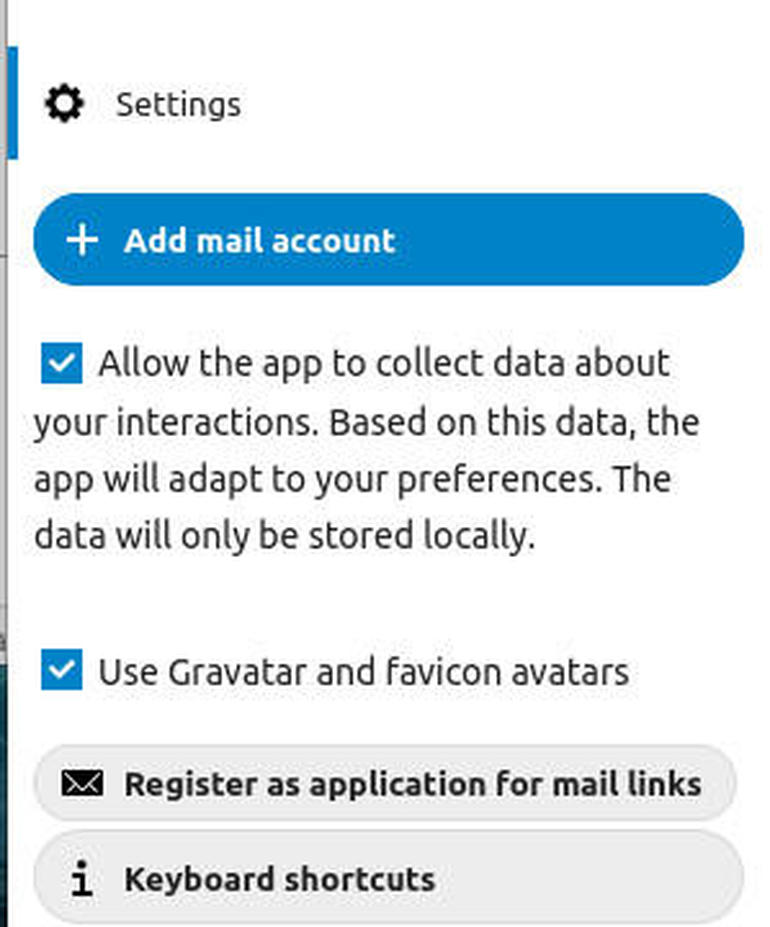
Enabling the AI feature for Nextcloud Mail.
Once you’ve taken care of that, give Mail a bit of time to start learning your habits and you should see a vast improvement in the collection of mail in the Important, Favorite, and Other inboxes.
And that’s all there is to the Nextcloud Mail AI feature. For anyone who uses the email app in Nextcloud this new addition should go a long way to keep your inbox organized and efficient.

Data Center Trends Newsletter
DevOps, virtualization, the hybrid cloud, storage, and operational efficiency are just some of the data center topics we’ll highlight. Delivered Mondays and Wednesdays
Also see
Source of Article


