Nextcloud 20 includes a new Dashboard where you can add your Twitter feed for a quick overview. Jack Wallen shows you how to make this happen.

Image: Jack Wallen
The Nextcloud 20 on-premise cloud server platform includes a couple of features that users are going to absolutely love. One of those features is the new Dashboard. With the Dashboard, users can add widgets and make a few configuration changes so they can get a quick overview of what’s going on with their daily Nextcloud life. One of the widgets that can be added makes it possible to view your Twitter account on your Nextcloud 20 Dashboard.
With this app, you can add either/both your Twitter home timeline or your Twitter notifications. With this included in your Dashboard, you’ll get a quick heads up on what’s happened within your particular Twitterverse.
Although this feature might not be useful to some, it could make the workflow a bit easier for others–especially if you use Twitter for your business.
I want to walk you through the steps of adding the widget to the Dashboard and then connecting it to your Twitter account. It’s not hard, but it can be a bit tricky.
SEE: Cloud data storage policy (TechRepublic Premium)
A word on browsers
What makes adding Twitter to your Nextcloud Dashboard tricky is that most browser developers don’t seriously take Federation (a group of computing or network providers that have agreed upon standards of operation) into account: Chrome obfuscates it, Firefox will ask about making the connection, but it’s slow and easily missed. Because of this, you might find connecting your Twitter account a bit of a challenge.
What you’ll need
Make sure you’re logged in to your Twitter account on the browser you’ll be using with Nextcloud. I’ll be demonstrating with both Firefox and Chrome.
How to add the Twitter widget to the Dashboard
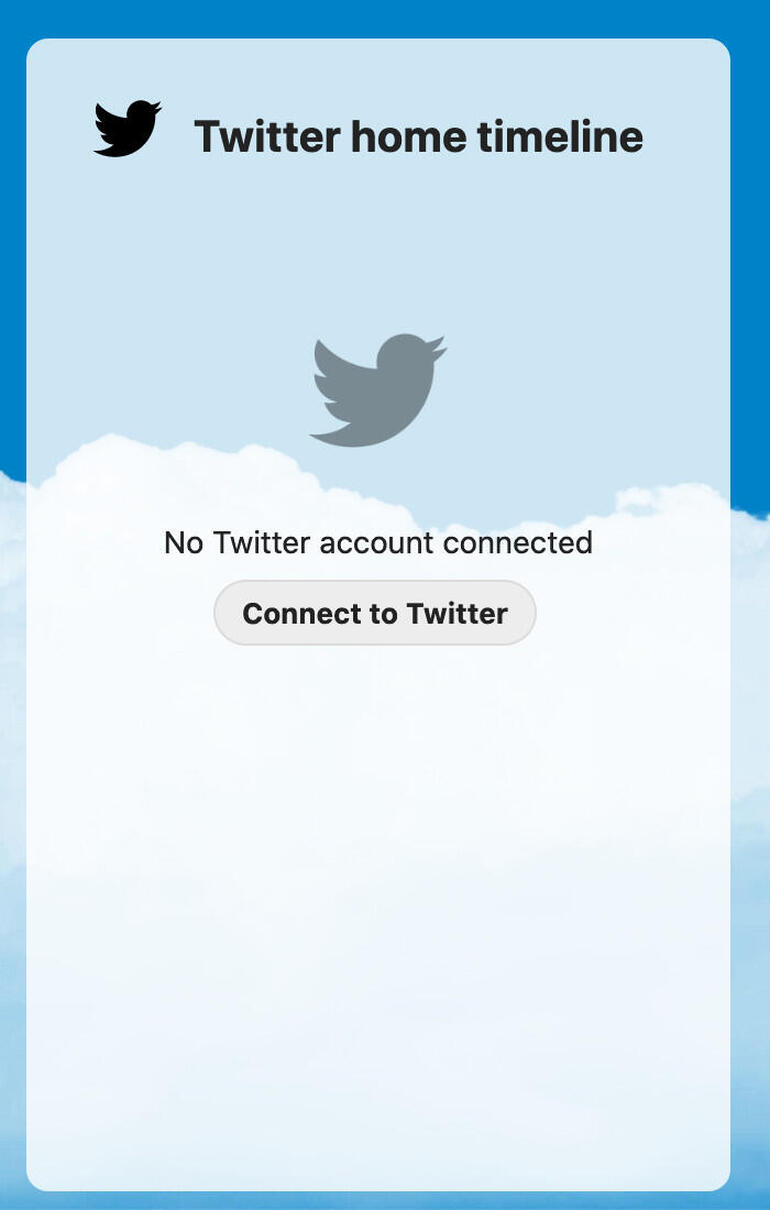
The first thing to be done is to add the Twitter widget to the Nextcloud Dashboard. Log in to your Nextcloud instance and you should immediately be greeted by the Dashboard. Scroll down until you see the Customize button. Click that and you’ll be presented with the list of available widgets. Select one of the Twitter widgets and they’ll be automatically added to the Dashboard. Close out the Widget selection overlay and then locate the newly-added Twitter widget.
Click Connect To Twitter (Figure A).
Figure A
” data-credit rel=”noopener noreferrer nofollow”>
Connecting the Dashboard widget to your Twitter account.
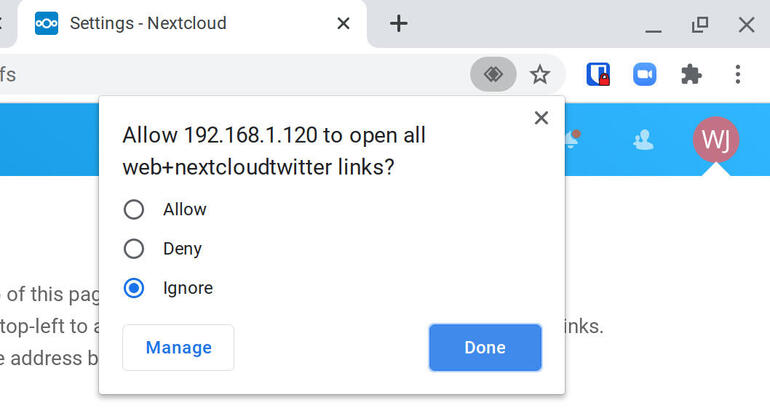
This is where it can get a bit testy. Depending on your browser, you might need to give your application permission to open web+nextcloudtwitter links. For example, on Chrome you’ll see a small double diamond icon appear in the address bar (Figure B).
Figure B
” data-credit rel=”noopener noreferrer nofollow”>
The far too subtle way Chrome handles permission for nextcloudtwitter link permission.
Click that icon and a drop-down will appear (Figure C). Click Allow and then click Done.
Figure C
” data-credit rel=”noopener noreferrer nofollow”>
Giving Chrome permission to open nextcloudtwitter links.
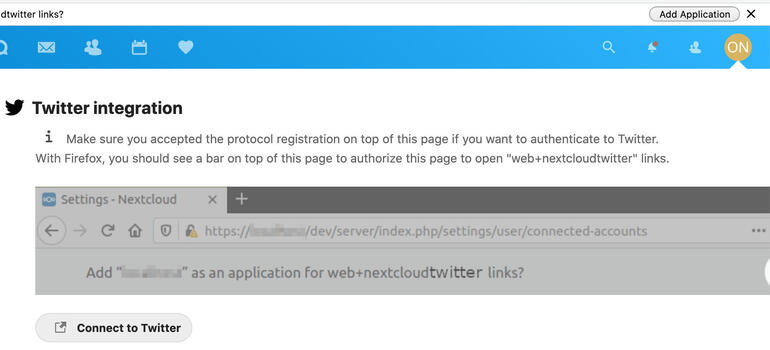
Let’s go back to Firefox. In the resulting window, click Add Application and then click Connect To Twitter (Figure D).
Figure D
” data-credit rel=”noopener noreferrer nofollow”>
Back at Firefox you must add the application and then connect.
You will then be asked to authorize the connection to your Twitter account (Figure E).
Figure E
” data-credit rel=”noopener noreferrer nofollow”>
Click Authorize App to allow the connection to Twitter.
If you’re using Chrome, you should be automatically redirected back to Nextcloud. If you’re using Firefox, you have a few more steps to take.
As Firefox attempts to redirect you back to the application, you’ll need to click Allow to make that possible (Figure E).
Figure E
” data-credit rel=”noopener noreferrer nofollow”>
Allowing Firefox to redirect back to the Nextcloud application.
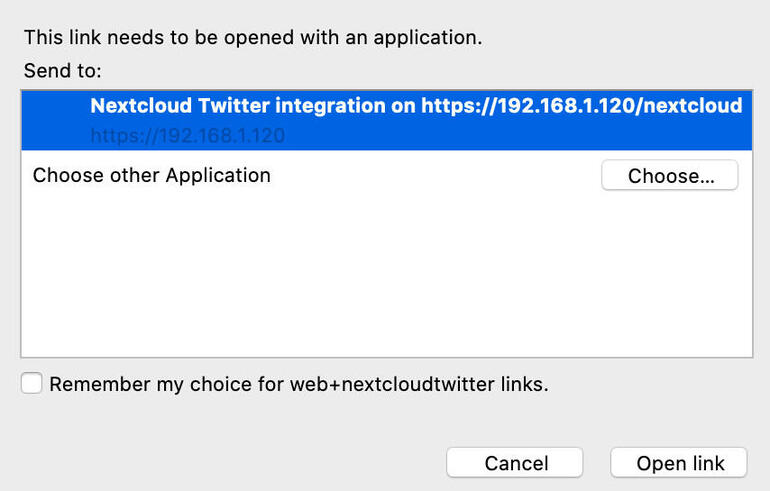
There’s another permission to be had. A new window will pop up wherein you must select the application to open the link (Figure F).
Figure F
” data-credit rel=”noopener noreferrer nofollow”>
Selecting the correct application in Firefox.
Make sure to click Nextcloud Twitter Integration and then click Open Link. This should then send you back to Nextcloud, indicating that connection has been made (Figure G).
Figure G
” data-credit rel=”noopener noreferrer nofollow”>
The connection between Nextcloud and Twitter has been made.
Congratulations, you’ve successfully connected Nextcloud to your Twitter account and can view your Twitter home timeline and/or your notifications from your Dashboard.
Also see
Source of Article
