If your company needs the means to visualize and present data for easier analysis, look no further than the open source Metabase tool.

Image: iStockphoto/solarseven
Companies large and small rely on data. With data, it’s possible to draw conclusions, shape the future, and maximize efforts. It’s one thing to have all of that data on hand, but without the ability to view that data in a meaningful way, that data might as well be a spreadsheet of random values.
To that end, what do you do? You make use of data visualization tools. One such tool is the open source Metabase, which can help your company visualize your data without having to write a single SQL query.
Metabase is a powerful database lookup tool, with a GUI that makes it easy to search data sets and display information. With Metabase you can:
-
Summarize and visualize your data
-
Browse or search through tables
-
Filter information to find what you need
-
Migrate data to graphs and charts with a few clicks
I’m going to walk you through the process of installing Metabase on Ubuntu Server 18.04.
SEE: Feature comparison: Data analytics software, and services (TechRepublic Premium)
What you’ll need
In order to successfully install Metabase, you’ll need the following:
-
A running, updated instance of Ubuntu Server 18.04
-
A user with sudo privileges
How to install Java
The first thing to be done is the installation of Java. Since we’re using Ubuntu, this is actually quite simple. Log in to your Ubuntu server and issue the command:
sudo apt-get install default-jre -y
Once that installation completes, you’re ready to install the database server.
How to install MariaDB and create a database
We’ll be using MariaDB as the database server. To install this tool, issue the command:
sudo apt-get install mariadb-server mariadb-client -y
Start and enable the database server with the commands:
sudo systemctl start mariadb
sudo enable mariadb
When the installation completes, secure it with the command:
sudo mysql_secure_installation
After you’ve completed the securing of the database, log in to the MariaDB console with the command:
sudo mysql -u root -p
Create the database and the necessary user with the commands:
CREATE DATABASE metabase;
CREATE USER 'metabaseuser'@'localhost' IDENTIFIED BY 'PASSWORD';
GRANT ALL ON metabase.* TO 'metabaseuser'@'localhost' WITH GRANT OPTION;
FLUSH PRIVILEGES;
EXIT;
Where PASSWORD is a strong, unique password.
How to install Metabase
We’ve finally reached the point where we can install Metabase. The first thing to do is download the Metabase .jar file with the commands:
cd /tmp
wget http://downloads.metabase.com/v0.34.1/metabase.jar
Next, create a new directory with the command:
sudo mkdir -p /opt/metabase
Move the .jar file into the new directory with the command:
sudo mv metabase.jar /opt/metabase
Create a new group and user with the commands:
sudo addgroup --quiet --system metabase
sudo adduser --quiet --system --ingroup metabase --no-create-home --disabled-password metabase
Change the ownership of the /opt/metabase directory with the commands:
sudo chown -R metabase:metabase /opt/metabase
Change the ownership of the /opt/metabase directory with the commands:
sudo touch /var/log/metabase.log
sudo chown metabase:metabase /var/log/metabase.log
Create a new environment file with the commands:
sudo touch /etc/default/metabase
sudo chmod 640 /etc/default/metabase
Next, we’ll create a Metabase configuration file for rsyslog with the commands:
cd /etc/rsyslog.d
sudo nano metabase.conf
In this new file, paste the following:
:msg,contains,"metabase" /var/log/metabase.log
& stop
Save and close the file.
Restart rsyslog with the command:
sudo systemctl restart rsyslog
Now it’s time to create a systemd file for Metabase. For this, issue the command:
sudo nano /etc/systemd/system/metabase.service
In that file, paste the following:
[Unit]
Description=Metabase server
After=syslog.target
After=network.target [Service]
WorkingDirectory=/opt/metabase/
ExecStart=/usr/bin/java -jar /opt/metabase/metabase.jar
EnvironmentFile=/etc/default/metabase
User=metabase
Type=simple
StandardOutput=syslog
StandardError=syslog
SyslogIdentifier=metabase
SuccessExitStatus=143
TimeoutStopSec=120
Restart=always [Install]
WantedBy=multi-user.target
Save and close the file.
Reload the systemd manager with the command:
sudo systemctl daemon-reload
Start and enable Metabase with the command:
sudo systemctl start metabase
sudo systemctl enable metabase
How to access Metabase
Now that Metabase is up and running, open a web browser and point it to http://SERVER_IP:3000 (where SERVER_IP is the IP address of the Metabase hosting server). Click Let’s Get Started to begin working with Metabase (Figure A).
Figure A
” data-credit rel=”noopener noreferrer nofollow”>
Metabase is almost ready.
You’ll be greeted by a wizard, where you’ll first enter data about yourself (Figure B).
Figure B
” data-credit rel=”noopener noreferrer nofollow”>
Tell Metabase something about yourself.
Next, you’ll connect Metabase to the database housing your information. At this point, you will need to have that database ready for the platform to use. So if you have yet to create that database, you might want to hold off until it’s ready. There is also the option to add your data later. For that, scroll all the way to the bottom and click I’ll Add My Data Later (Figure C).
Figure C
” data-credit rel=”noopener noreferrer nofollow”>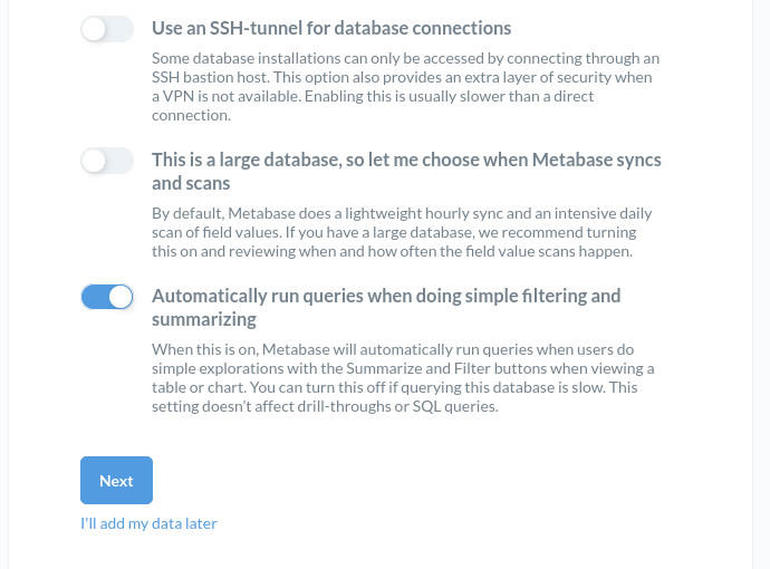
Adding your Metabase data at a later time.
And that’s all there is to getting Metabase up and running. This is a seriously powerful tool that can help your business make sense of all that data you’ve collected. And considering it’s free and open source, it won’t cost your business penny to use. That’s a serious win-win.
Also see
Source of Article