If you’re using LXD for container development, and you’re unable to access those containers from your LAN, you need to create a bridge. Jack Wallen shows you how.

Image: Getty Images/iStockphoto
LXD is a great way to develop for containers that might be a bit more familiar to you. Why? Because LXD treats containers a bit more like virtual machines. Because of this, it’s a bit easier to use with regards to networking, so you’ll have a leg up on developing for the cloud or other network services.
LXD is similar to one of my favorite container tools, Multipass, but offers a bit more in the way of configuration. To find out how to install LXD and launch your first container, check out: How to use LXD to deploy containers.
What I want to do this time around is to show you how to use a netplan bridge with LXD to expose containers to your network. You’ll need to make sure to give my article, How to create a bridge network on Linux with netplan a read first.
SEE: Implementing DevOps: A guide for IT pros (free PDF) (TechRepublic)
What you’ll need
-
LXD installed and running
-
A bridge created with netplan
-
A user with sudo privileges
I’m going to assume you followed my tutorial for creating a bridge, and that your bridge name is br0. If you wanted a bit more clarification, you could name that bridge lxdbr0 to avoid mistaking it with another bridge.
How to launch a container
The first thing we must do is launch a new container that will use the bridge. Let’s launch a container based on Ubuntu 20.04. To do this, issue the command:
lxc launch ubuntu:20.04
Once that container launches, find out the random name it was assigned with the command:
lxc list
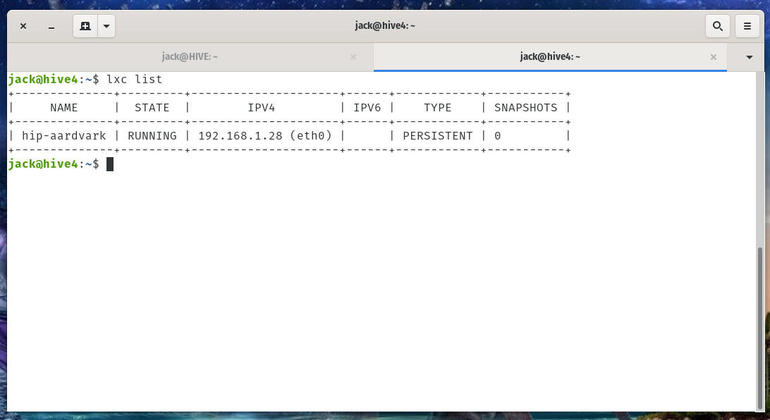
Our container is named hip-aardvark and has been assigned an internal IP address that cannot be reached from our LAN (which uses the 192.168.1.x scheme) (Figure A).
Figure A
” data-credit rel=”noopener noreferrer nofollow”>

Our newly launched container.
How to assign the network bridge
Now that we have both our bridge and our container, let’s connect them. To do this, we’ll use the lxc config command. In my example, the container name is hip-aardvark and the bridge is br0, so our command looks like:
lxc config device add hip-aardvark eth0 nic nictype=bridged parent=br0 name=eth0
Once you’ve run the above command, give it a moment and then issue the command:
lxc list
You should now see your container has been assigned an address compatible with your LAN network (Figure B).
Figure B
” data-credit rel=”noopener noreferrer nofollow”>

Our LXC container is now reachable from the LAN.
You might think that we’d use the device name ens5, as that’s the device associated with the host. However, the device associated with the container uses the old school nomenclature of eth0. If you’re unsure of what device your container is using, gain access to it’s shell with the command:
lxc exec hip-aardvark /bin/bash
Remember to substitute the name of your container.
Once inside the container, issue the command:
less /etc/netplan/50-cloud-init.yaml
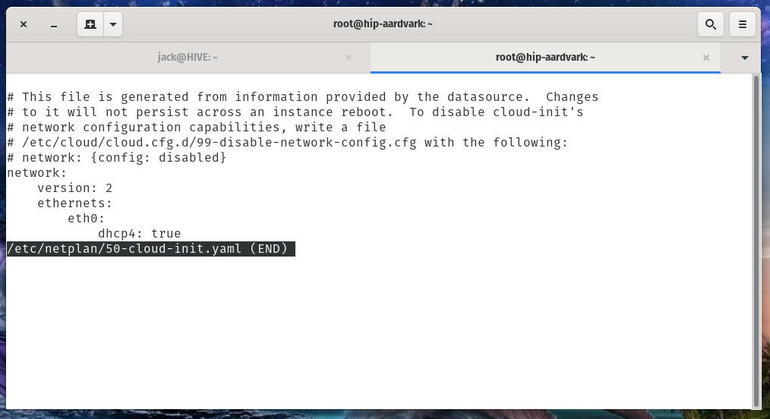
You should see that eth0 is used for the Ethernet connection (Figure C).
Figure C
” data-credit rel=”noopener noreferrer nofollow”>

Our container uses eth0 as its network interface.
Congratulations, your LXD container is now reachable from within your LAN. Start developing that cloud- or service-based application, knowing you can test it on your network.
Also see
Source of Article


