If you frequently miss out on the perfect photo with your Pixel phone, Jack Wallen has a tip that will help you always wind up with great results.

Image: GettyImages/Yiu Yu Hoi
First, let me say this: I cannot wait to get my hands on a Pixel 6.
There, I feel better.
SEE: Electronic communication policy (TechRepublic Premium)
That said, my Pixel 5 still takes great pictures. Sure, the camera might be a bit long in the tooth but it’s still better than most. But even the best camera on the best phone doesn’t always guarantee you’ll always get the best picture. However, the Pixel camera app has a hidden trick up its sleeve to help you always get that perfect photo. And, best of all, it’s something anyone (so long as you have a Pixel phone) can use.
I’m going to show you how to do just that.
Before I do, know that getting the perfect shot isn’t just a matter of using this trick. You’ll still need decent lighting and a good subject. With that said, let’s get to the goods.
How to take the perfect photo
Good news: You don’t have to install any third-party applications because the Pixel camera app has everything you need. But before you do snap that first photo, I want you to enable the Gridlines in the viewfinder. To do that, open the camera app and tap the downward-pointing arrow at the top of the window. In the resulting popup (Figure A), tap the gear icon.
Figure A
” data-credit>
Accessing the camera settings app from the viewfinder.
In the Camera settings window, scroll down until you see Grid type. Tap that entry and then tap Golden ratio (Figure B).
Figure B
” data-credit>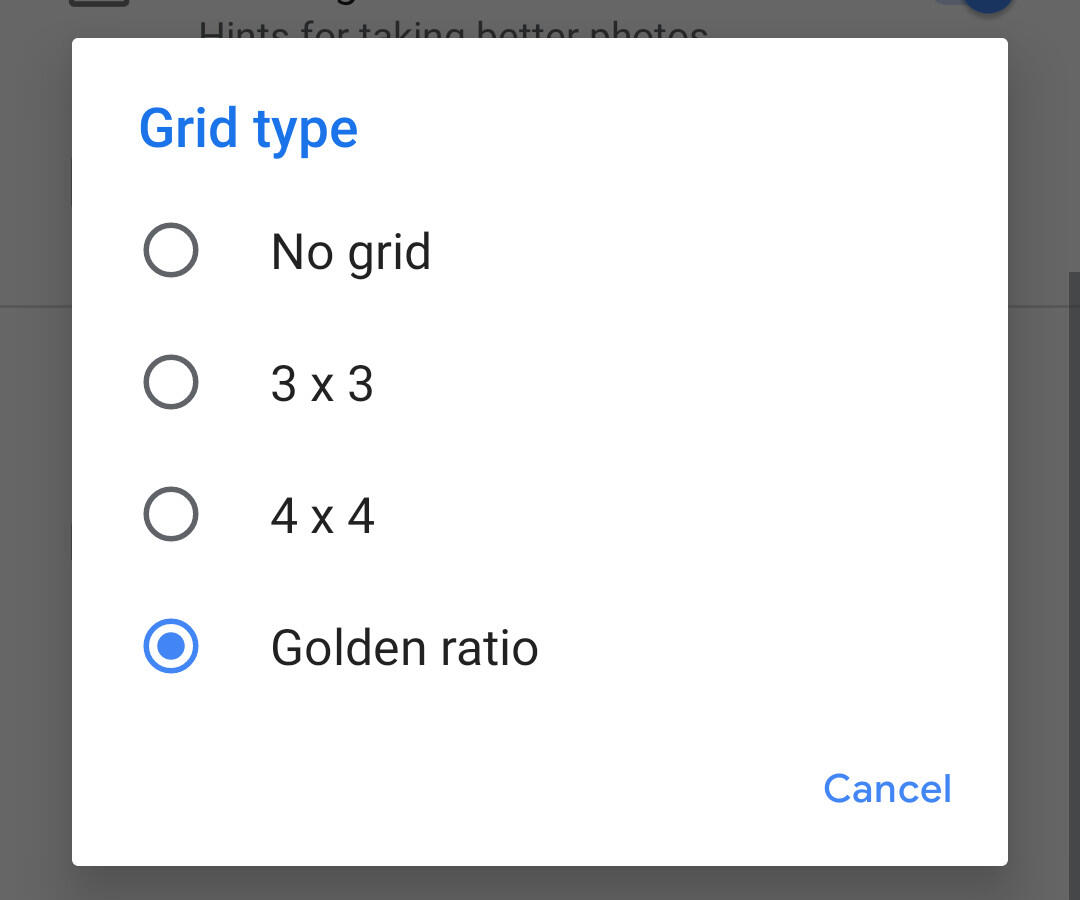
Enabling the Golden ratio grid.
The point of the Golden ratio is to ensure the focal point of the photo rests in an intersection of one of the lines. Doing that will ensure your photo composition is sound. You can align the focal point in any one of the four intersections and your photo will be good to go.
Now that the Golden ratio grid has been enabled, let’s get to that trick.
With the camera app open, make sure you’re on the Camera option. Line up your shot and then press and hold the shutter button. Keep that button pressed, and the camera app will take a video of your subject … only it’s not really a video, it’s a series of photos. After a few seconds have passed, release the shutter button. Once the video has been processed, tap the thumbnail viewer to the right of the shutter button to view the results. At this point, it’ll look like a typical video. However, if you tap the edit button, you’ll see the video broken into a series of frames (Figure C).
Figure C
” data-credit>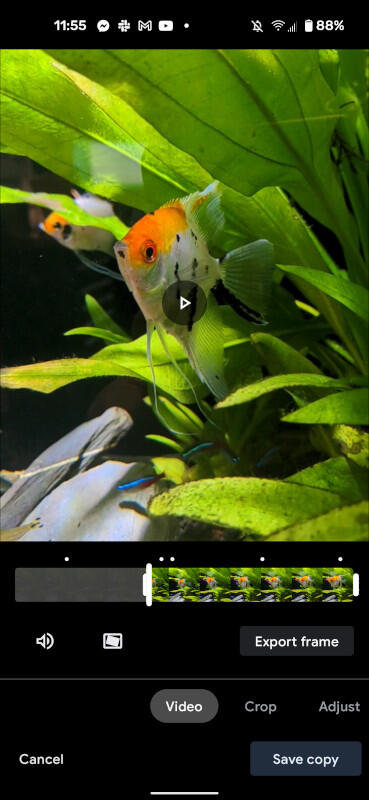
Our video is a series of frames that can be viewed one at a time.
Drag the left timeline handle to the right until you find the exact frame you want to use as the image and then tap Export Frame. That frame will be saved to your Photos account where you can view it and share it. You can also go back to the original video and extract other frames to get even more photos from that one shoot.
If you find yourself always missing the perfect photo (because your subjects move or you never seem to wait until the right moment to tap the shutter button), this little trick will save you a lot of frustration. Give it a try and see if it doesn’t help you always snap the perfect photo.
Subscribe to TechRepublic’s How To Make Tech Work on YouTube for all the latest tech advice for business pros from Jack Wallen.

5G and Mobile Enterprise Newsletter
5G networks and devices, mobile security, remote support, and the latest about phones, tablets, and apps are some of the topics we’ll cover. Delivered Tuesdays and Fridays
Also see
Source of Article