Looking for an internal chat server that offers all the collaboration features you need? Rocket.chat might be your best bet. Find out how easy it is to deploy via Univention Corporate Server.

Image: Shutterstock/Narcissa Less
You’ve deployed your Univention Corporate Server as a virtual machine, and you’re wondering what you can do with it. One thing you might consider, that could be a real boon for your company, is to deploy Rocket.chat for internal use only. That would be a great way to keep in-house discussions in-house and not worry that sensitive information/topics were being discussed on a third-party service.
That’s exactly what I’m going to show you how to do: deploy Rocket.chat on your UCS instance.
SEE: Feature comparison: Time tracking software and systems (TechRepublic Premium)
Why Rocket.chat?
Rocket.chat is an outstanding, open-source chat server solution that includes features like:
- Pop-up chat
- In-app messaging
- Notifications
- Targeted emails
- Customization
- Team inbox
- Lead development
- File sharing
- Mobile applications
- Search
- Third-party integrations
- Audio/video conferencing
The real question is, why not Rocket.chat? The only reason you might not want to go this route is that you’re already happy with your current chat service/provider.
With that out of the way, let’s hop to the deployment.
How to deploy Rocket.chat with UCS
Point your web browser to your UCS server installation and login with the administrator user (which is literally, administrator). Once you’ve logged in, click on the App Center icon, click CONTINUE (when prompted) and search for Rocket.chat when the database populates (if this is your first time in the App Center). I have had a few instances where the list of apps refuses to populate. Usually, a reboot will solve that problem. You might also need to first visit the Software update module before you can successfully use the App Center.
Click Mail & Messaging in the left sidebar and you should see the Rocket.chat entry (Figure A).
Figure A
” data-credit>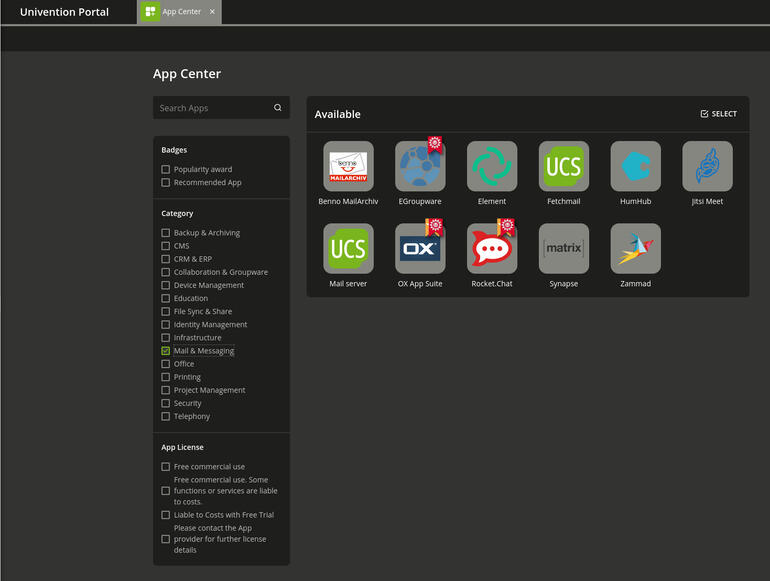
Rocket.chat is ready to install on your UCS instance.
Click the Rocket.chat icon and then, in the resulting window (Figure B), click INSTALL.
Figure B
” data-credit>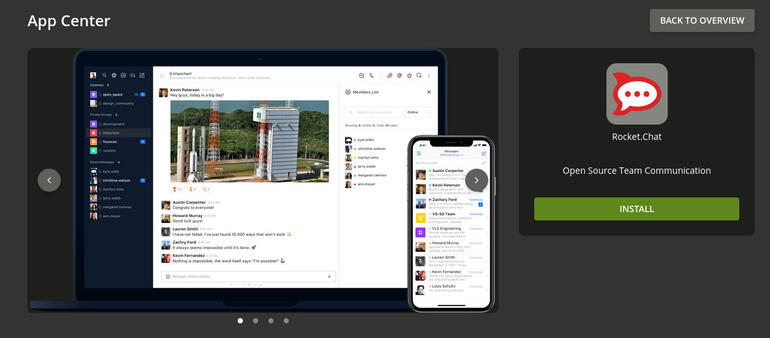
Installing Rocket.chat is a click away.
If you haven’t already activated your UCS instance, you’ll need to do so before you can continue the installation (which is as simple as entering an email, waiting for the license key to arrive and uploading the license key to the server).
The installation should take less than a couple of minutes. Once it completes, click MANAGE INSTALLATION. You will then be prompted to log in with the admin username and rocket.chat password. You will be immediately required to complete the setup wizard (Figure C), which walks you through the admin information, organizational information, server information and server registration.
Figure C
” data-credit>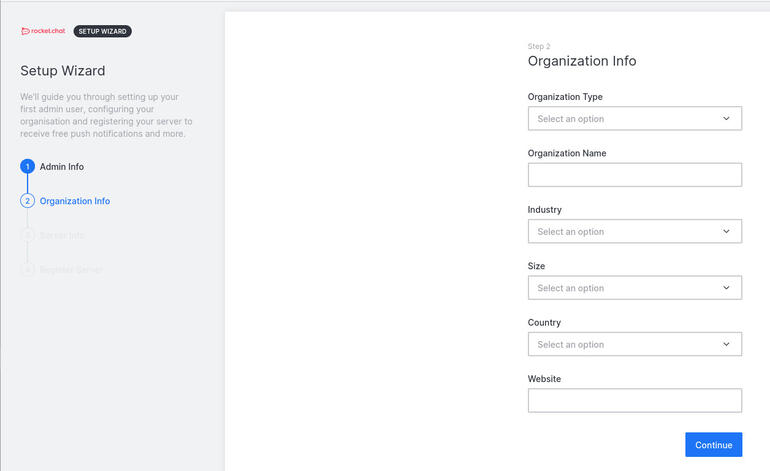
The Rocket.chat setup wizard is simple to complete.
Once you complete the setup wizard, you’ll be taken to your Rocket.chat instance, where you can further administer your new deployment (branding, user management, etc.) or start chatting with your teammates.
And that’s all there is to deploying Rocket.chat via Univention Corporate Server. This is about as simple a method of gaining the benefit of an internal collaboration tool as you’ll find. Give it a go and see if it doesn’t become your company default for LAN-based communication.
Subscribe to TechRepublic’s How To Make Tech Work on YouTube for all the latest tech advice for business pros from Jack Wallen.

Open Source Weekly Newsletter
You don’t want to miss our tips, tutorials, and commentary on the Linux OS and open source applications. Delivered Tuesdays
Also see
Source of Article