If your data center relies on VirtualBox and your virtual machines rely on USB, you’ve probably noticed that USB doesn’t work unless you enable it. Here’s how to do that.

If there’s one thing that frustrates VirtualBox users more than anything, it’s that USB doesn’t work out of the box. No matter how much we’d all like this to be the case, with every new iteration, the developers continue to keep USB out of the long list of things that just work.
Why would you want or need USB to work with VirtualBox? What if you want to back up data to an external drive or transfer data between virtual machines that aren’t on the same subnet? In such instances, having the ability to easily share data via USB could make VirtualBox a significantly easier VM solution.
SEE: Use this back-end developer hiring kit from TechRepublic Premium to find the right person for your developer team.
For those that need USB working on VirtualBox, I’m going to walk you through the process of getting this working. I’ll be demonstrating on VirtualBox 5.2 running on an Elementary OS host (based on Ubuntu). The process isn’t really challenging; you just have to know what to look for.
Jump to:
Besides a computer or laptop and a USB, there are two main tools you need to enable USB in VirtualBox: the VirtualBox Extension Pack and Guest Additions. The VirtualBox Extension Pack is a free add-on that provides additional features for VirtualBox, among which USB support is included.
On the other hand, Guest Additions are drivers that are installed in the guest operating system (the OS running inside the virtual machine) to improve performance and compatibility. These drivers include a utility that allows you to share USB devices between the host and guest OSs. Guest additions can be downloaded here. If you already have VirtualBox, you will need to install the latest version. Here’s how to do that.
Install the latest version of VirtualBox
The first thing to do is make sure to install the latest version of VirtualBox. To do this, remove the current version with the command:
sudo apt purge virtualbox
Once that is complete, add the necessary repository with the command:
sudo add-apt-repository "deb http://download.virtualbox.org/virtualbox/debian contrib"
Where UBUNTU-RELEASE is the version of Ubuntu you are using. If you’re unsure which version of Ubuntu you have installed, issue the command lsb_release -a.
Next, download and install the signature key for the repository with the command:
wget -q https://www.virtualbox.org/download/oracle_vbox_2016.asc -O- | sudo apt-key add -
Now, you can install the latest release with the following commands:
sudo apt-get update
sudo apt install virtualbox-5.2 dkms
Install the Extension Pack
The first thing that must be done is the installation of the VirtualBox Extension Pack. There is a catch here. The open-source Extension Pack only supports USB 1.0. If you need USB 2.0 or 3.0 support, you must install the closed-source version released by Oracle.
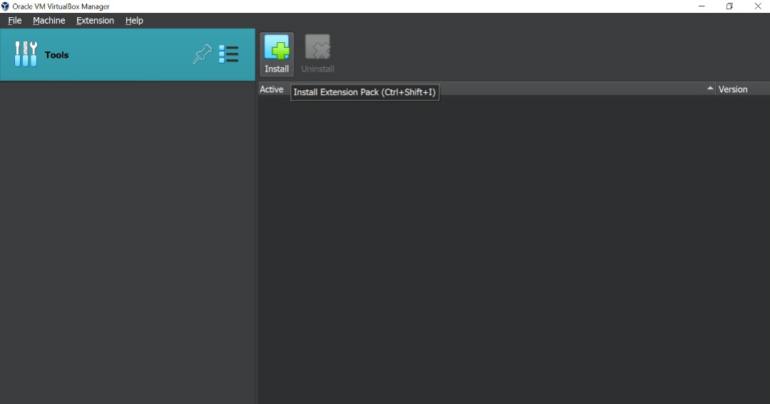
To get the Oracle version, head over to the Downloads page, and download the file for All supported platforms. Once that has been downloaded, open VirtualBox, and do the following:
- Click File | Tools | Extension Pack Manager.
- Click the Install (+ icon) button (Figure A).
Figure A
- Navigate to where you saved the Extension Pack.
- Select the Extension Pack, and click Open.
- When prompted, click the Install button.
- Scroll through the EULA, and then click I Agree.
- Type your sudo password.
- Allow the installation to complete.
Add user to the vboxuser group
There is one final step for this. In order for VirtualBox to have access to the USB subsystem, the user running VirtualBox must belong to the vboxuser group. To do this, open up a terminal and issue the following command:
sudo usermod -aG vboxusers
Where USERNAME is the name of the user.
Once the command runs, log out and log back in.
Activate USB support
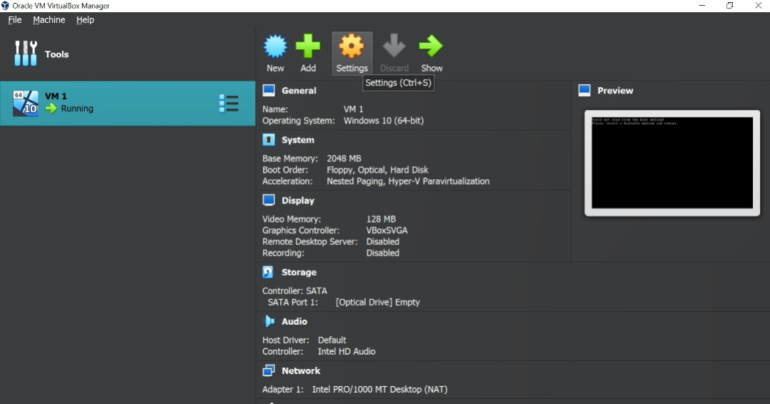
Open up VirtualBox, right-click on the virtual machine that needs access to USB, and click Settings (Figure B). In the VM settings window, click USB. You should see that USB is now available. Click the + button under USB Device Filters to add a new device.
Figure B
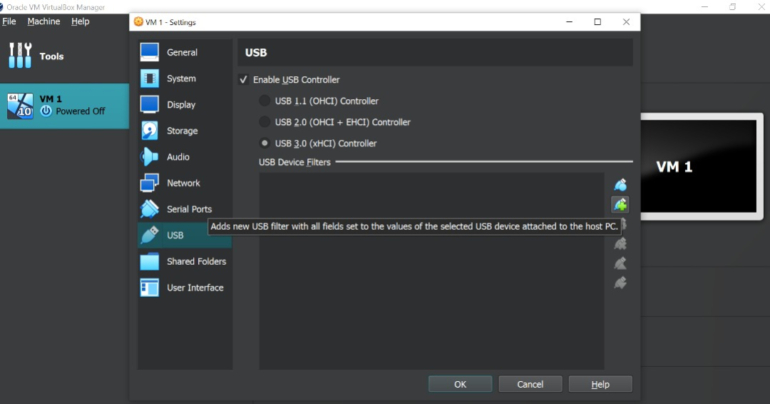
When you start up that VM, it will have access to the USB device. If you need to give it access to more than one USB device, go back to the Settings window of the VM. Click the USB (+ icon) button (Figure C), and add the next device. Repeat that until the VM has access to all necessary USB devices.
Figure C
A bit more usable now
Congratulations! VirtualBox is a bit more usable now. You no longer have to jump through hoops to get data from an external device to your VMs (or vice versa). Your data center will thank you for it.
Source of Article