If you’re looking to deploy a powerful NoSQL database on Linux, let Jack Wallen walk you through the process of installing RavenDB.
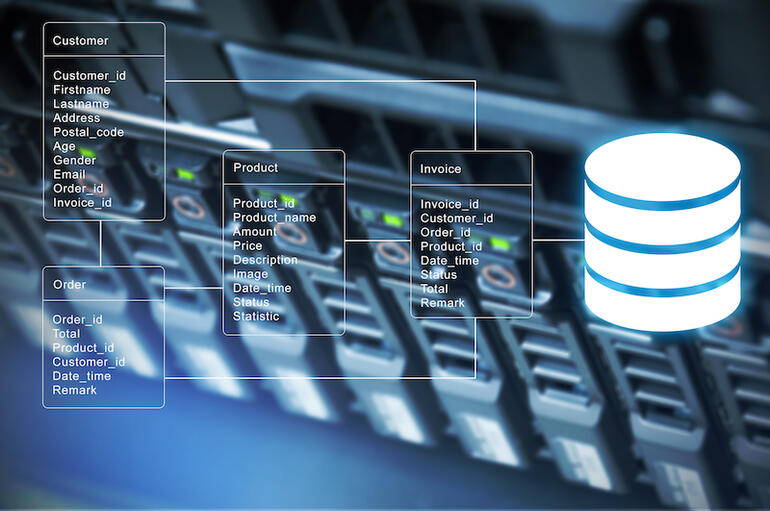
Image: iStockphoto/canjoena
RavenDB is an open source, ACID, and fully transactional NoSQL database that was designed for the .NET platform and supports multiple databases, sharding, has an advanced query language, offers high availability and clustering, can be integrated with relational databases, and much more. RavenDB is used for primary data storage and is capable of handling multi-document transactions. You’ll want to use this database for workloads that need to be fast, agile, and scalable.
But how do you install RavenDB? I’m going to show you. I’ll demonstrate on the latest LTS release of Ubuntu Server (20.04).
SEE: MSP best practices: Server deployment checklist (TechRepublic Premium)
What you’ll need
How to install RavenDB dependencies
The first thing to be done is the installation of the necessary repository for the dependencies. To do that, log in to your Ubuntu Server and issue the command:
wget https://packages.microsoft.com/config/ubuntu/20.04/packages-microsoft-prod.deb -O packages-microsoft-prod.deb
Once the .deb file has downloaded, install it with the command:
sudo dpkg -i packages-microsoft-prod.deb
Update apt with the command:
sudo apt-get update
After apt has updated, install the necessary dependencies with the following command:
sudo apt-get install apt-transport-https aspnetcore-runtime-3.1 -y
How to download and configure RavenDB
Now we can download the RavenDB file with the command:
wget -O ravendb.tar.bz2 https://hibernatingrhinos.com/downloads/RavenDB%20for%20Linux%20x64/latest
When the download completes, unpack it with the command:
tar xvjf ravendb.tar.bz2
You should now see a newly-created directory, named RavenDB. You can either leave it there or move it to a different location. I’m going to assume you’ll leave it where it is, so the direct path will be /home/USER/RavenDB (where USER is your username).
Next, we can modify the RavenDB configuration file. Open this file for editing with the command:
nano ~/RavenDB/Server/settings.json
In that file, change the ServerUrl line to match your server’s IP address and add a new line prior to the final brace. The finished configuration file will look like:
{ "ServerUrl": "http://SERVER_IP:8080", "Setup.Mode": "Initial", "DataDir": "RavenData", "Security.UnsecuredAccessAllowed": "PrivateNetwork"
}
Where SERVER_IP is the IP address of your hosting server.
Save and close the file.
How to create a systemd file
Now we must create a systemd file, so RavenDB can be started. Create the new file with the command:
sudo nano /etc/systemd/system/ravendb.service
In that file, paste the following:
[Unit]
Description=RavenDB v4.0
After=network.target [Service]
LimitCORE=infinity
LimitNOFILE=65536
LimitRSS=infinity
LimitAS=infinity
User=root
Restart=on-failure
Type=simple
ExecStart=/PATH/TO/RavenDB/run.sh [Install]
WantedBy=multi-user.target
Where /PATH/TO is the actual path to the RavenDB folder. Make sure to not use ~/, as systemd will not parse that correctly. If you leave RavenDB in your home directory, that line might look something like:
ExecStart=/home/jack/RavenDB/run.sh
Save and close the file.
Reload the systemd daemon with the command:
sudo systemctl daemon-reload
Start and enable RavenDB with the commands:
sudo systemctl start ravendb
sudo systemctl enable ravendb
At this point, RavenDB is running and listening on port 8080.
How to access the RavenDB web interface
With RavenDB running, you can now access its web interface. Open a browser and point it to http://SERVER_IP:8080 (where SERVER_IP is the IP address of the hosting server). You should be greeted by the RavenDB EULA (Figure A).
Figure A
” data-credit rel=”noopener noreferrer nofollow”>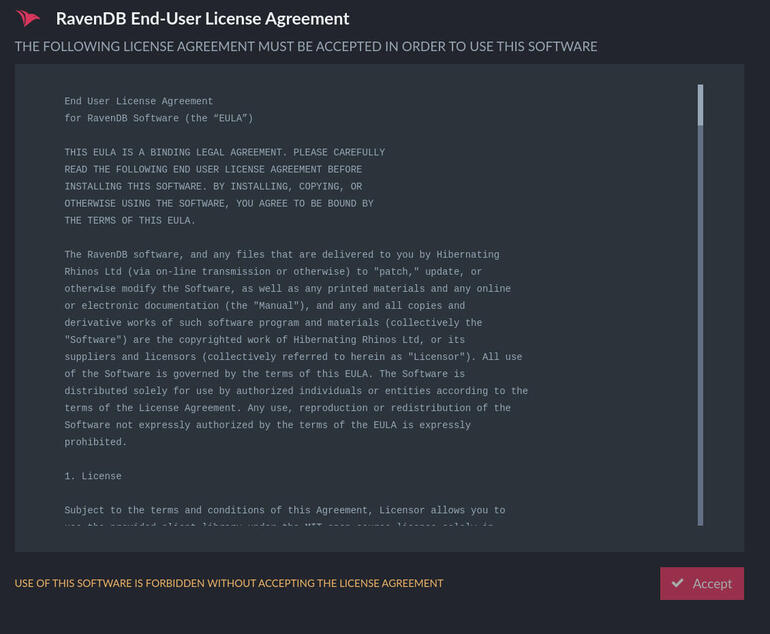
The RavenDB EULA must be accepted before you can start using the database.
In the next window, you can select whether you want a secure (SSL) or insecure (non-SSL) server (Figure B). Insecure is fine for development purposes (which is what I selected). If you’ll be using this in production, you’ll definitely want to go the SSL route.
Figure B
” data-credit rel=”noopener noreferrer nofollow”>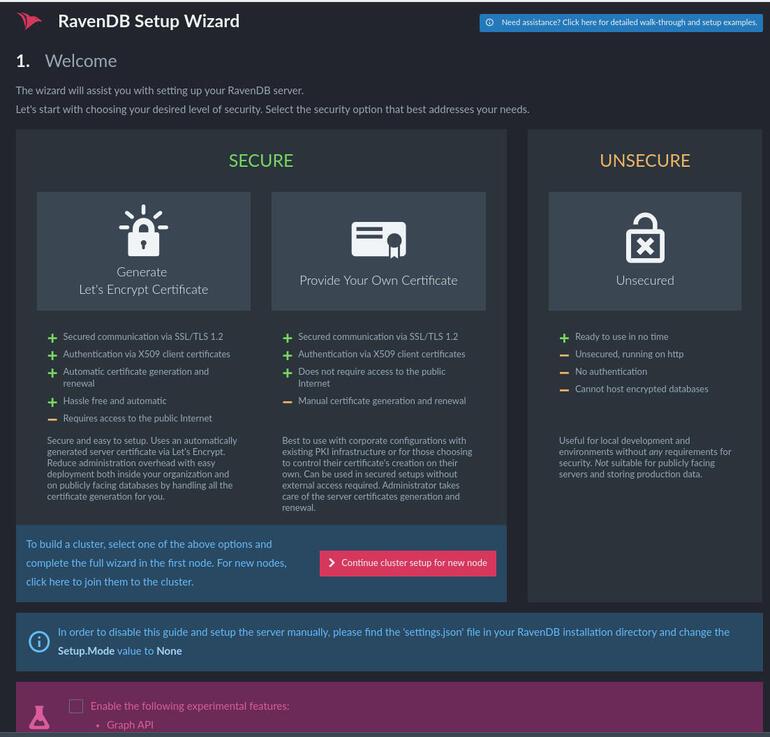
Selecting an SSL or non-SSL server for RavenDB.
Make your selection and click Next. In the resulting window, you must complete the configuration of the server by configuring an HTTP port, TCP port, and IP address (Figure C). Because the setup wizard is using port 8080, you cannot use that as the HTTP port, so select another port (such as 8081).
Figure C
” data-credit rel=”noopener noreferrer nofollow”>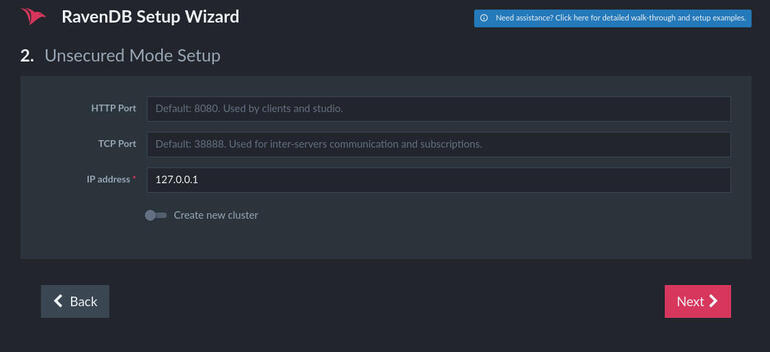
Configuring the server ports and address.
After filling out the information, click Next. When prompted, click Restart Server (Figure D).
Figure D
” data-credit rel=”noopener noreferrer nofollow”>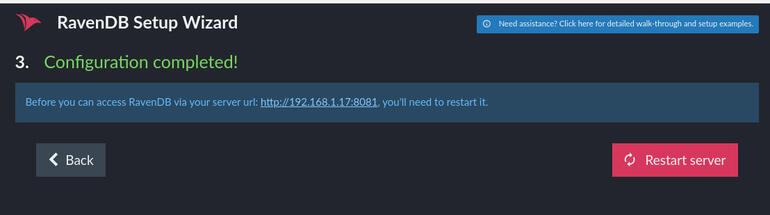
Restarting the RavenDB server.
After the server restarts, you can access the web interface via the IP address and port you configured. The web interface allows you to do everything you need with RavenDB (Figure E) .
Figure E
” data-credit rel=”noopener noreferrer nofollow”>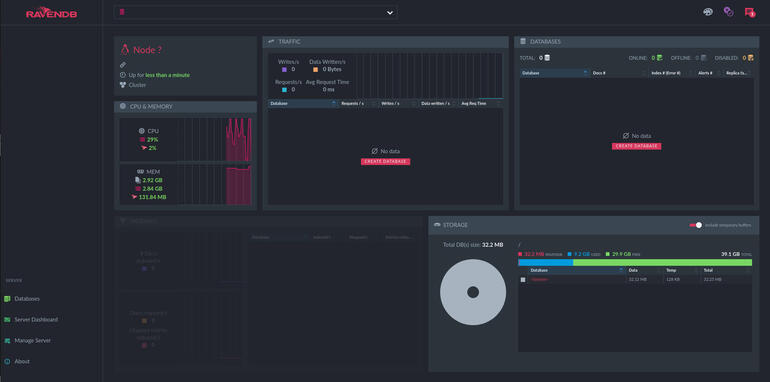
The RavenDB web-based dashboard is ready to serve.
Congratulations, you now have a powerful, scalable NoSQL database server running on Ubuntu 20.04.

Data Center Trends Newsletter
DevOps, virtualization, the hybrid cloud, storage, and operational efficiency are just some of the data center topics we’ll highlight. Delivered Mondays and Wednesdays
Also see
Source of Article