
The chat tool in Zoom offers several handy tricks. Here’s how to use them.

Image: Getty Images/iStockphoto
Like many virtual meeting apps, Zoom includes its own text chat tool through which you can chat with other people either during a meeting or separately. There’s more to Zoom’s chat feature than meets the eye. Using the chat tool, you can share screenshots and files. You can attach an audio message. You can highlight an important message by giving it a star. You can even create channels and then set each one to be public and available to anyone in your organization, or private and accessible by invitation only.
SEE: The tech pro’s guide to video conferencing (free PDF) (TechRepublic)
How to enable standalone chat
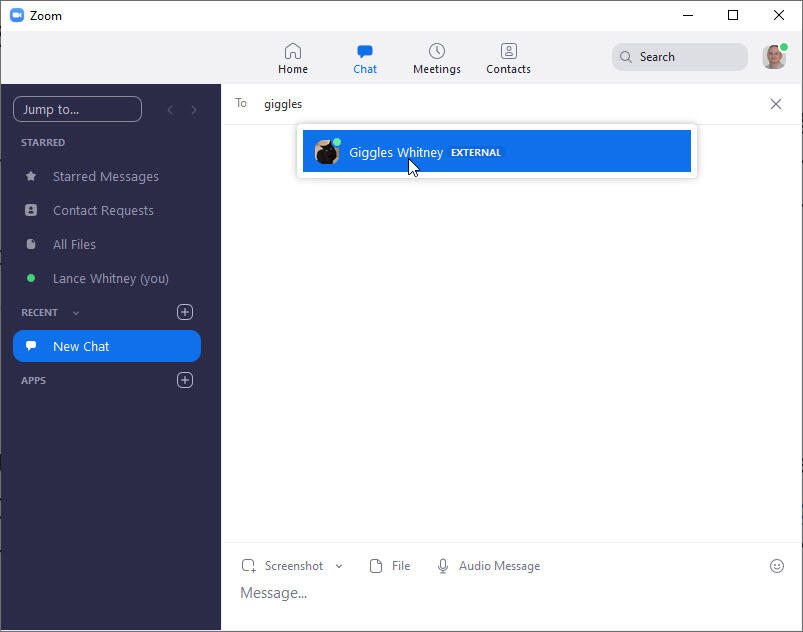
To chat with another person from the main Zoom window outside of an actual meeting, click the Plus icon next to Recent and select the option for New Chat. If the person with whom you want to chat is in your Zoom contact list, start typing the person’s name or email address and select it. If not, then type the person’s full email address (Figure A). If the person is in your contact list, you can also click the Contacts icon at the top, select the person, and then click the Chat icon.
Figure A
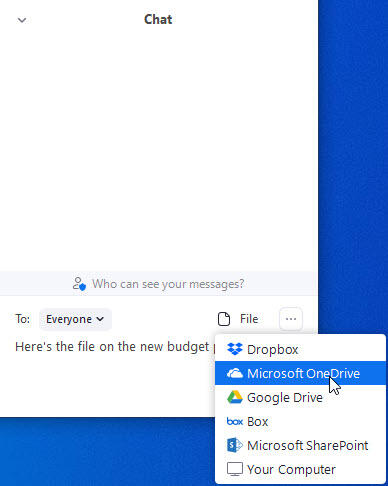
Type your message at the bottom of the screen. Zoom’s Chat tool offers a few types of items you can add to your message. Click the File icon. You can then attach a file from DropBox, Microsoft OneDrive, Google Drive, Box, SharePoint or your computer. Choose the service and select the file (Figure B).
Figure B

You can attach a screenshot. First open the program or window you want to capture and then return to the Zoom window. Click the Screenshot icon. Go back to the program or window you opened and drag your mouse to select the area you want to capture. A toolbar appears for the screenshot. Use the palette on the toolbar to draw shapes on the screenshot if necessary. Click the Capture button to include the shot; click Cancel to try again (Figure C).
Figure C

Next, you can send an audio message instead of a regular text. Click the icon for Audio Message. Start speaking or playing the audio you wish to record. When done, click Send Message to send it (Figure D).
Figure D

To add some flourish to your message, you can tap into an emoji or animated GIF. Click the emoji icon on the right. Search or browse for an emoji or GIF and select the one you want to include (Figure E).
Figure E

Zoom offers certain options for a message that vary based on whether you sent or received it. Click the More icon for a message. From there, you can follow or unfollow it, highlight it with a star, save it, copy it, mark it as unread or delete it (Figure F).
Figure F

How to chat within a meeting
Chatting within a meeting doesn’t offer the array of options available with a standalone chat, but you can still attach a file. In your meeting, click the Chat icon on the bottom toolbar. In the chat window, click the Everyone icon and select whether you want to chat with all meeting participants or just a specific person. To attach a file, click the File icon, select the service storing the file and then select the file (Figure G).
Figure G
How to create a channel
You can create specific channels to better organize your chats, a handy capability if you work for a large organization with multiple departments or need to chat with internal and external contacts.
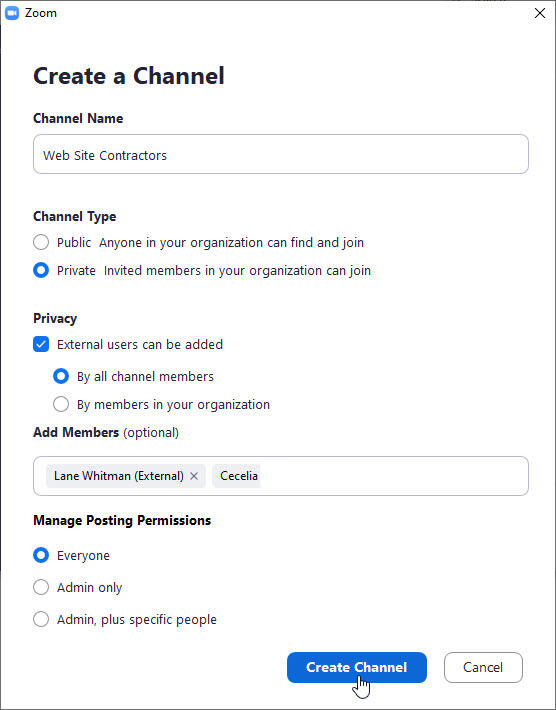
At the main Zoom window, click the Plus icon next to Recent and select the option for Create A Channel. At the Create A Channel window, name the channel. Choose whether the channel should be public and available to anyone in your organization or private and accessible by invitation only.
Check the option for External Users and then choose whether they can be added by all channel members or by anyone in your organization. Add the required members to this channel if you wish. By default, everyone will be able to post to this channel. When done, click the Create Channel button (Figure H).
Figure H
Now, let’s say you want to chat with just the members in a specific channel. At the Chat window, select the channel. You can now chat with everyone in that channel using all the features available in the Chat tool (Figure I).
Figure I


Cloud and Everything as a Service Newsletter
This is your go-to resource for XaaS, AWS, Microsoft Azure, Google Cloud Platform, cloud engineering jobs, and cloud security news and tips. Delivered Mondays
Also see
Source of Article


