Redash can create dashboards from various data sources that display charts, pivot tables, cohorts, boxplots, counters, funnels, maps, sankeys, sunbursts and word clouds. Here’s how to use it.

Redash is a powerful data visualization platform that can be deployed to your on-premises data center or a third-party cloud host. With Redash you can create dashboards from various data sources that display charts, pivot tables, cohorts, boxplots, counters, funnels, maps, sankeys, sunbursts and word clouds.
SEE: Hiring Kit: Database engineer (TechRepublic Premium)
The list of data sources you can connect to Redash is extensive and includes the likes of Redshift, Google BigQuery, PostgreSQL, MySQL, Graphite, Presto, Google Sheets, Cloudera Impala, Hive and MongoDB.
I’m going to show you how easy it is to connect Redash to one of the most popular NoSQL databases on the market, MongoDB.
What you’ll need
To make this connection, you’ll need a running instance of Redash as well as an accessible MongoDB server. You’ll also need a user with sudo privileges (to enable MongoDB for remote access).
Let’s connect.
How to allow remote connections to MongoDB
The first thing we must do is allow remote connections to the MongoDB server. For that, log into the server hosting MongoDB and open the necessary configuration file with:
sudo nano /etc/mongodb.conf
Locate the line:
bind_ip = 127.0.0.1
Change that line to:
bind_ip = 127.0.0.1, SERVER
Where SERVER is the IP address of the server hosting Redash.
Save the file and restart MongoDB with:
sudo systemctl restart mongodb
If you haven’t already created a user with privileges to a database, we should do that now. Say, for example, you want to give user jack access to the admin database. Open the MongoDB console with the command:
mongo
At the console, you’ll type the following (one line at a time):
db.createUser(
{ user: "jack",
pwd: "PASSWORD",
roles:[{role: "userAdminAnyDatabase" , db:"admin"}]})
Where PASSWORD is a strong/unique password.
If you issue the command show users you should see the new user listed with the proper permission to the admin database.
How to add the MongoDB data source to Redash
It’s now time to add the MongoDB data source to Redash. Log into your Redash instance and (on the front page) click Connect a Data Source. In the resulting page (Figure A), click New Data Source.
Figure A

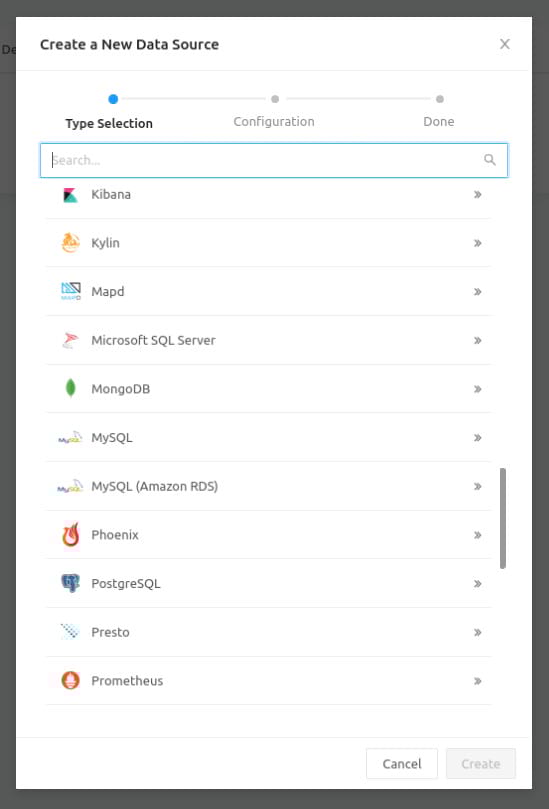
In the next window (Figure B), scroll down and select MongoDB from the list.
Figure B
The new window (Figure C), requires you to fill out the necessary information for the MongoDB connection.
Figure C
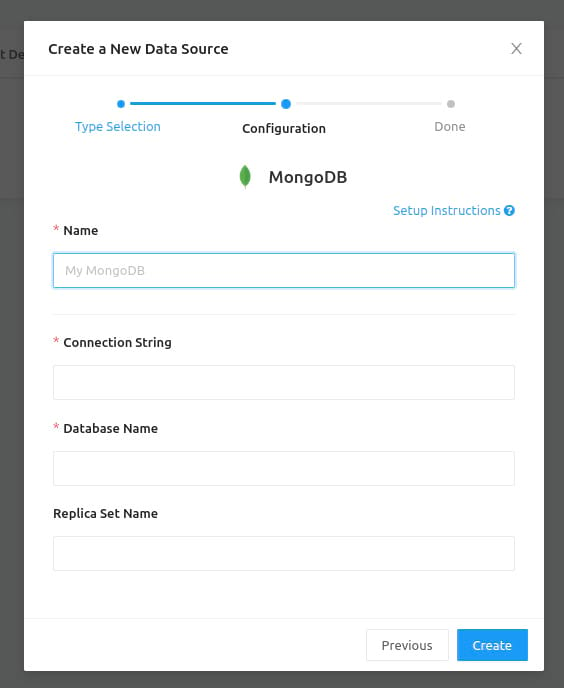
Here’s what you need to fill out:
- In the Name section, type any human readable name.
- The Connection String is in the form mongodb://USERNAME:PASSWORD@HOSTNAME:PORT/DBNAME
- The Database Name will be the name of the database.
Where USERNAME is the MongoDB user you created, the PASSWORD is the password for the MongoDB user, HOSTNAME is the IP address of the MongoDB server, PORT is most likely 27017, and DBNAME is the name of the database to be used.
If you have SSL setup, the connection string will look like this:
mongodb://USERNAME:PASSWORD@HOSTNAME:PORTt/DBNAME?ssl=true&ssl_cert_reqs=CERT_NONE
Click Save, and the data source should be ready to go. Congratulations, you can now start to create your first queries and dashboards in Redash.
Subscribe to TechRepublic’s How To Make Tech Work on YouTube for all the latest tech advice for business pros from Jack Wallen.
Source of Article