When managing projects, you’ll need to assign roles and set permissions, so everyone can access their work. Learn how to do that in Orangescrum.

When you create a project in Orangescrum, it doesn’t default to include any users. And although you can certainly assign users to tasks, you might want to add them to the overall project as well. When you add a user to the whole project, you can assign a specific role to them — whether that’s an admin, a user or a client role — with preset permissions and access levels. You can also add existing users and send invites to others once this is all set up.
SEE: Hiring kit: Project manager (TechRepublic Premium)
There are two ways to add a user to an Orangescrum project. The first and most obvious is during the user creation phase. The second method is from the project itself.
It is the second method I want to focus on, because adding a user to a whole project allows you to easily assign a specific role to that user. Setting up project-based users is an easy task, and it’s one you should take care of for every project and user.
With that said, let’s add some users and assign some roles.
Jump to:
What you’ll need to add users and assign roles
The only thing you’ll need is a valid admin Orangescrum account. You can add users and assign roles on either the cloud or the self-hosted version of Orangescrum. It also doesn’t matter which plan you’re using, as the feature is available to both free and paid accounts.
How to add a user to a project in Orangescrum
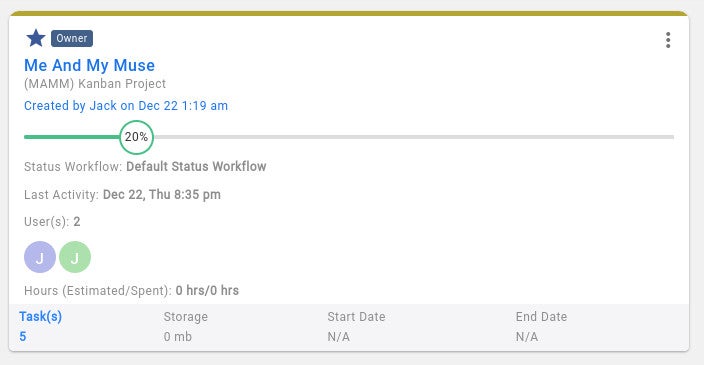
Whether you’re adding new internal or external users, the process is similar. Start by logging in to your Orangescrum admin account and click Projects in the left navigation. All of your current projects should appear (Figure A).
Figure A
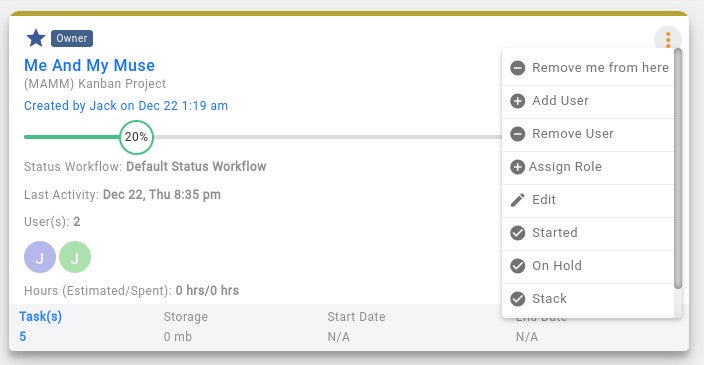
Click the three-dot menu in the upper-right corner of the project, and then, select Add User from the dropdown (Figure B).
Figure B
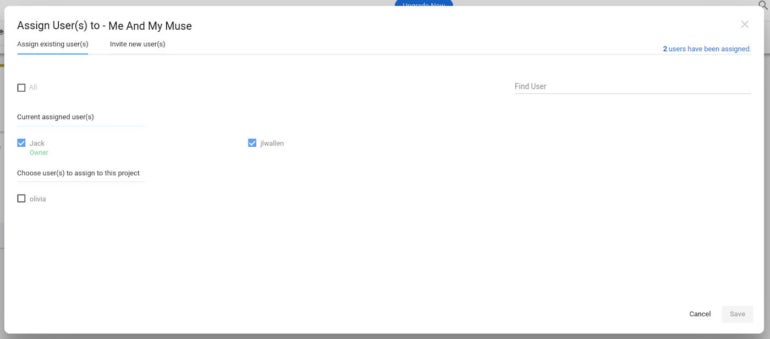
In the resulting pop-up (Figure C), select the Assign Existing User(s) tab, select the user you want to add and then click Save.
Figure C
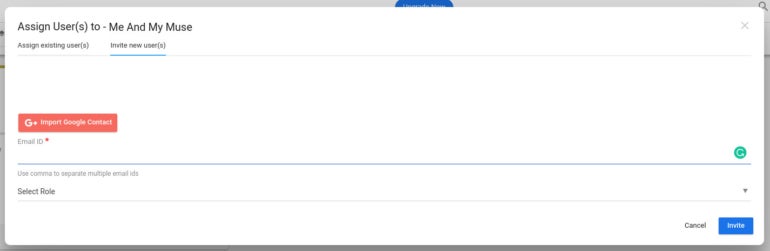
If you need to invite a new user to a project in Orangescrum, click the Invite New User(s) tab, type the user’s email address, select their role and click Invite (Figure D).
Figure D
How to assign a role to an existing user in Orangescrum
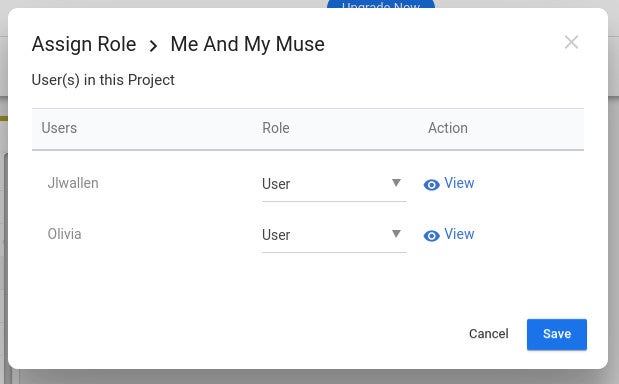
When you’re adding existing users to a project in Orangescrum, you don’t get to choose their role the same way. To assign roles to these users, you’ll need to go back to the project menu and click Assign Role. In the resulting pop-up (Figure E), select a role for each user and click Save.
Figure E
Simple user management
Orangescrum makes it fairly easy to manage users on a per-project basis. It is also possible to create new roles with the platform, which is something we’ll deal with at a later date. Until then, the three built-in roles of Admin, User and Client should get you by.
Read next: The 10 best project management software and tools (TechRepublic)
Source of Article