An attractive and user-friendly website is essential to keeping visitors on your page. With visual regression testing, you can ensure that updating your website won’t have a negative impact on the user experience. However, you might not know how to get started with this testing method.
The good news is that some WordPress plugins can automate this task for you. Once you install such a tool, you can control the test from your WordPress dashboard and receive notifications about any issues.
In this post, we’ll take a closer look at how visual regression testing works and why it’s essential for your WordPress website. Then, we’ll explain how to automate the process with a plugin called VRTs – Visual Regression Tests. Let’s get started!
An Overview of Visual Regression Testing (And Why It’s Important for Your WordPress Website)
As a developer or site owner, you might make changes to your site’s code to improve the User Experience (UX), tweak the web design, or add new features for your visitors. However, this can lead to bugs and glitches on your pages. For example, visual elements like buttons and images may become unusable or appear out of place.
This is where visual regression testing comes in. With this test, you can determine if your changes have disrupted your site’s appearance and functionality.
This testing method is designed to detect changes from:
- Plugin and core software updates
- Manual code changes
- External software and APIs
- Server issues
- Malware and other malicious code
Visual regression testing is an essential preventative measure. Rather than causing problems on your site and not noticing them until later, you can spot and fix them immediately. Therefore, you can avoid inconveniencing your visitors and making your website look unprofessional.
Furthermore, visual regression testing is an essential task for digital agencies, WordPress designers, and developers. If you’re working on a client’s website or application, you can ensure that your updates won’t damage the product.
How to Automate Visual Regression Testing in WordPress
Many visual regression testing services are third-party platforms. This means that you won’t be able to control the process from your WordPress dashboard.
Furthermore, many third-party services can be challenging to use. You’ll need to run manual tests and interpret the results, which can be tricky if you’re not familiar with visual regression testing.
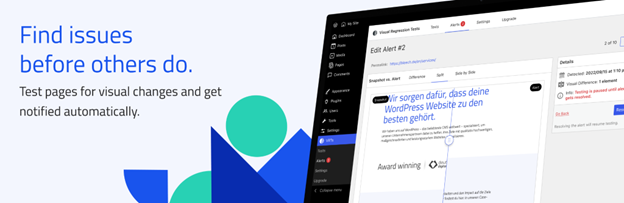
Fortunately, the Visual Regression Tests plugin enables you to manage the testing process from your WordPress dashboard:

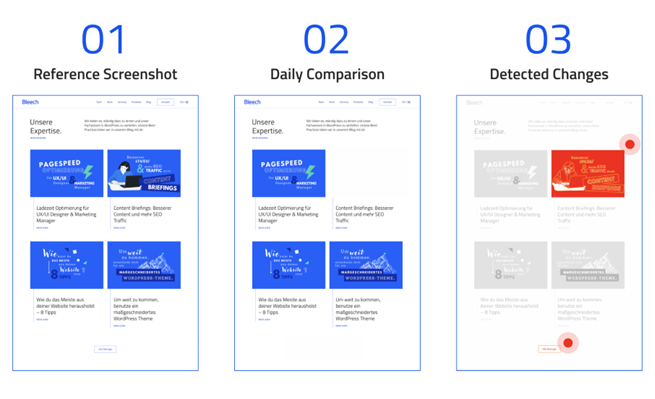
With this plugin, you can run automatic visual regression tests across your entire site. The tool takes reference screenshots every 24 hours (or every time you update your content) and compares them for discrepancies:
Plus, you’ll receive immediate email alerts if something goes wrong with your website. Now, let’s explore how to install and configure this visual regression testing plugin!
Step 1: Install and Activate Visual Regression Tests
You’ll first need to install and activate Visual Regression Tests. There is a free version available that enables you to run three simultaneous tests on three WordPress pages. You can download it directly from the WordPress plugins directory by navigating to Plugins > Add New and searching for “Visual Regression Tests”.
Hit Install Now and wait for the process to run. Finally, select Activate to finish the installation process.
When you’re ready to run more tests on your WordPress site, you can upgrade to the Pro version of VRTs – Visual Regression Tests. It will let you run up to 25 tests simultaneously. After purchasing the plugin, you’ll receive a license key to activate it.
Step 2: Configure the Plugin’s Settings
As soon as you install the plugin, it will start running visual regression tests on your home page and send alerts to your registered email address. If you’d like to track other posts or pages, we’ll show you how to do that in the next step.
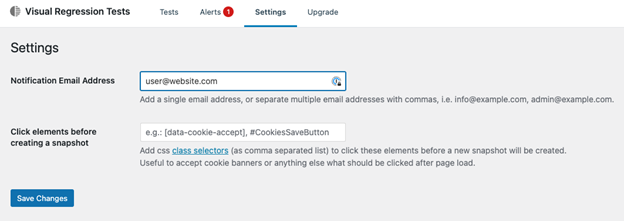
Now, head to VRTs > Settings. Here, you can configure the plugin’s settings and control your visual regression tests.
For example, you can exclude class selectors from your tests. With this setting, you can omit automatically-loading elements (such as cookie banners) from your screenshots:
Make sure to save your changes when you’re done!
Step 3: Turn on Visual Regression Tests for a WordPress Post or Page
You can run a visual regression test for any published post or page on your WordPress site. Simply open it in editing mode and click on the Visual Regression Tests icon at the top right of the page:
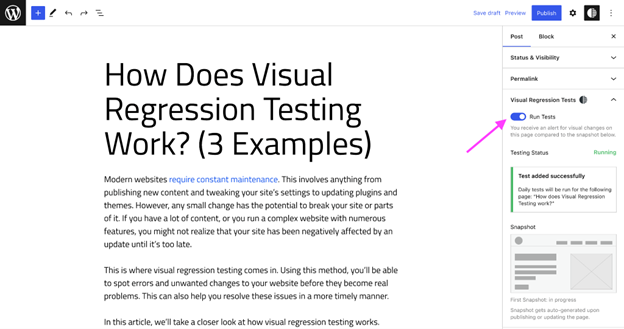
From here, select the toggle switch next to Run Tests. Make sure to update or publish the page to save the test. Then, the plugin will take a screenshot of it. It will also take screenshots whenever the content changes.
You can view the snapshot test results by navigating to VRTs > Tests and clicking on the relevant file in the Snapshot column:
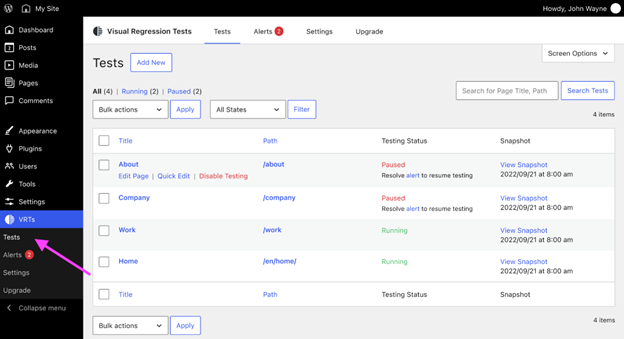
Note that if you’ve just set up testing for a particular post and haven’t updated it yet, you may not see a screenshot.
Step 4: View Visual Regression Testing Alerts
The plugin will alert you if it detects a problem during the testing period. Then, the daily testing will be paused until you resolve the issue.
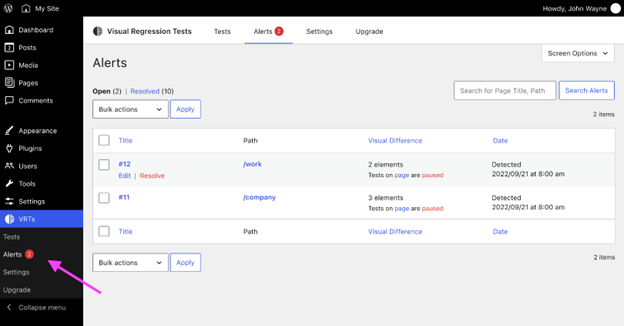
Navigate to VRTs > Alerts, and you will see a list of all issues. The alerts identify the problem on a particular post or page, the date and time it happened, as well as a summary of the Visual Difference:
Clicking on View underneath an alert will open a new visual interface. Here, you can choose to highlight the Difference, show the changes Side by Side, or Split them. Visual differences in the Difference Modus will be highlighted in red:
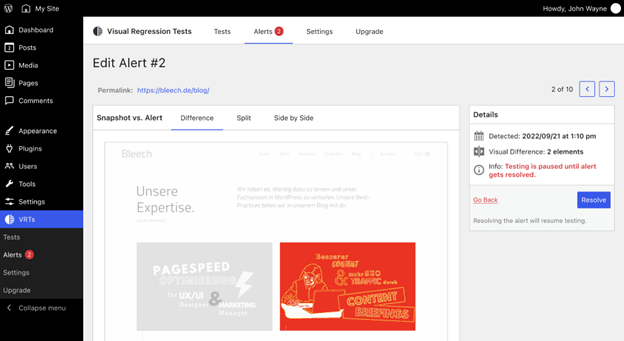
Difference Modus
Split will show you the differences on either side of a line:
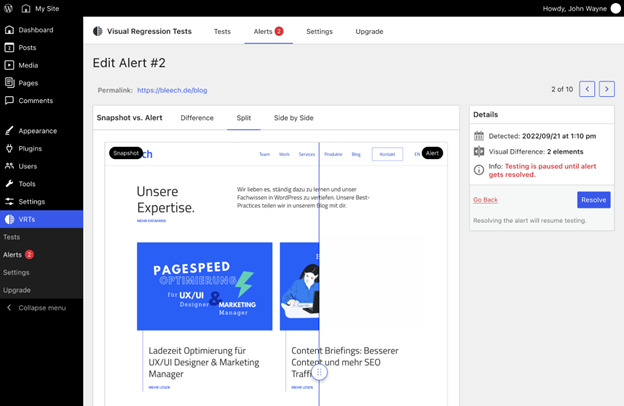
Split Modus
Additionally, Side by Side will display visual differences next to each other:
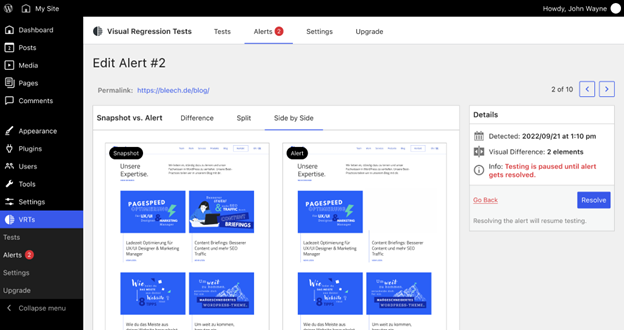
Side by Side Modus
Once you’ve fixed the issue, you can mark it as Resolved. This will make it disappear from the main Alerts page, but you can view it again by clicking on the Resolved tab.
That’s it! It’s that easy to automate visual regression testing in WordPress.
Conclusion
Automated visual regression testing enables you to catch visual bugs before they become big problems on your website. In turn, this testing can improve your site’s user experience without adding more work to your plate.
To recap, here’s how to automate visual regression testing in WordPress:
- Install and activate the Visual Regression Tests plugin.
- Configure the plugin’s settings.
- Turn on visual regression testing for your posts and pages.
- View the alerts to resolve any issues.
Do you have any questions about automating visual regression testing in WordPress? Let us know!
Source of Article


