If you’re a regular user of Linux on a Chromebook, you should be backing up your Linux apps and files. Jack Wallen shows you how.
Image: CC Photo Labs/Shutterstock
If you’ve made the jump and installed Linux support on your Chromebook, you’ve probably already started installing apps and working with files and data. That being the case, you might be curious as to how you back up those apps and data. In some cases, you’ll be saving data within the Linux filesystem hierarchy (and not on either your local or cloud storage, via Chrome OS.
Fortunately, the Chrome OS developers thought of this, so you don’t have to bother with locating that data and running commands to back it all up.
SEE: Research: Video conferencing tools and cloud-based solutions dominate digital workspaces; VPN and VDI less popular with SMBs (TechRepublic Premium)
I want to show you how this is done. I’ll be using Chrome OS 95.0.4631.0, but the process should work on nearly any recent release that supports Linux. I will assume you already have Linux support enabled on your Chromebook. If you don’t, check out How to install Linux apps on your Chromebook to get that subsystem installed.
If you’ve already enabled Linux on your Chromebook, you’ve got everything you need. If you haven’t enabled Linux on your Chromebook, do so now and then you can continue to the backup section.
How to backup Linux apps and data
Open the Chrome OS Settings app and locate Linux Development Environment (which should be found under the Developers section). In the resulting window (Figure A), click Backup & Restore.
Figure A
” data-credit>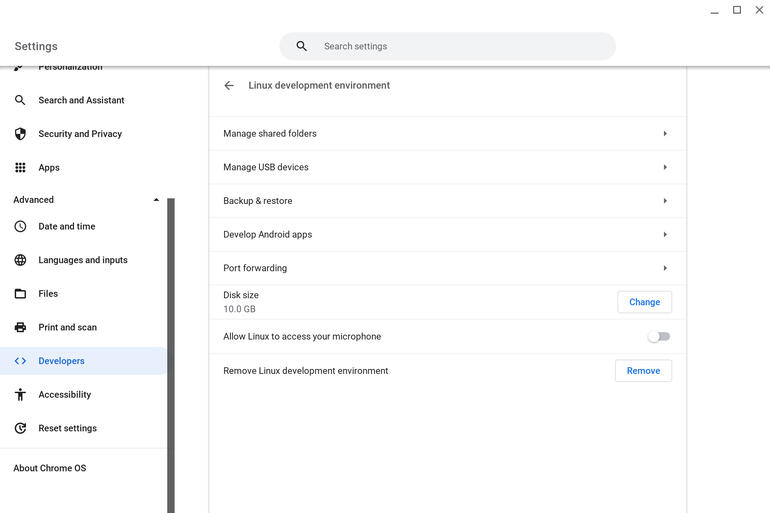
The Linux Development Environment section of Settings includes the Backup & Restore option.
In the new window (Figure B), click Backup.
Figure B
” data-credit>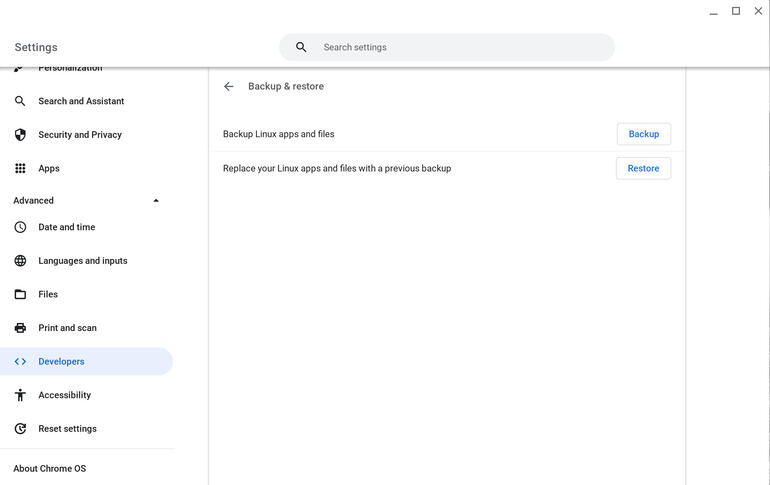
These Backup and Restore actions will take care of you in a click.
After clicking Backup, you’ll be prompted to select a location to house your backup file (Figure C, which will have a .tini extension). I would highly recommend you either save that file to Google Drive or an external SD card. Do this in case a powerwash is required at some point (otherwise you’d lose those backups).
Figure C
” data-credit>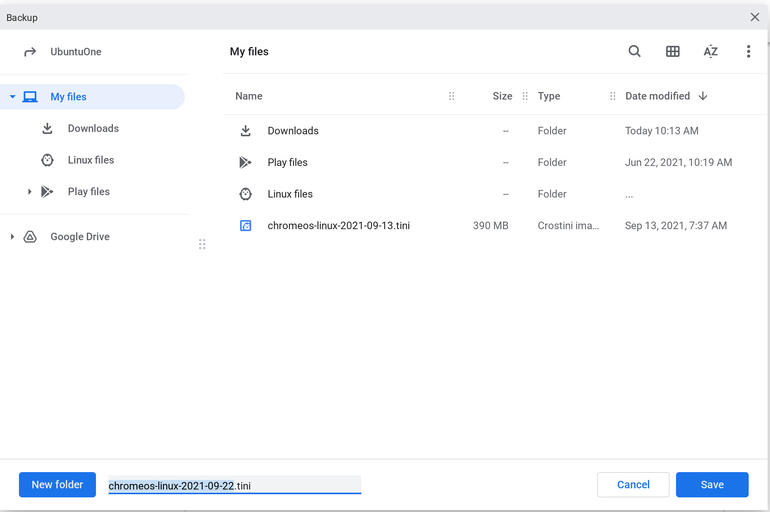
Selecting a location to house your backup.
I created a LINUX BACKUP folder on Google Drive to house my Chrome OS Linux backups. Better safe than sorry.
Depending on how many Linux apps you’ve installed and how much data is housed in the Linux directory hierarchy, the backup can take some time (especially if you’re sending it to Drive). Allow it plenty of time to complete.
How to restore a Linux backup
The restoration process is pretty much the same, the only difference is you click Restore instead of Backup. Once you click Restore, you’ll be prompted to confirm the restoration and locate the backup file. Do that and the restoration will do its thing without so much as a hitch. You will need to either restart your Chromebook after the restoration or restart Linux. You can restart Linux by launching one of your Linux apps, which will prompt you for the restart (Figure D).
Figure D
” data-credit>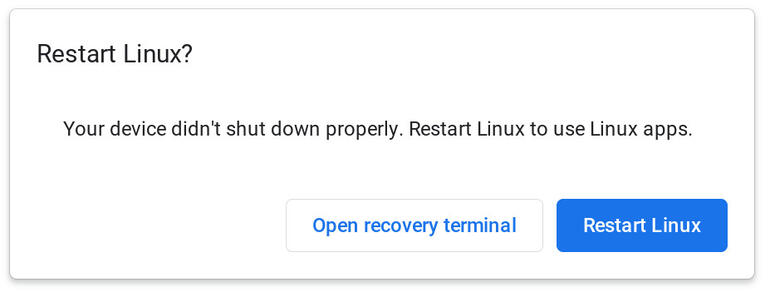
I was prompted to restart Linux after attempting to open the Linux terminal.
Once Linux was restarted, everything worked as expected.
And that’s all there is to backing up Linux apps and files on your Chromebook. If you depend on Linux on your Chrome OS device, get in the habit of backing up regularly, so you don’t wind up having to start from scratch, should disaster strike your Chromebook.

Cloud and Everything as a Service Newsletter
This is your go-to resource for XaaS, AWS, Microsoft Azure, Google Cloud Platform, cloud engineering jobs, and cloud security news and tips. Delivered Mondays
Also see
Source of Article