Jack Wallen walks you through the steps to link your Linux servers together with Webmin for much more efficient administration.

How many Linux servers do you administer? Chances are pretty good you’re working with considerably more servers running the open-source operating system than ever before. That can be a time-consuming task when you have to SSH into each server and run your daily admin tasks.
SEE: 40+ open source and Linux terms you need to know (TechRepublic Premium)
What if I told you that process could be made far more straightforward with the help of Webmin? If that sounds interesting, keep reading because I’m going to show you how to add other servers to a single Webmin interface, so all you have to do is log into that one server where you can enjoy quick access to every system on the Webmin servers index.
It’s much easier than it sounds. Let me show you how.
What you’ll need to cluster Webmin
The only things you’ll need are multiple Linux servers with Webmin installed. It doesn’t matter which operating system is hosting Webmin.
How to temporarily add a server to Webmin
Log into Webmin on the server you want to use as the single point of entry for your admin tasks. Click on the Webmin tab in the left navigation and then expand the Webmin entry to reveal the Webmin Servers Index (Figure A).
Figure A

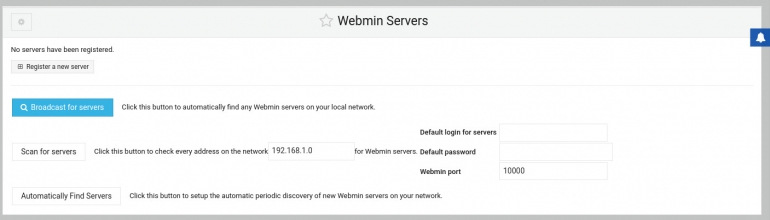
On the resulting page (Figure B), click Broadcast For Servers.
Figure B
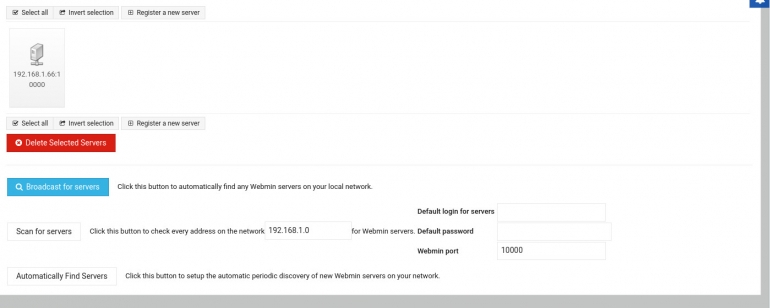
The scan should find any/all servers you have running Webmin so long as they’re on the same network and will report them as discovered (Figure C).
Figure C

Click Return To Servers and you should see any server discovered now listed (Figure D).
Figure D
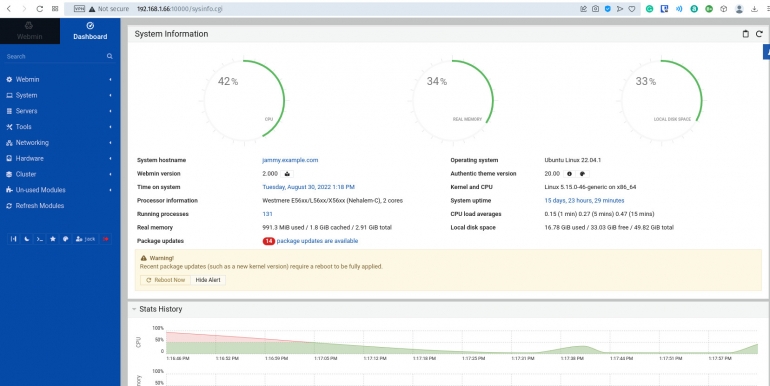
If you click on a listed server, Webmin will automatically open that server to the default Webmin dashboard for that host (Figure E).
Figure E
How to permanently add a server to Webmin
Now that you’ve seen how quickly Webmin can temporarily add a server, let’s permanently add on. Go back to the Webmin Servers Index and this time click Register a New Server. On the resulting page (Figure F), fill out the necessary information for the server — at a minimum, the IP address, server type, enable SSL, username and password — and click Save.
Figure F

The remote server will then be a permanent addition to your Webmin host. Anytime you click on that server, it will open Webmin to its dashboard.
The one caveat to this is that it actually takes you away from the original point of entry. Because of this, I suggest adding the main server — the one you originally accessed — to all remote servers, so getting back to the centralized point of entry is much easier. Otherwise, you’ll have to either hit the back button until you land on your original Webmin server, or type the IP address of the server.
Work smarter, not harder.
Subscribe to TechRepublic’s How To Make Tech Work on YouTube for all the latest tech advice for business pros from Jack Wallen.
Source of Article