If you’re building applications for the GNOME Desktop, you might be using GNOME Builder. Find out how you can connect that IDE with projects on Git with ease.

Image: GNOME
If you’re a software engineer and you work on Linux, chances are pretty good you’ve used GNOME Builder. For those unfamiliar with GNOME Builder, it’s an integrated development environment for GNOME-based applications. Although it might be limited in scope, it’s an important tool for the evolution of the GNOME desktop.
Of course, GNOME Builder being part of the Linux landscape, it is quite familiar with Git. In fact, GNOME Builder makes it really easy for you to work with a Git repository.
How easy? Let me show you. I’ll demonstrate how to connect GNOME Builder to a Git repository, so you can start working right away.
SEE: Implementing DevOps: A guide for IT pros (free PDF) (TechRepublic)
What you’ll need
The only things you’ll need to make this work are a Git repository to clone and a running instance of GNOME Builder. If you’ve not already installed the tool, you can do so from the standard repository. For example, if you’re using a flavor of Ubuntu (or any Debian-based Linux distribution), you can install GNOME Builder with the command:
sudo apt-get install gnome-builder -y
Once you have everything necessary, you’re ready to make the connection.
How to connect GNOME Builder to Git
To demonstrate this process, I’ll be using a repository from Github. Go to the project in question and click Clone or download to reveal the repository URL, ending in .git. Copy that URL.
Open GNOME Builder. From the main window (Figure A), click Clone Repository.
Figure A
” data-credit rel=”noopener noreferrer nofollow”>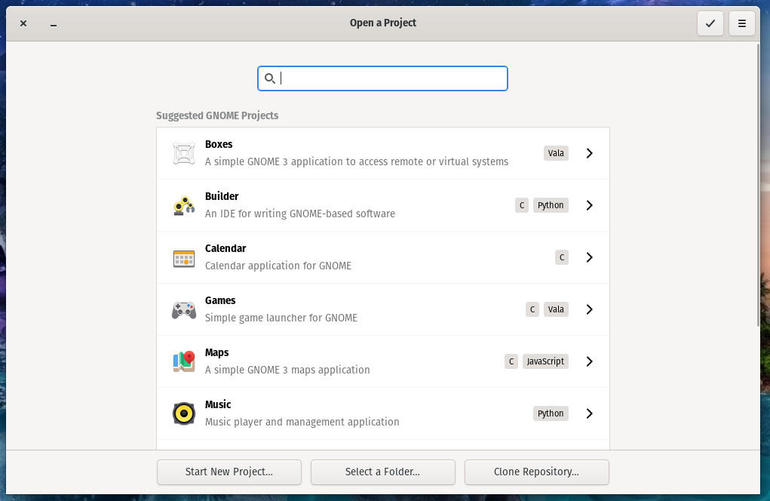
The GNOME Builder main window.
In the resulting window, paste the project URL in the corresponding field (Figure B).
Figure B
” data-credit rel=”noopener noreferrer nofollow”>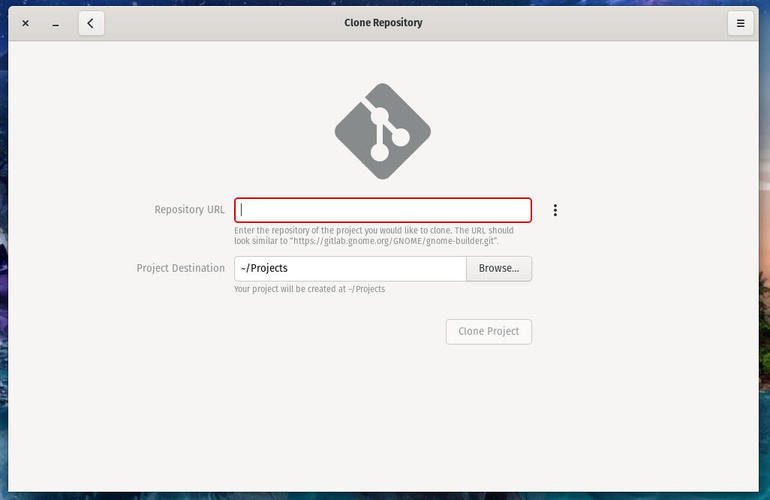
Cloning a Git repository in GNOME Builder.
Next, you can optionally locate the project in a different folder. By default, it’ll be housed in ~/Projects. Unless you’ve already created that folder, or created another project with Builder, that folder won’t exist. Worry not–Builder will create the ~/Projects folder for you. However, if you want to house that project in a different location (say a folder on a shared SMB directory), click Browse, locate the directory in question, and click Select.
Once you’ve chosen the location to house the project, click Clone Project. When the cloning is complete, Builder will open in a new window, displaying the project tree (Figure C). You can now begin working on this newly cloned project or immediately build it.
Figure C
” data-credit rel=”noopener noreferrer nofollow”>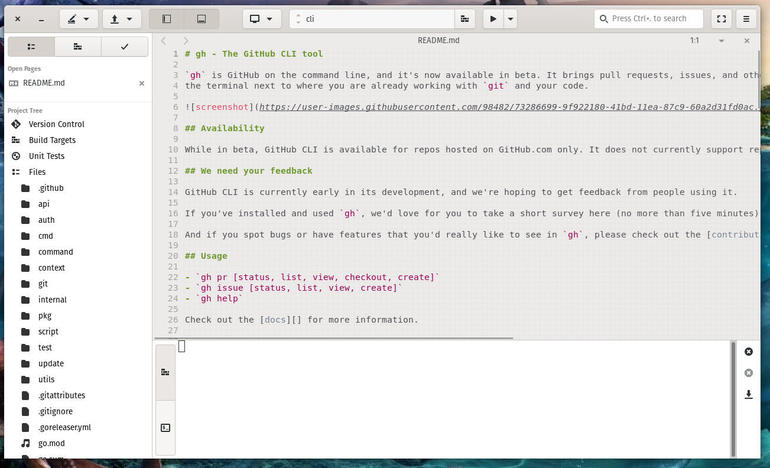
Our newly cloned Github project is ready for work.
How to get around the permissions issue
The one problem I have encountered with building projects using GNOME Builder is the permissions of /usr/local, which many Git projects use for building. This directory is traditionally owned by the root user, and shouldn’t be changed. Because of this, if a project is built in a folder such as /usr/local/share, the build will fail. Because of this, you might have to go into the project Makefile and change the build directory from /usr/local/ to one you have permission to use. This will occur on a project-by-project basis, so you’ll have to test out the building of the project and check the GNOME Builder logs for errors as you go.
This issue won’t happen on your own projects, as you’ve probably created them to build specific to your environment.
Other than that one caveat, GNOME Builder should serve you well. Enjoy the experience.

Developer Essentials Newsletter
From the hottest programming languages to the jobs with the highest salaries, get the developer news and tips you need to know. Weekly
Also see
Source of Article