Multiple calendars let you share calendars, but they can also complicate scheduling. Here’s how to export and import Google Calendar data to reduce your number of calendars.

Image: Andy Wolber / TechRepublic
Google Calendar gives people the ability to create, share, and access multiple calendars. This can make it easier to schedule an event with a colleague, since a shared calendar allows you to determine whether or not a person has an event already planned for a particular time. A shared calendar also can convey the availability of a shared resource, such as a conference room.
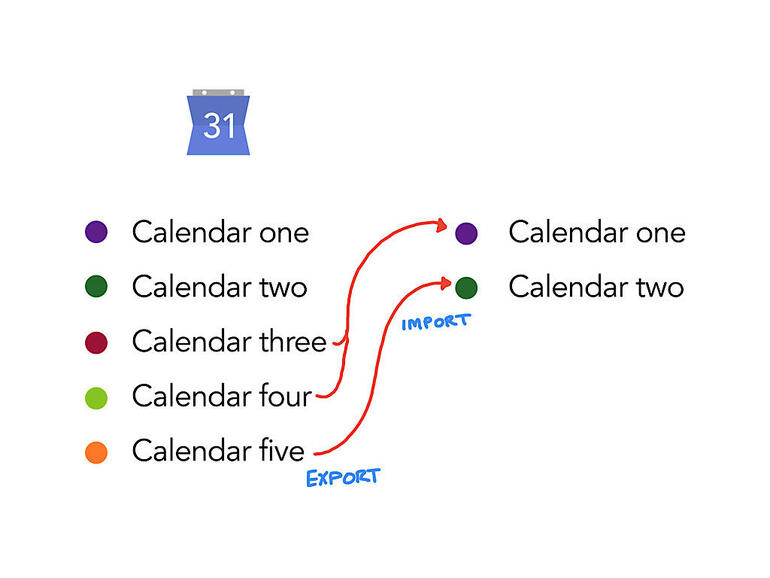
Some people rely on different calendars for distinctly different roles. For example, one person I know used five different Google calendars: One for work, two for community volunteer roles (with two different nonprofit organizations), one for a role as an elected official, and yet another calendar to manage personal activities. This configuration allowed the person to share each different calendar with a different set of people, while still being able to view all five calendars at once.
However, maintaining multiple calendars can make it difficult to verify availability, since you need to check several calendars for events. I recommend that people maintain as few calendars as possible. For many people, two calendars suffice–one for work-related activities and one for personal events.
To reduce the number of calendars you use, first decide which calendars you want to keep. If you use G Suite for work, the primary calendar associated with your G Suite account will typically serve as your central work calendar and a primary calendar associated with a personal Gmail account might make sense for personal activities. Next, follow the steps below to export calendar data from each calendar you no longer need, then import that data into a calendar you will continue to use.
To export Calendar events, you’ll need to use Chrome on a laptop or desktop system as you work through this calendar consolidation process.
SEE: Google Sheets: Tips and tricks (TechRepublic download)
How to export a Google calendar
You may export any Google calendar displayed on your My Calendars list.
1. Open Chrome and go to https://calendar.google.com.
2. Select the sprocket (in the upper-right corner area, to the left of the day/week/month/etc. drop-down selector), then Settings (Figure A).
Figure A
” data-credit rel=”noopener noreferrer nofollow”>
While in Google Calendar on the web, select the sprocket, then Settings.
3. Scroll down the left-side menu to Settings For My Calendars where the system displays your calendars.
4. Click on the name of the calendar you want to export.
5. Calendar settings will display to the right. Select the Export Calendar button (Figure B).
Figure B
” data-credit rel=”noopener noreferrer nofollow”>
Select the calendar you want to export (left arrow), then select the Export Calendar button (middle arrow). The system will send the calendar events to your computer as a download (right arrow).
6. Chrome will download your calendar events to a file. Note: This file is typically named with your account information, followed by “.ical.zip.”
7. To access your exported file from Chrome, select the three-vertical dot menu (in the upper-right area of your browser), then choose Downloads. Select Show In Folder to locate the downloaded item. On most systems, you may double-click to open the .zip file and access the .ics calendar file.
How to import to Google Calendar
You may import calendar data (in .ics or .csv file formats) to any Google Calendar displayed on your My Calendars list.
1. Open Chrome and go to https://calendar.google.com.
2. Select the sprocket (in the upper-right area) to access Settings. (Figure A)
3. Select Import & Export from the left-side menu.
4. Click on or tap Select A File From Your Computer, then navigate to and select the exported calendar file you want to import (Figure C).
5. If needed, adjust the calendar listed below the Add To Calendar menu.
6. Select Import to add events from your chosen file to your selected Google calendar.
Figure C
” data-credit rel=”noopener noreferrer nofollow”>
Select Import & Export (red arrow) and make sure Import is selected. Select your calendar file, and choose the calendar to which you want to import items (settings within the red circle), then select Import.
After you import a calendar, review events to make sure the data imported correctly. Note: Not all information from every type of exported calendar file will import. For example, in some cases, only the first event of recurring activities might display. In other cases, event guests or details may not import fully.
How to delete a Google calendar
When you no longer need a Google calendar, you may delete it. Only do this after you have reviewed your calendar items to ensure you no longer need the data. If you like, and if your organizational data preservation policy permits, export and then save your calendar data first. If you preserve this calendar data file, you might use it to import and recover calendar data in the future.
You may not delete the primary calendar associated with your Google account. At most, you may delete all events from your primary calendar. You may delete any other calendar that you have created.
1. Open Chrome and go to https://calendar.google.com.
2. Select the sprocket (in the upper-right area) to access Settings (Figure A).
3. Scroll down the left-side menu to Settings For My Calendars and click on the name of the calendar you want to delete (Figure D).
4. In the main settings area, scroll to the end of the section, then select Delete.
Note: If you have selected your primary calendar, and then choose Delete, the system will delete all events on your primary calendar.
5. The system will then ask you to confirm by selecting Permanently Delete.
Figure D
” data-credit rel=”noopener noreferrer nofollow”>
Select the calendar you wish to delete from the left menu (top-left arrow), then scroll down to the options displayed on the right to select the Delete button (bottom center arrow).
What are your calendar practices?
How many different calendars do you consistently rely on and use? If you use more than two calendars (one work, one personal) how do you find multiple calendars benefit you? If you’ve consolidated your calendars, what prompted you to reduce the number of calendars you use? Let me know how you choose to use calendars–either in the comments below or on Twitter (@awolber).

Google Weekly Newsletter
Learn how to get the most out of Google Docs, Google Cloud Platform, Google Apps, Chrome OS, and all the other Google products used in business environments. Delivered Fridays
Also see
Source of Article