Namespaces are crucial to better Kubernetes management. Learn how to create a new namespace and then deploy a pod to it.
Image: Jack Wallen
Within the realm of Kubernetes, a namespace is used in certain environments where multiple users are spread across teams or projects. By using namespaces, it is possible to divide resources between users without running into name collision.
For example: Within a Kubernetes cluster, you cannot have pods of the same name. However, by using namespaces, those pods with the same name can be isolated within a namespace, such that Kubernetes will have no problem with their existence. In other words, namespaces are a sort of virtual cluster. In a similar fashion as having multiple guest VMs on a host, you can have multiple namespaces on a single cluster.
SEE: Implementing DevOps: A guide for IT pros (free PDF) (TechRepublic)
Upon deploying your Kubernetes cluster, you’ll find at least three basic namespaces:
-
default – Used for deployments not given a namespace
-
kube-system – Used for everything related to the Kubernetes system
-
kube-public – Readable by everyone, but reserved for system use only
You can view the list of current namespaces by issuing the command:
kubectl get namespaces
You should see those three namespaces at a minimum (Figure A).
Figure A
” data-credit rel=”noopener noreferrer nofollow”>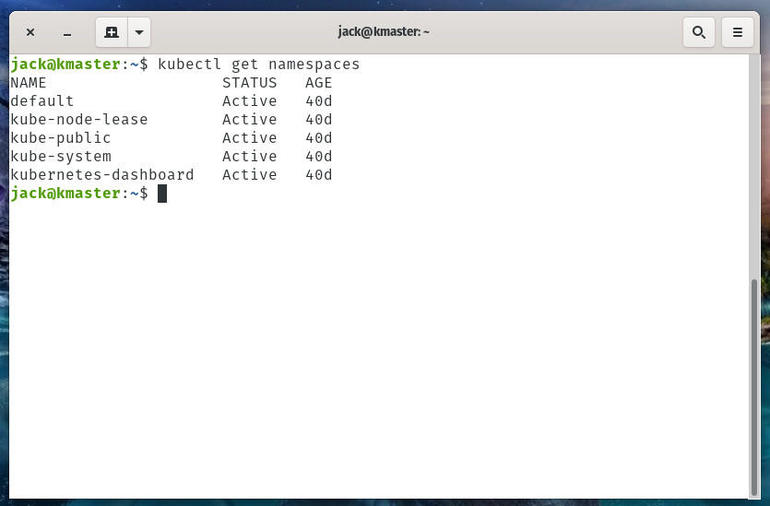
The basic namespaces are listed with a few extra in my test cluster.
What you’ll need
In order to create a new namespace, you’ll need a Kubernetes cluster up and running. If you’ve not already taken care of that, follow the steps in: How to deploy a Kubernetes cluster on Ubuntu server.
How to create a namespace
Let’s create a namespace called staging. To do that, open a terminal window on your Kubernetes controller and issue the command:
kubectl create namespace staging
The kubectl command will report back the namespace has been created (Figure B).
Figure B
” data-credit rel=”noopener noreferrer nofollow”>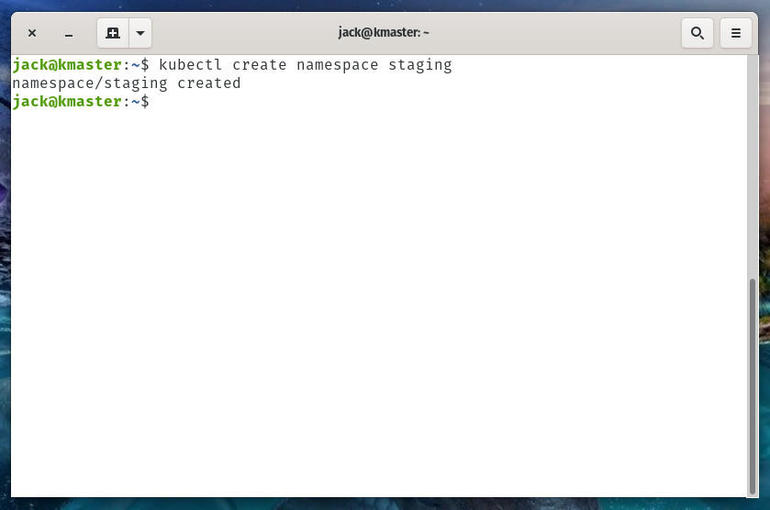
Our staging namespace has been created.
How to deploy a pod to a namespace
Now that we’ve created our namespace, how do we deploy to it? That’s easy. Say you want to deploy an NGINX pod to the new staging namespace. For that you would issue the command:
kubectl run nginx --image=nginx --namespace=staging
The kubectl command will report back that your pod has been created (Figure C).
Figure C
” data-credit rel=”noopener noreferrer nofollow”>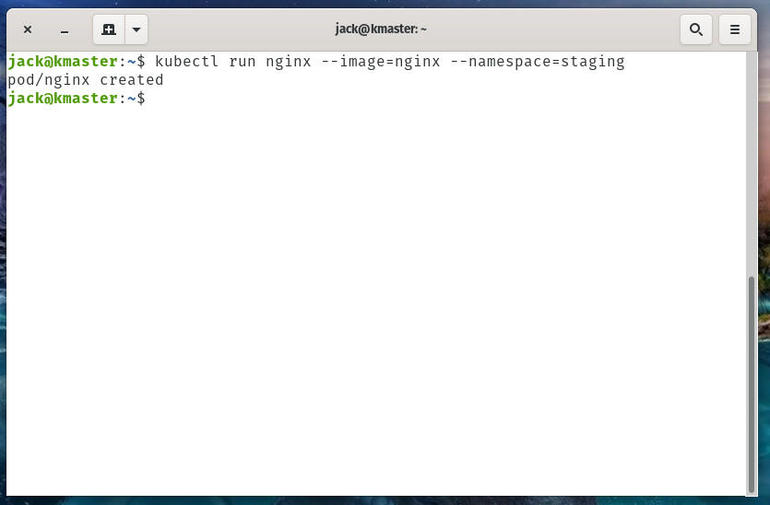
Our NGINX pod has been deployed to the staging namespace.
To ensure the pod was in fact deployed to the staging namespace, issue the command:
kubectl get pods --namespace=staging
The kubectl command will report back that the NGINX pod is running (Figure D).
Figure D
” data-credit rel=”noopener noreferrer nofollow”>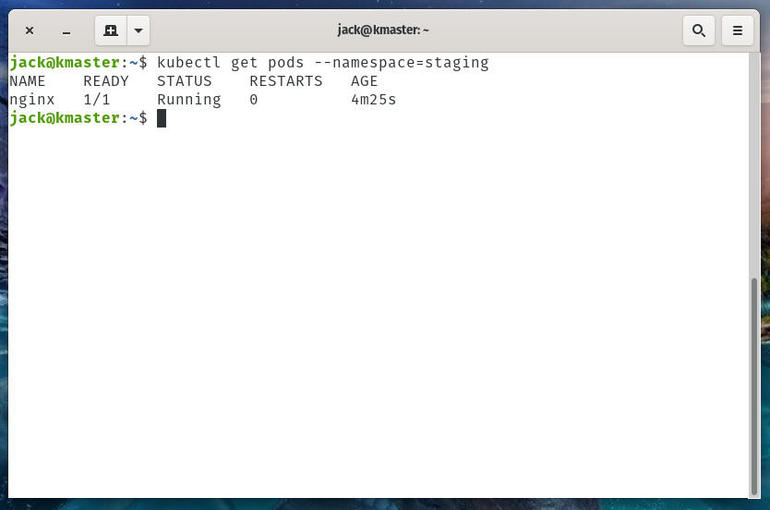
Our NGINX pod is running.
How to set the default namespace
Let’s say you’ve created a namespace you intend to always use as your default. Instead of having to use the –namespace= option in your deployment/management commands, you could always set that new namespace as the default.
To do that, you would issue the command:
kubectl config set-context --current --namespace=NAMESPACE
Where NAMESPACE is the name of the namespace you wish to use as the default.
Now, if you were to deploy that NGINX pod to the staging namespace (which we’ve set as our default), the command would simply be:
kubectl run nginx --image=nginx
And that’s all there is to creating a Kubernetes namespace. Play around with this feature so you’re confident in its usage because you will eventually need namespaces to make your clusters easier to manage.

Cloud and Everything as a Service Newsletter
This is your go-to resource for XaaS, AWS, Microsoft Azure, Google Cloud Platform, cloud engineering jobs, and cloud security news and tips. Delivered Mondays
Also see
Source of Article