Sharing folders between VirtualBox hosts and guests isn’t nearly as hard as you think, and the results of the task can make your virtual machines far more flexible. Jack Wallen shows you how.
Image: Oracle
VirtualBox is a great tool for creating, running, and managing virtual machines. It’s free, it’s flexible, and it’s powerful. If you use this tool in your data center, you might find the need to create a shared folder between a host and a guest. In fact, this is a solid way to share a folder with multiple guests or use it as a way to expand the available storage for your virtual machines.
No matter how you use these shared folders, you have to know how to create them first. Let me show you how to do so in VirtualBox 6.1.
SEE: Kubernetes: A cheat sheet (free PDF) (TechRepublic)
What you’ll need
To make this work, you’ll need a working instance of VirtualBox 6.1 and a guest VM already created. I’ll be demonstrating with a Fedora guest and a Pop!_OS host, but the process should be the same, no matter which combination you use. You will also need to make sure you’ve already installed the Guest Additions for the guest VM. To do that, follow these steps:
- Boot the guest virtual machine.
- Log in to the guest and click Devices | Insert Guest Additions CD Image.
- When prompted, click Run.
- Type your user password and click Authenticate.
- Allow the installation to complete.
- When prompted, hit the Enter key on your keyboard.
- Reboot the guest, so the changes will take effect.
How to define the shared folder in the guest
Before we do anything with the guest, we need to either choose a folder on the host or create one. Let’s create a folder in /home/USER/ named SHARED (Where USER is the same user who runs VirtualBox). Open a terminal window and issue the command:
mkdir ~/SHARED
With this folder created (or chosen), go back to your VM and select Settings. From the Settings window, select Shared Folders. In the resulting popup (Figure A), click the Folder Path drop-down and select Other.
Figure A
” data-credit>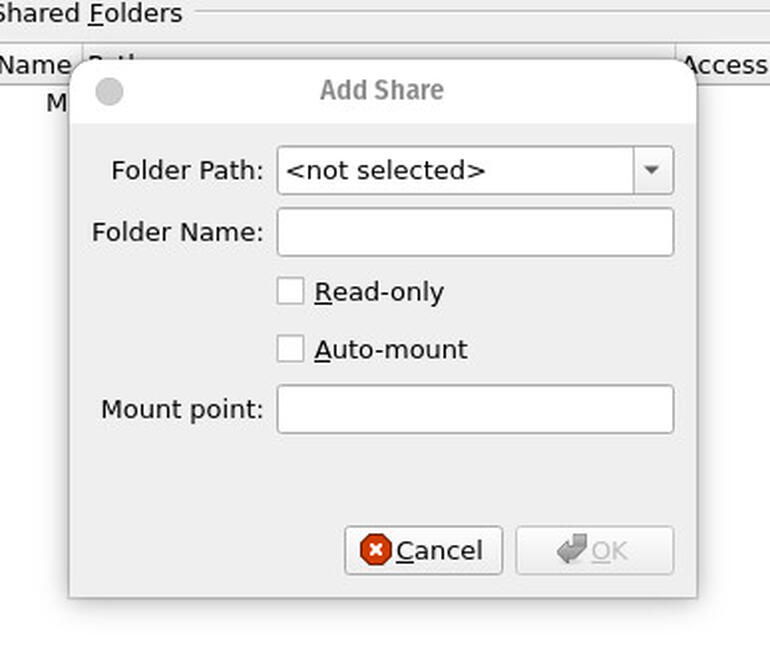
Creating your shared folder in VirtualBox 6.1.
This will open your host’s file manager. Navigate to the newly-created (or chosen) folder and select it. Next, type a name for the new share and click the check box for Auto-mount. Click OK to save the changes and OK to dismiss the Settings window.
Create the mount point with the command:
mkdir ~/share
You can name the mount point whatever you like. In my case, I named it pop_share (since it’s being shared with Pop!_OS). Mount the share with the command:
sudo mount -t vboxsf SHARE ~/share
Again, change the names SHARE and share to whatever you’ve named those folders.
You can now open your file manager to see that the contents of the SHARE folder on the host now show up on the share mount point on the guest.
How to make this permanent
Unfortunately, clicking Make Permanent in the VirtualBox settings for the share doesn’t actually work. To make this share permanent, you have to add an entry to the fstab file. Open that file on the guest with:
sudo nano /etc/fstab
At the bottom of that file, add the following line:
SHARED /home/USER/share vboxsf uid=1000,gid=1000 0 0
Make sure the change out SHARED for the name of the shared folder on the host, USER with your username on the guest, and share with the mount point on the guest.
Save and close the file. Now, when you reboot the guest, the share will be automatically mounted.
And that’s all there is to creating a shared folder between a VirtualBox host and guest. This would help make your data center virtual machines more flexible and usable.

Data Center Trends Newsletter
DevOps, virtualization, the hybrid cloud, storage, and operational efficiency are just some of the data center topics we’ll highlight. Delivered Mondays and Wednesdays
Also see
Source of Article


