Portainer makes it easy to create and manage Docker networks. Jack Wallen walks you through the process.

If you’re just starting to work with Docker containers, you might have run into one of my favorite Docker tools, Portainer. With this web-based tool, you can manage nearly every aspect of your Docker containers. One such aspect is networks.
SEE: Hiring kit: Back-end Developer (TechRepublic Premium)
But why would you need to manage networks for Docker containers? In a word … isolation. Docker networks allow you to link Docker containers to any number of networks as necessary and even isolate containers from one another. Docker networks should be used for several reasons:
- You can deploy containers to an isolated network.
- Requires fewer instances of an OS to run a workload.
- Helps expedite application delivery.
- Makes applications more portable.
Before we get into creating a Docker network with Portainer, it’s important to understand the different network drivers available to the platform. These drivers are:
- bridge–the default network driver. It is used when an application is to be deployed to standalone containers that still need a network for communication. Used for when you need multiple containers to communicate with the same host.
- host–another network for standalone containers, only this one uses the host network. Used for when the network stack must not be able to communicate to the host.
- overlay–connect multiple Docker daemons together so swarm services can communicate with one another. Used for when containers on different hosts need to be able to communicate with one another.
- ipvlan–gives users total control over both IPv4 and IPv6 addressing. Used for when you need more control over networking.
- macvlan–allows you to assign a MAC address to a container so it appears as a physical device on your network. Used for when you need your containers to appear as physical hosts on your network.
With Portainer, you will find the host network option missing, so there’s only bridge, ipvlan, macvlan and overlay available.
With that said, let’s get to the networks!
How to create a Docker network with Portainer
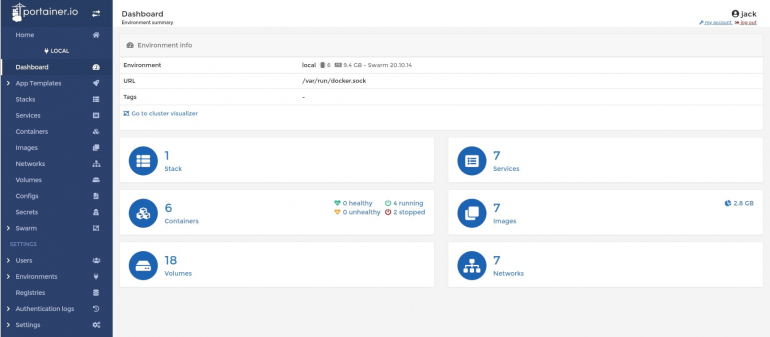
Log into your Portainer instance. If you’ve not already deployed Portainer, find out how to do so in “How to deploy the Portainer container management tool with persistent storage.” Once logged in, click on Networking in the left sidebar (Figure A).
Figure A
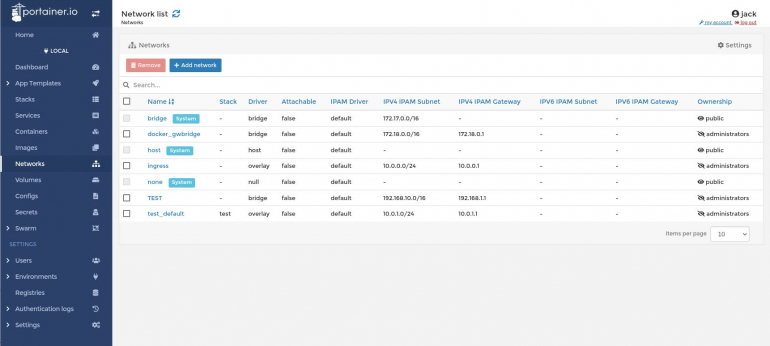
In the resulting window (Figure B), click Add network.
Figure B
In the Create Network window (Figure C), the first thing you’ll do is give the new network a name.
Figure C
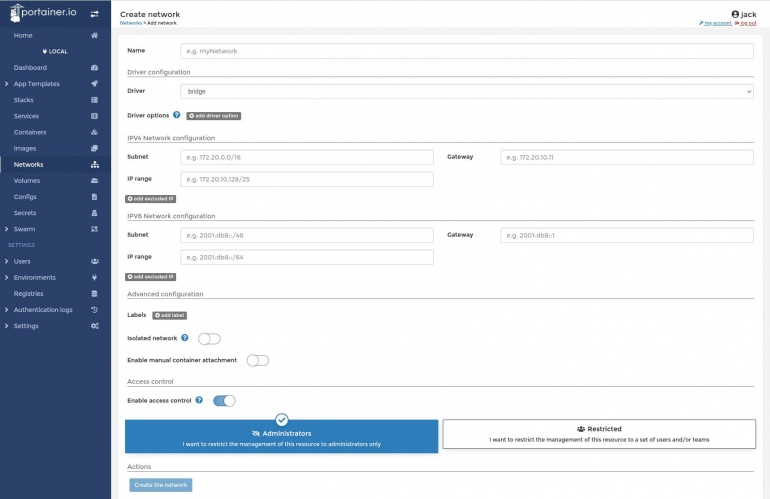
Let’s call this network trtest. We’ll stick with the default bridge driver, so select Bridge from the driver drop-down.
Next, define your IPv4 range, subnet, and gateway. For example, you might want to assign an IPv4 subnet of 10.0.0.0/16, an IPv4 range of 10.0.0.0/25, and a gateway of 10.0.0.1. If you need to exclude any IP addresses in the range, click Add Excluded IP and enter the required value.
If this is to be an isolated network, make sure to click the On/Off slider to the ON position. Also, if you want to enable manual container attachment, click the On/Off slider for Enable manual container attachment to the On position.
You might also want to restrict this network to either Administrators or specific users or groups. If you want to go that route, you must first have created either authorized teams or users.
Once you’ve filled out the necessary information, click Create the Network. You should be immediately taken back to the network listing, where trtest is now available. If you click on that network, you’ll see the ID as well as the network configuration (Figure D).
Figure D
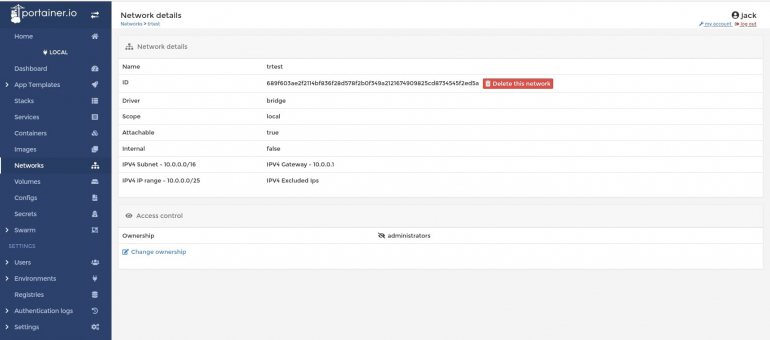
Notice, that the only thing you can edit in a network is the ownership. So if you’ve created a network and then gone back and created an authorized user or team, you can reassign this network to those restricted users. Otherwise, you cannot change anything with a network configuration.
How to use your new network
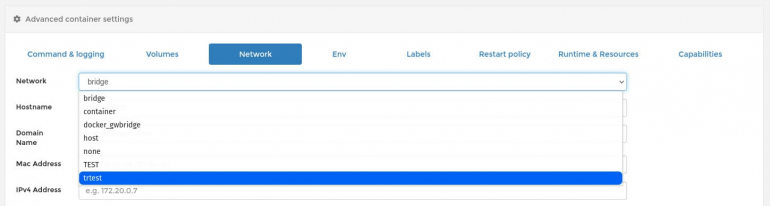
Let’s create a new container, using our new network. Click Containers in the left sidebar and then click Add container. In the resulting window, fill out the container information as you normally would and then click the Network tab near the bottom. In the resulting screen, you can select your new network from the Network drop-down (Figure E).
Figure E
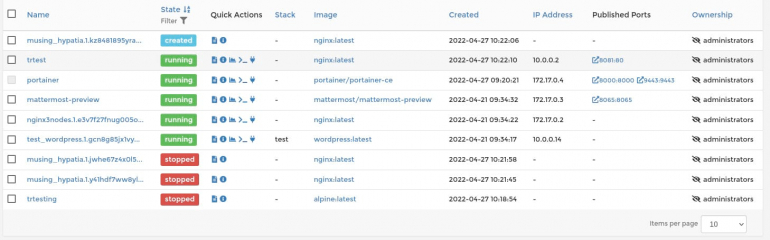
When you finish configuring the container, click Deploy the Container. Once the container has successfully deployed, it’ll be listed and should show an IP address within the IPv4 range you set in the network (Figure F).
Figure F
Congratulations, you just created a Docker network and attached it to a container, all from within the GUI goodness of Portainer. Keep experimenting with this to keep your container education moving forward.
Subscribe to TechRepublic’s How To Make Tech Work on YouTube for all the latest tech advice for business pros from Jack Wallen.
Source of Article