
Jack Wallen shows you how to configure specific DNS servers for your Docker container deployments.

Image: Shutterstock/roman-Samborskyi
When you deploy a container on your network, if it cannot find a DNS server defined in /etc/resolv.conf, by default it will take on the DNS configured for the host machine. That may be fine and dandy for certain situations. But what if (maybe for security reasons), you do not want your containers using the same DNS as your hosts. Say, for example, your host servers use a specific DNS server to prevent users from visiting particular sites. Or maybe you have different DNS configurations for VPNs.
SEE: The best programming languages to learn–and the worst (TechRepublic Premium)
There might be several reasons you don’t want your containers using the same DNS as their hosts. So, what do you do? How do you define DNS for Docker containers, such that it won’t pick up the DNS of the hosting machine?
It’s actually quite simple. Let me show you how.
What you’ll need
To make this work, you’ll need a machine running the Docker engine. I’ll be demonstrating on Ubuntu Server 20.04, but the hosting platform doesn’t matter, so long as you have Docker running and can deploy containers. You’ll also want to have a user that’s a member of the docker group (so you’re not deploying as either the root user or with sudo, both of which are a security issue). With those things at the ready, let’s deploy.
How to deploy a container with DNS pre-configured
I’m going to show you how to deploy Docker containers with DNS pre-configured. The first method will use the docker command and the second will be via Docker Compose.
Let’s say you want to deploy a Ubuntu container, named ubuntuDNS, with the primary Cloudflare DNS server of 1.0.0.1. That command would be:
docker run -d -t --name ubuntuDNS --dns="1.0.0.1" ubuntu
You could also deploy that container with a primary and secondary DNS like so:
docker run -d -t --name ubuntuDNS --dns="1.0.0.1" --dns="1.1.1.1" ubuntu
Let’s make sure the container honors our DNS configuration. For that, access the shell of the container with the command:
docker exec -it ubuntuDNS bash
From the shell, issue the command:
cat /etc/resolv.conf
You should see the DNS server(s) you configured from the command line (Figure A).
Figure A
” data-credit>
Our Cloudflare DNS servers have been successfully configured.
Exit from the shell with the exit command.
Now we’ll do the same, using Docker Compose. Of course, you have to have this command installed, which can be done with the following:
wget https://github.com/docker/compose/releases/download/1.29.2/docker-compose-Linux-x86_64
chmod u+x docker-compose-Linux-x86_64
sudo mv docker-compose-Linux-x86_64 /usr/local/bin/docker-compose
With Docker Compose installed, you can now create the necessary file with the command:
nano docker-compose.yaml
In that file, let’s deploy a rabbitmq (an open-source message broker) container that will use a CloudFlare DNS entry, which will look like:
version: '3'
services: service: dns: - "1.0.0.1" - "1.1.1.1" network_mode: "bridge" image: rabbitmq:3-management container_name: rabbitmq hostname: rabbitmq ports: - "15672:15672"
Note: Without the network_mode option set to “bridge” the DNS entry will not work.
Save and close the file. Deploy the container with the command:
docker-compose up
The container will deploy. Open a new SSH connection to the hosting server (as the deployment won’t return your prompt) and then access the shell of the rabbitmq container with the command:
docker exec -it rabbitmq bash
Once inside the container, view the DNS entries with the command:
cat /etc/resolv.conf
You should see 1.0.0.1 and 1.1.1.1 listed (Figure B).
Figure B
” data-credit>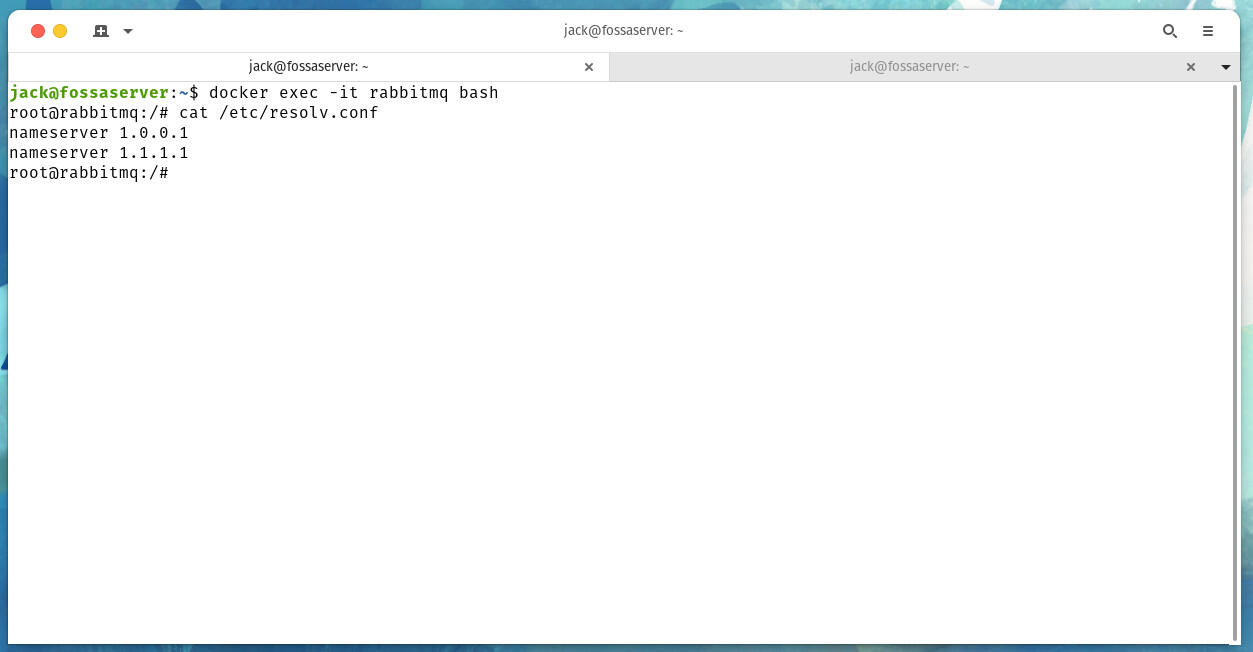
Our WordPress deployment is using the proper DNS entry.
And that’s all there is to defining DNS in your Docker containers. Why you would use this will depend on your needs, but having this feature at the ready can be quite handy.
Subscribe to TechRepublic’s How To Make Tech Work on YouTube for all the latest tech advice for business pros from Jack Wallen.

Developer Essentials Newsletter
From the hottest programming languages to the jobs with the highest salaries, get the developer news and tips you need to know. Weekly
Also see
Source of Article