Find out how ServerCat makes it easy to deploy a container to one or more Docker hosts with batch execution.

ServerCat is one of my favorite tools for remotely accessing and monitoring Linux servers. With a beautifully designed UI and user-friendly structure, anyone can use this tool to access remote Linux servers.
But ServerCat has a few other tricks up its crafty sleeve. One such trick is the ability to batch-execute Docker deployments to any supporting server you have connected. With a single command, you can deploy containers to all of your Docker servers and then monitor them to make sure they’re running as expected. I’ll show you how simple it is to do just that by batch-deploying an NGINX container to multiple servers hosting Docker containers.
SEE: Hiring kit: Back-end Developer (TechRepublic Premium)
What you’ll need to deploy a container with ServerCat
You’ll need ServerCat installed on a macOS device, and at least one Linux host connected that runs Docker.
How to deploy a container with ServerCat
Before we get into this, know that deploying a container with ServerCat isn’t totally a point-and-click affair, because you will need to know how to deploy that container via the command line. I will demonstrate an NGINX container deployment, which is relatively simple.
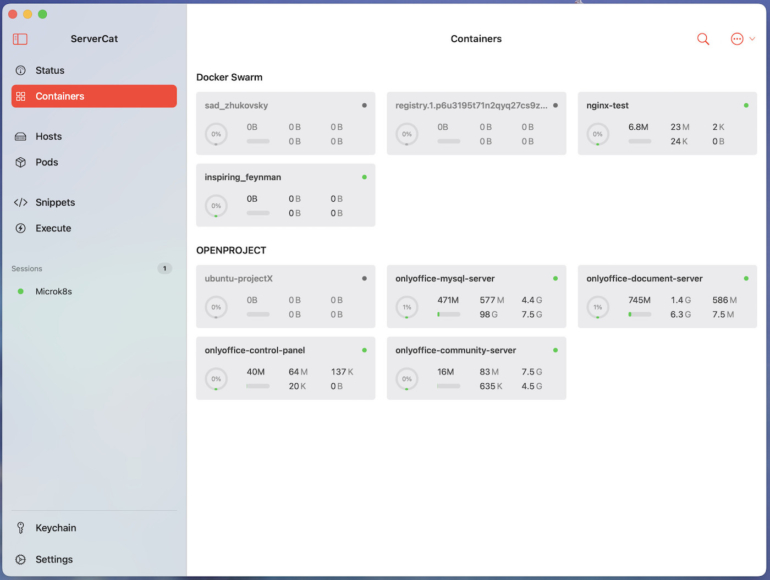
The first thing to do is open ServerCat on your macOS device. From the main window, you should see the Execute entry in the left navigation (Figure A).
Figure A
In the Execute screen (Figure B), you’ll see a list of all the available hosts at the top, the execute command field, and the Execute button.
Figure B
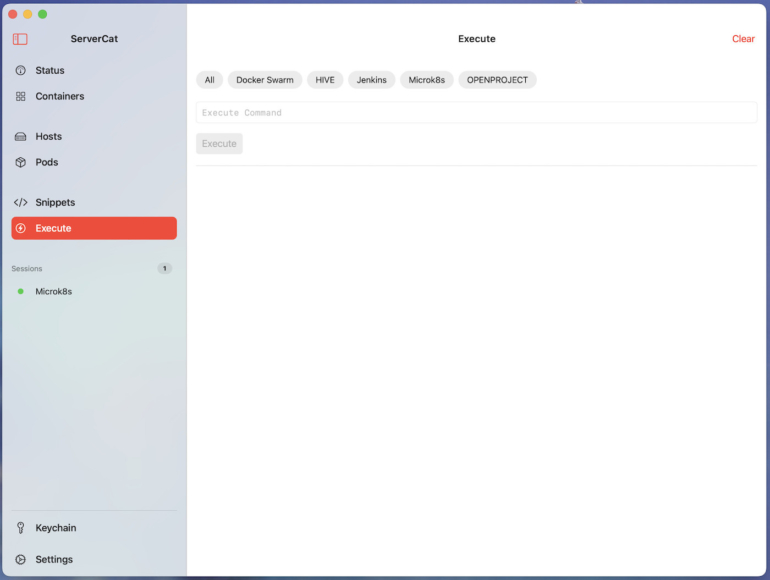
This isn’t only used for deploying containers; you could also, say, run sudo apt-get upgrade -y on any Ubuntu-based server. But for this demonstration, we’ll deploy a container.
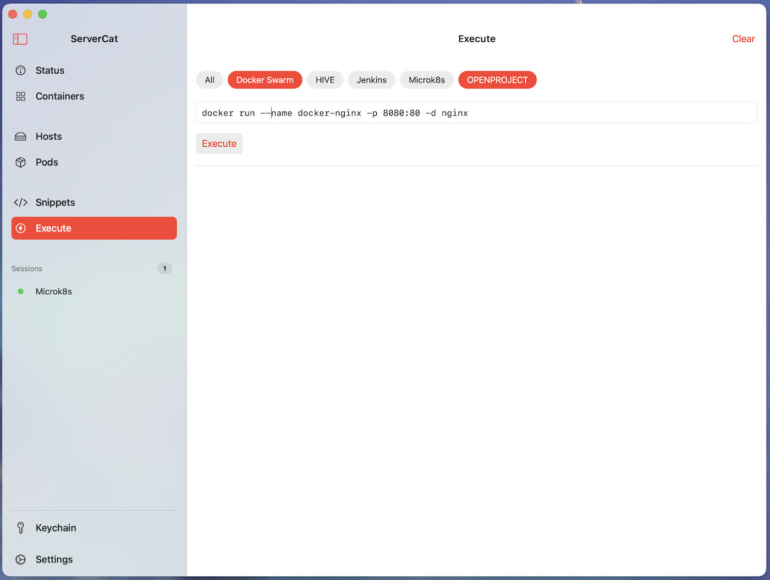
At the top, select all of the Docker servers to which you want to deploy the container. Next, in the Execute Command field, type:
docker run --name docker-nginx -p 8080:80 -d nginx
With everything set (Figure C), click Execute to deploy the container to the selected hosts.
Figure C
As you can see in Figure D, one deployment succeeded, while the other did not.
Figure D
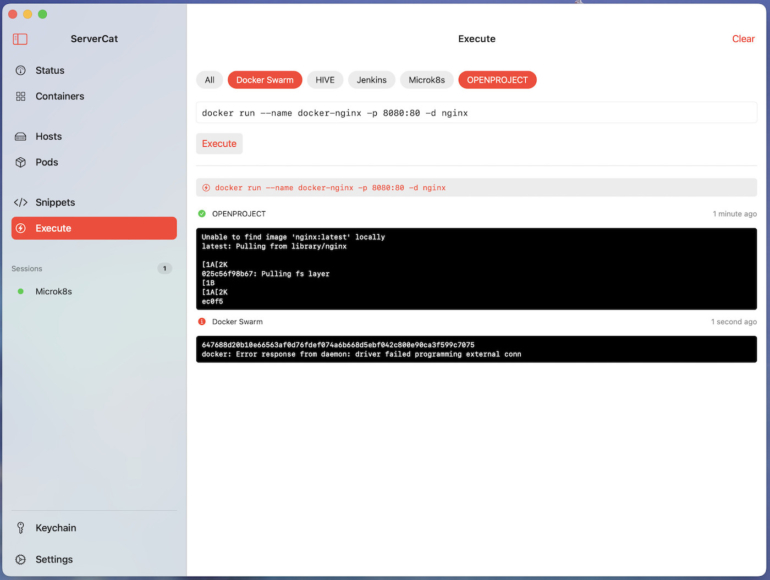
If I go to Hosts and then double click the Docker Swarm entry, I can run docker ps -a to discover port 8080 is already taken, which caused the error (Figure E).
Figure E
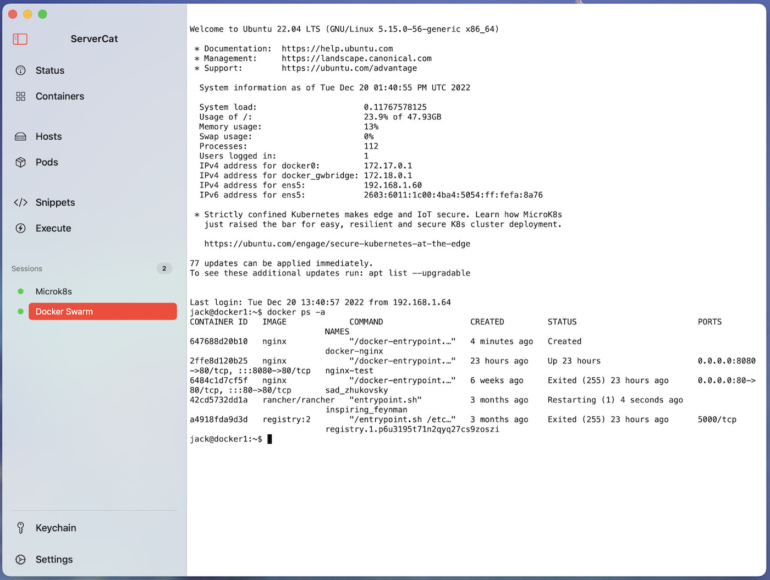
Then, I can attempt another deployment using a different external port with the command:
docker run --name docker-nginx2 -p 8081:80 -d nginx
We have to rename docker-nginx to docker-nginx2 because the first name is already taken. That command will succeed, and our NGINX container will be deployed to our Docker Swarm host.
Simple Docker deployment
Although ServerCat container deployment isn’t a full-on point-and-click affair, it does make it easy to spin up containers on multiple remote Docker nodes and then monitor those containers. If you know the basics of Docker CLI deployment, ServerCat will help make the deployment and monitoring of those containers a bit easier. Give this all-in-one tool a try, and see if it doesn’t become your go-to means of batch-executing containers to your Docker servers.
Continue your IT education with this The Linux & Docker Coding Bundle from TechRepublic Premium.
Subscribe to TechRepublic’s How To Make Tech Work on YouTube for all the latest tech advice for business pros from Jack Wallen.
Source of Article


