A password manager can keep your sensitive information in-house. Here’s how to deploy Passbolt to your data center or cloud-hosted service.

Passbolt is a password manager you can use for team collaboration, and it offers plenty of the features you’ve grown accustomed to having at your fingertips, such as a random password generator, team collaboration, folders, tags and user access control. This password manager is designed specifically for Agile and DevOps teams, and it’s application programming interface-centric and developer-first.
Why would you want to run a self-hosted instance of Passbolt?
If your project or organization needs to save sensitive information and you don’t want to trust it to third-party servers, you might want to run a self-hosted instance of Passbolt. If you’re comfortable using Docker, this is a surefire solution for protecting your passwords from breaches, such as what recently occurred to LastPass.
SEE: Password breach: Why pop culture and passwords don’t mix (free PDF) (TechRepublic)
If Passbolt sounds like a password manager well-suited to your needs, learn how it can be deployed with the help of Docker.
What you’ll need to deploy Passbolt
To run the self-hosted version of Passbolt, you’ll need a server with an operating system that supports Docker. I’ll demonstrate with Ubuntu Server 22.04 and the latest version of Docker CE; for that, you’ll need a running instance of Ubuntu Server and a user with sudo privileges.
How to install Docker
First, add the official Docker GPG key with the command:
curl -fsSL https://download.docker.com/linux/ubuntu/gpg | sudo gpg --dearmor -o /usr/share/keyrings/docker-archive-keyring.gpg
With the key in place, add the Docker repository with the command:
echo "deb [arch=amd64 signed-by=/usr/share/keyrings/docker-archive-keyring.gpg] https://download.docker.com/linux/ubuntu $(lsb_release -cs) stable" | sudo tee /etc/apt/sources.list.d/docker.list > /dev/null
Next, install the required dependencies with the command:
sudo apt-get install apt-transport-https ca-certificates curl gnupg lsb-release -y
Update apt, and install Docker CE with the commands:
sudo apt-get updatesudo apt-get install docker-ce docker-ce-cli containerd.io -y
Make sure your user is still a member of the docker group with the command:
sudo usermod -aG docker $USER
Log out and log back in for the changes to take effect.
Download the Passbolt Docker Compose YAML file with:
wget https://download.passbolt.com/ce/docker/docker-compose-ce.yaml
Open that file for editing with the command:
nano docker-compose-ce.yaml
Go through that file and edit any entries you need. For example, you might change the APP_FULL_BASE_URL: line to reflect your server’s IP address or hostname. Once you’ve edited the file, save and close it. You can then start the containers with the command:
docker-compose -f docker-compose-ce.yaml up -d
Once the containers have started, you must then create your first admin user with the command:
docker-compose -f docker-compose-ce.yaml exec passbolt su -m -c "/usr/share/php/passbolt/bin/cake passbolt register_user -u EMAIL -f FIRSTNAME -l LASTNAME -r admin" -s /bin/sh www-data
Where:
- EMAIL is your email address.
- FIRSTNAME is your first name.
- LASTNAME is your last name.
The above command will output an address like this:
https://192.168.1.60/setup/install/f398345d-3bee-897d-afe5-321ea3dd3a5b/724fe653-80d7-4042-8667-ea61ddd104c6
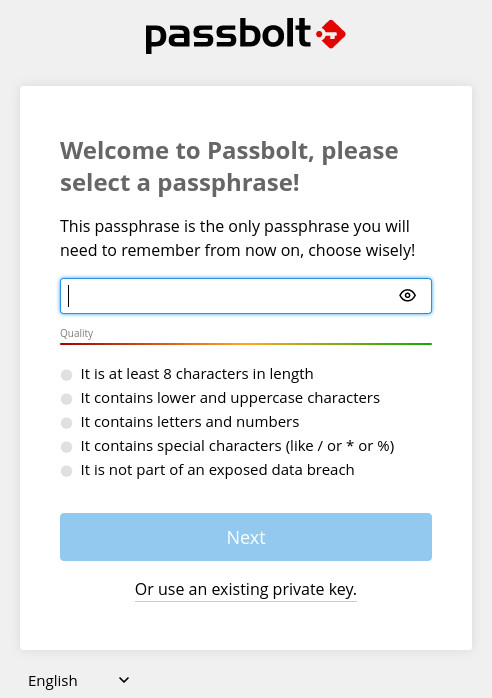
Open your default web browser, which must be either Firefox, Chrome, Edge, Brave or Vivaldi, paste the output address and hit enter. Now, you can create a passphrase for your vault (Figure A), making sure it’s strong and unique.
Figure A
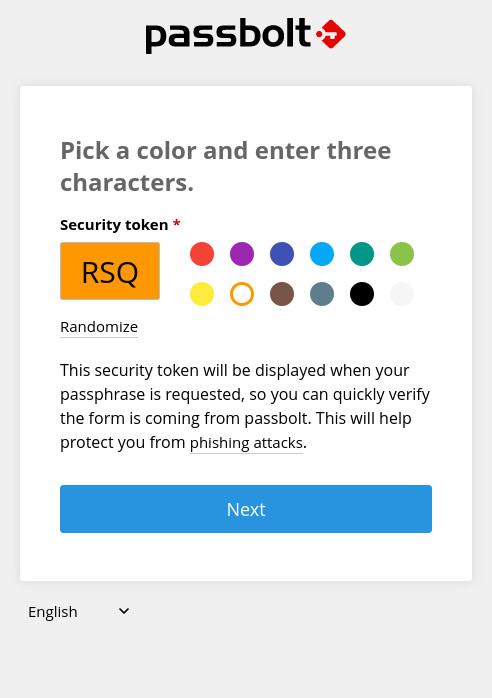
Click Next, save the recovery kit file to your local drive and click Next again. You will be required to pick a color and type three random characters (Figure B).
Figure B
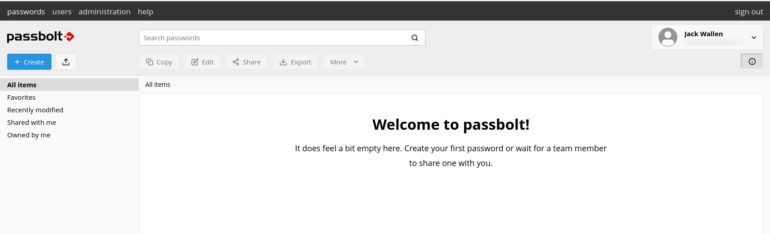
Click Next, and you’ll find yourself on the Passbolt main window (Figure C), where you can start adding vault entries.
Figure C
Another security resource to use is TechRepublic Premium’s password management policy.
Subscribe to TechRepublic’s How To Make Tech Work on YouTube for all the latest tech advice for business pros from Jack Wallen.
Source of Article