If you’re looking to deploy a private or public social networking platform for your organization, Jack Wallen shows you how to get HumHub up and running.

Image: Getty Images/iStockphoto
In the never-ending quest to empower your employees, you’ve gone to great lengths to give them the means to communicate. The vast majority of those tools are for business-only communication. During a time when morale is at its lowest, and your business needs to do everything it can to give its staff a boost, why not launch a private social networking platform? This way your employees have the means to be social in such a way that’ll keep them connected, which will help improve the remote work environment.
As a bonus, you could use a social networking tool for project management as well.
There are plenty of tools to make this a reality, one of which is called HumHub. This open source social network platform offers many of the usual features, without the ads, privacy invasion, and the other issues that go along with so many other platforms.
With HumHub, you can control what is allowed and even control who can use the platform, or if it’s a private or public platform. How do you install it? Let me walk you through the process.
There are two different versions of HumHub: Community and Enterprise. I’m going to demonstrate with the Community version. I recommend you test the platform using the this particular version. If HumHub meets your standards, and you want to get more out of the platform, you can purchase an Enterprise license and enjoy a few more features such as commercial support, the creation of categories to organize your communication within branches and departments, expanded LDAP support, and more. The Enterprise license is roughly $120.00/month for up to 50 users or $409.00/month for up to 500 users.
I’ll be demonstrating the installation on Ubuntu Server 20.04.
SEE: Incident response policy (TechRepublic Premium)
What you’ll need
In order to successfully install HumHub, you’ll need a working, upgraded instance of Ubuntu Server 20.04 and a user with sudo privileges.
How to install the necessary dependencies
The first thing we’re going to do is install the necessary dependencies. To do that, log in to your server and install Apache with the command:
sudo apt install apache2 libapache2-mod-xsendfile php-fpm -y
Next, we need to enable the FPM and FCGI modules with the commands:
sudo a2enconf php7.4-fpm
sudo a2enmod proxy_fcgi setenvif
sudo systemctl restart apache2
Then we’ll install PHP and the required modules with the command:
sudo apt install php php-cli php-imagick php-curl php-bz2 php-gd php-intl php-mysql php-zip php-apcu-bc php-apcu php-xml php-ldap php-sqlite3 -y
We now must configure PHP. Open the configuration file for editing with the command:
sudo nano /etc/php/7.4/php.ini
Make the following changes to these lines:
post_max_size = 32M
max_execution_time = 120
upload_max_filesize = 32M
Save and close the file. Restart Apache with the command:
sudo systemctl restart apache
How to install the database
We’ll be using MariaDB for this installation. To install the database, issue the command:
sudo apt install mariadb-server mariadb-client automysqlbackup -y
Secure the database installation with the command:
sudo mysql_secure_installation
Log in to the database server with the command:
sudo mysql
Create the new database with the command:
CREATE DATABASE `humhub_demo` CHARACTER SET utf8mb4 COLLATE utf8mb4_unicode_ci;
Create a new user with the command:
CREATE USER 'humhub_user' IDENTIFIED BY 'PASSWORD';
Where PASSWORD is a secure, unique password.
Give the new user permission to access the database with the command:
GRANT ALL ON `humhub_demo`.* TO `humhub_user`@localhost IDENTIFIED BY 'PASSWORD';
Where PASSWORD is a secure, unique password.
Finalize the database with the commands:
FLUSH PRIVILEGES;
exit
How to download and relocate HumHub
Change into the /tmp directory with the command:
cd /tmp
Download HumHub with the command:
wget https://www.humhub.com/download/package/humhub-1.7.0.zip
When the download completes, unpack the file with the command:
unzip humhub-1.7.0.zip
If you find the unzip command not available, install it with:
sudo apt-get install zip -y
Move the newly created file to the Apache document root with the command:
sudo mv humhub-1.7.0 /var/www/html/humhub
Change the ownership of the HumHub directory with the command:
sudo chown -R www-data: /var/www/humhub
How to create a configuration file for HumHub
Create an Apache configuration file with the command:
sudo nano /etc/apache2/sites-available/humhub.conf
In the new file, paste the following contents:
<VirtualHost *:80> ServerAdmin admin@your_example.com
ServerName your_example.com
ServerAlias www.your_example.com DocumentRoot /var/www/html/humhub <Directory /var/www/html/humhub/>
Options -Indexes -FollowSymLinks
AllowOverride All
</Directory> <DirectoryMatch "/var/www/html/humhub/(\.|protected|themes/\w+/views|uploads/file)">
Order Deny,Allow
Deny from all
</DirectoryMatch> <FilesMatch "^\.">
Order Deny,Allow
Deny from all
</FilesMatch> </VirtualHost>
Save and close the file.
Enable the new site configuration with the command:
sudo a2ensite humhub
Restart Apache with the command:
sudo systemctl restart apache2
How to access HumHub
You can now open a browser and point it to http://SERVER_IP/humhub (where SERVER_IP is the IP address of your hosting server). You will be greeted by the setup wizard, where you’ll need to take care of the following:
-
Database configuration: Make sure to fill in the necessary information according to the database and database user created earlier (Figure A).
-
Name of your social network: What you’ll call your instance of HumHub
-
What your HumHub will be used for: What you select will determine the use cases HumHub configures
-
Security settings: How people can register
-
Module selection: From Wiki, custom pages, birthday widget, polls, mail, files, and tasks
-
Admin account creation: Create the admin account that will control the HumHub instance
Figure A
” data-credit rel=”noopener noreferrer nofollow”>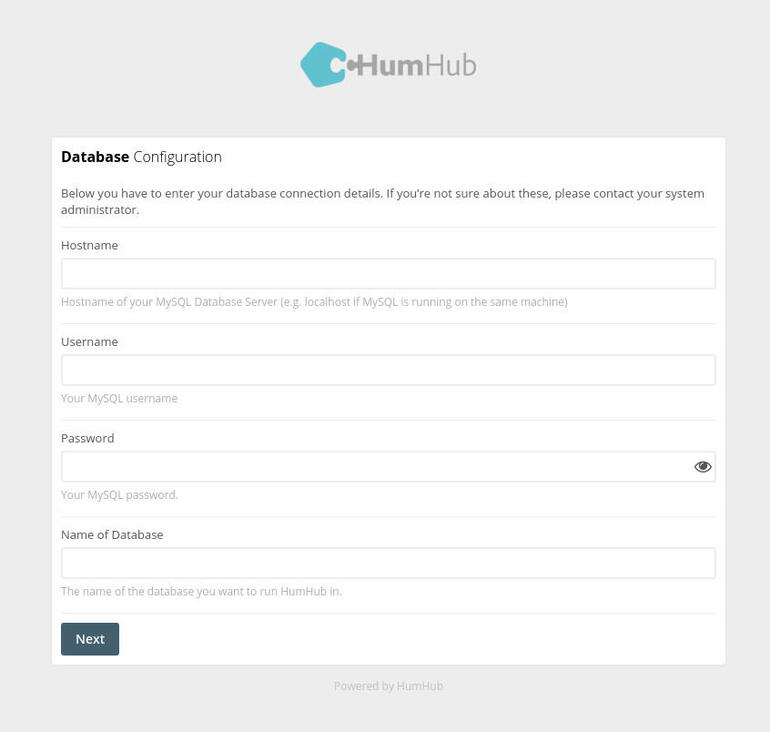
Configuring the database for HumHub.
When you finish the wizard, you’ll be able to log in with your admin account and you’ll be presented with that user’s dashboard (Figure B).
Figure B
” data-credit rel=”noopener noreferrer nofollow”>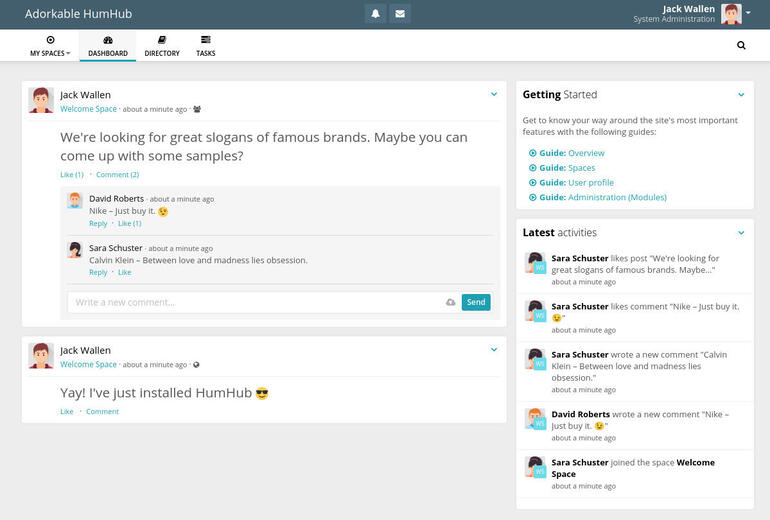
The admin user’s HumHub dashboard.
How to create the necessary cronjob
To finish up the installation, you need to create a cronjob that will take care of a couple of necessary background tasks. To do this, issue the command:
sudo crontab -e
At the bottom of the crontab file, paste the following two lines:
* * * * * /usr/bin/php /var/www/html/humhub/protected/yii queue/run >/dev/null 2>&1
* * * * * /usr/bin/php /var/www/html/humhub/protected/yii cron/run >/dev/null 2>&1
Save and close the file.
Congratulations, you’re ready to customize HumHub to perfectly fit your organization’s needs.

Open Source Weekly Newsletter
You don’t want to miss our tips, tutorials, and commentary on the Linux OS and open source applications. Delivered Tuesdays
Also see
Source of Article