Looking for a simple and powerful multi-purpose server for your business? Univention Corporate Server might be just the thing. Jack Wallen explains the process of deploying UCS with VirtualBox.

Image: iStock/klmax
Univention Corporate Server is a great platform to deploy to your data center to serve many needs. It can be a domain controller, a chat server, an in-house cloud-based groupware solution, a kanban platform, your Nextcloud Hub installation, a mail server, and with a robust App Center, you can extend this server to be just about anything you need.
But before you get to the point where you’re installing applications and having users logging into the various services, you must first deploy the UCS server. That’s what I’m going to do here first. (In later how-to’s we’ll build on this base.) With the help of VirtualBox, we’ll deploy Univention Corporate Server.
SEE: Checklist: How to manage your backups (TechRepublic Premium)
What you’ll need
To make this work, you’ll need the Univention Corporate Server virtual appliance for VirtualBox. You’ll also need VirtualBox running on a host that has at least 4GB of RAM to spare. That’s it; let’s make some server magic.
How to create the virtual machine
We’ll start this process by importing the virtual appliance into VirtualBox. To do this, open VirtualBox and click File | Import Appliance. In the resulting window, click the folder icon to the right of File (Figure A).
Figure A
” data-credit>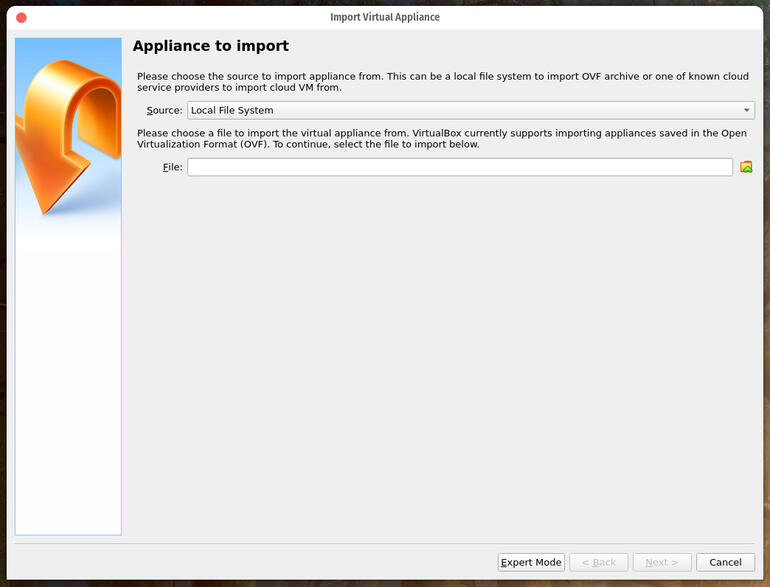
The appliance import window of the VirtualBox creation wizard
In the resulting windows, locate the .ova file you downloaded from the Univention download page and click Next. In the next window (Figure B), go through the settings and make sure they look correct.
Figure B
” data-credit>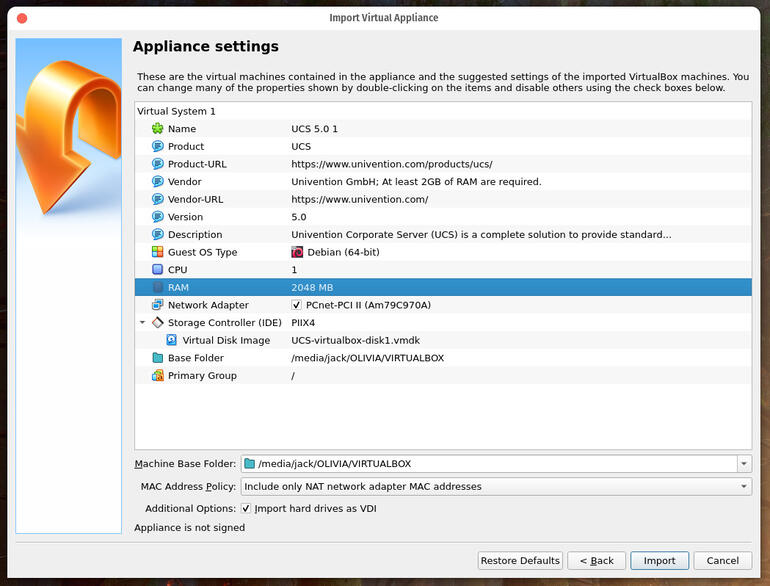
The UCS Appliance Settings window for VirtualBox
There is one thing you’ll need to immediately correct. Double-click on the RAM entry and change it from 2048 to 4096 (otherwise, some of the apps will not install).
Click Import and then, when prompted, click to agree with the EULA. The import process will begin and should complete after a few seconds. Once the import is finished, select the UCS entry in the left sidebar and click Start. You will be greeted by the UCS setup wizard (Figure C).
Figure C
” data-credit>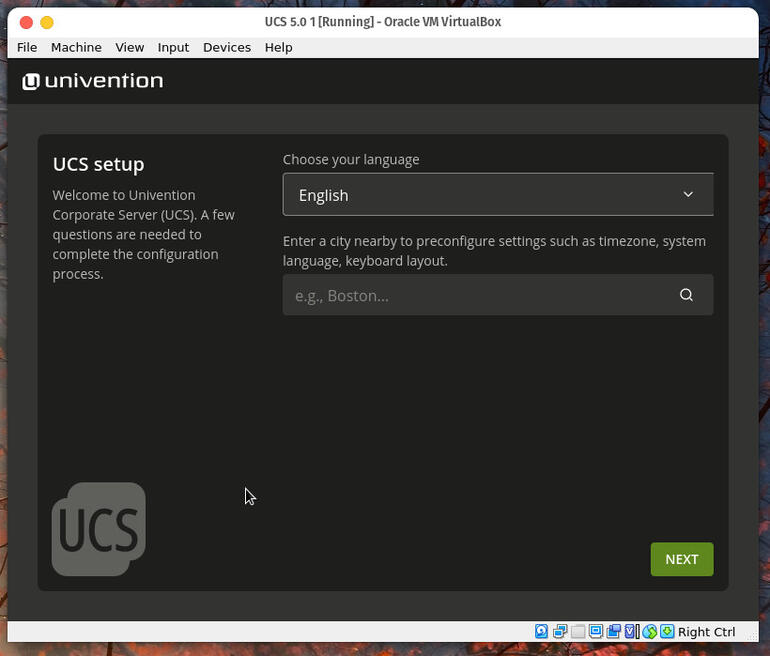
The UCS setup wizard is user-friendly and quick.
Through the wizard, you’ll set up:
- Language
- Locale
- Networking information (Figure D)
- UCS domain setup (select Create A New UCS Domain)
- Account information (organization name, email address for activation, and administrator password)
- Host settings (FQDN and LDAP base)
Figure D
” data-credit>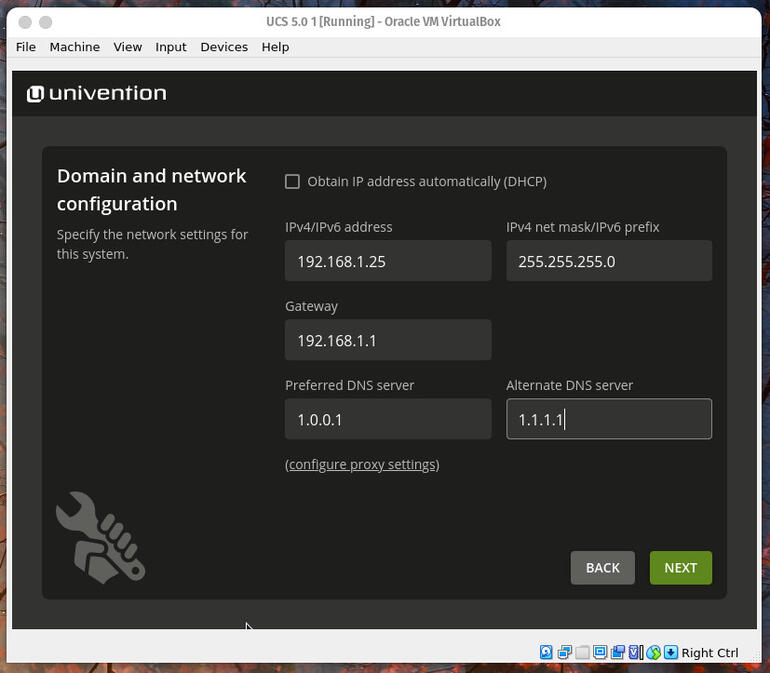
Configuring the Network information for UCS
Once you’ve walked through the wizard, click Configure System. The process will take some time to complete (as this is really the bulk of the installation). When the setup completes, click FINISH and you’ll be presented with a page (Figure E) instructing you how to access the web management interface.
Figure E
” data-credit>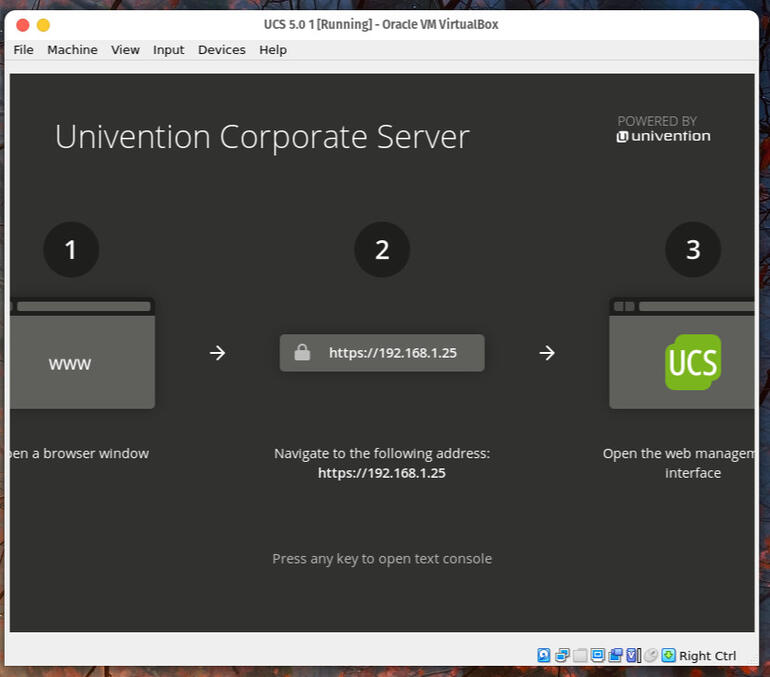
The UCS installation and setup are complete.
Open your browser and point it to https://SERVER (where SERVER is either the IP address or domain of your UCS installation).
And that’s all there is to deploying the Univention Corporate Server via a VirtualBox VM.
Next time around, we’ll find out how to deploy the Rocket.chat server with UCS.
Subscribe to TechRepublic’s How To Make Tech Work on YouTube for all the latest tech advice for business pros from Jack Wallen.

Data Center Trends Newsletter
DevOps, virtualization, the hybrid cloud, storage, and operational efficiency are just some of the data center topics we’ll highlight. Delivered Mondays and Wednesdays
Also see
Source of Article