If you’re looking for yet another cloud storage provider, one that offers a Linux desktop app, Jack Wallen believes Megasync might be exactly what you need.

Image: GettyImages/da-kuk
Mega.nz is a cloud service from New Zealand that offers a 20GB free account and includes all the bells and whistles you’ve become accustomed to with similar providers. And like Dropbox, Mega.nz has a Linux desktop client that is not only open source, it’s just as easy to use as any client in the cloud space.
Mega.nz includes features like:
- User-controlled end-to-end encryption.
- Cross-platform clients for Linux, macOS, Windows, iOS and Android.
- Full sync or selective sync.
- Supports two-factor authentication .
- Password-protected or expirable share links.
- Built-in file versioning.
- MEGAdrop allows you to create a folder anyone can upload files to.
- MEGAchat: audio/video calls using MEGA’s end-to-end encrypted chat.
I’m going to walk you through installing the Megasync GUI on Linux, as well as integrating it with the Nautilus file browser.
SEE: Research: Video conferencing tools and cloud-based solutions dominate digital workspaces; VPN and VDI less popular with SMBs (TechRepublic Premium)
What you’ll need
To use the Megasync client, you’ll first need to sign up for a free account. Once you’ve done that, you’ll need a working Linux desktop. I’ll be demonstrating on Pop!_OS 21.04 (which is based on Ubuntu 21.04). If you use a different distribution, you’ll need to alter the installation instructions accordingly.
How to install Mega.nz
Once you have your Mega.nz account created, head over to the download page and download the desktop app and the Nautilus sync app (saving them to your ~/Downloads directory). Once those have both downloaded, open a terminal window and change into the Downloads directory with:
cd ~/Downloads
Let’s first install the desktop client with:
sudo dpkg -i megasync*.deb
That installation will most likely error out. Fix those dependency problems with:
sudo apt-get install -f
Next, we’ll install the Nautilus integration with:
sudo dpkg -i nautilus-megasync*.deb
Restart Nautilus with:
nautilus -q
The Megasync.nz desktop client is installed and ready to go.
How to log into your account
This is tricky. When you first launch the Megasync client (which can be found in your desktop menu), it should open a login screen. This did not happen for me. Instead, the only thing that appeared was the notification tray icon. If I clicked on the Settings entry, the Megasync window would open, but wouldn’t allow me to interact.
Eventually, I figured out how to bring up the login screen, by clicking the Megasync system tray icon and selecting Show Status (Figure A).
Figure A
” data-credit>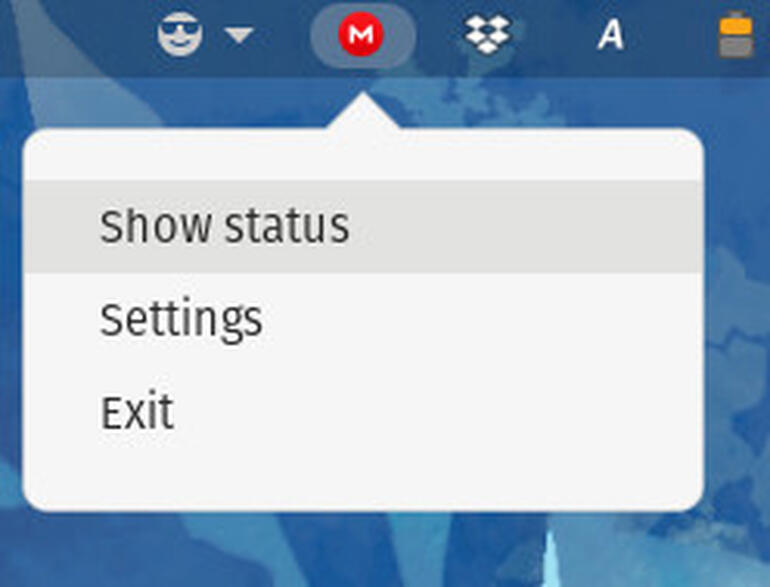
The Megasync system tray icon menu.
At that point, the login window appeared, where I could enter my Megasync.nz account credentials. The Megasync desktop client setup wizard then opened (Figure B), where I selected Selective sync (because I want to determine what is to be synced with my account.
Figure B
” data-credit>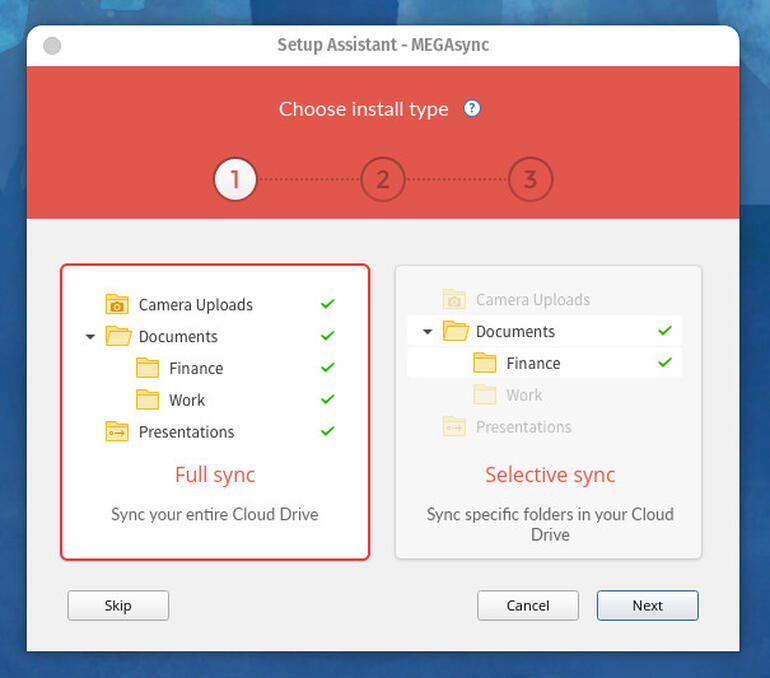
The Megasync setup wizard.
Finish walking through the wizard (it’ll ask you to select a local and remote folder and that’s it) and you’re ready to go.
Since we installed the Nautilus integration, you can now open your file manager and right-click any file/folder, and add it to your Megasync cloud sync (Figure C).
Figure C
” data-credit>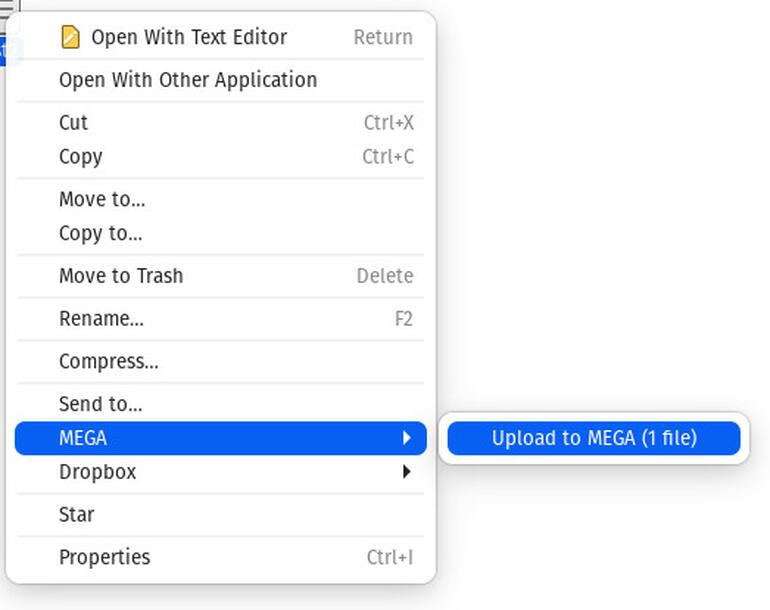
Syncing a file to Megasync from the Nautilus file manager.
And that’s all there is to installing and using the Megasync desktop client on Linux. If you’re looking for an alternative cloud storage service, you can’t beat 20GB of free storage that includes an open-source desktop client. And if you wind up enjoying Megasync.nz, you can always upgrade to a Pro account (starting at $5.85/month for 400GB of storage to $35.15/month for 16TB of storage).
Subscribe to TechRepublic’s How To Make Tech Work on YouTube for all the latest tech advice for business pros from Jack Wallen.

Cloud and Everything as a Service Newsletter
This is your go-to resource for XaaS, AWS, Microsoft Azure, Google Cloud Platform, cloud engineering jobs, and cloud security news and tips. Delivered Mondays
Also see
Source of Article