Do you need to gather data from users, but don’t want to risk that data leaking to third parties? You might want to try the new Nextcloud Forms app.
Image: Jack Wallen
The developers of the on-premise cloud solution, Nextcloud, are always coming up with something new to add to the mix. This time around, they’ve created a new app you can add to your Nextcloud instance, called Forms.
I bet you can guess what Forms does.
That’s right, it allows you to create and share questionnaires within the Nextcloud platform and then share them with users on your cloud instance, or even share them with those outside of your on-premise platform. It should be noted that you cannot collaborate on forms. When you create a form, you are the sole owner. I do not believe form collaboration is a feature that is planned, so when you “share” a form, you are sending said form out to other users that they can fill them out and provide you with data.
Even better, the data remains on Nextcloud, so you don’t have to worry about that information leaking out to Google or any other service/platform.
SEE: Hybrid cloud: A guide for IT pros (TechRepublic download)
The Forms app can be installed on Nextcloud 17 or newer and does an outstanding job with the task of creating forms to help you gather information.
I want to walk you through the process of installing and using forms.
What you’ll need
- A running instance of Nextcloud (version 17 or newer)
- An admin account
How to install Forms
The first thing to take care of is in the installation of the Forms app. This is actually quite simple. Log in to your Nextcloud instance as an admin user. Click your profile image at the top-right and then, from the drop-down, click Apps.
In the resulting window, type forms in the search bar. When the Forms app entry appears, click Download And Enable (Figure A).
Figure A
” data-credit rel=”noopener noreferrer nofollow”>
Installing Forms on Nextcloud 18.
If you’re prompted for your admin password, type it and click Confirm. Once the installation completes, Forms is ready to use.
How to use Forms
To create a new form, click the Forms icon in the Nextcloud toolbar. In the resulting window click Create A Form and then type a title and description for your form. Once you’ve taken care of the form information, click Add A Question. From the drop-box, select the type of question you want to ask (Checkboxes, Multiple Choice, Dropdown, Short Answer, Long Text) (Figure B).
Figure B
” data-credit rel=”noopener noreferrer nofollow”>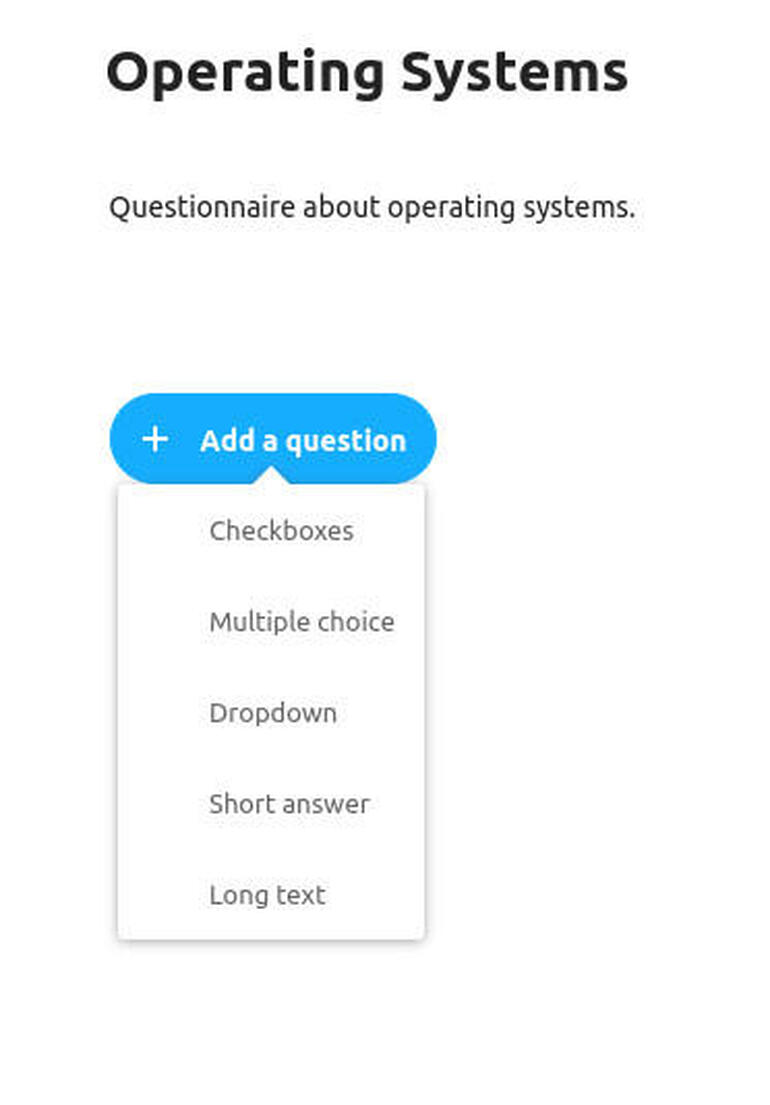
Selecting the type of question you want to add.
After adding the first question, you can then add a second question by clicking Add A Question again. Continue adding questions until your first form is complete (Figure C).
Figure C
” data-credit rel=”noopener noreferrer nofollow”>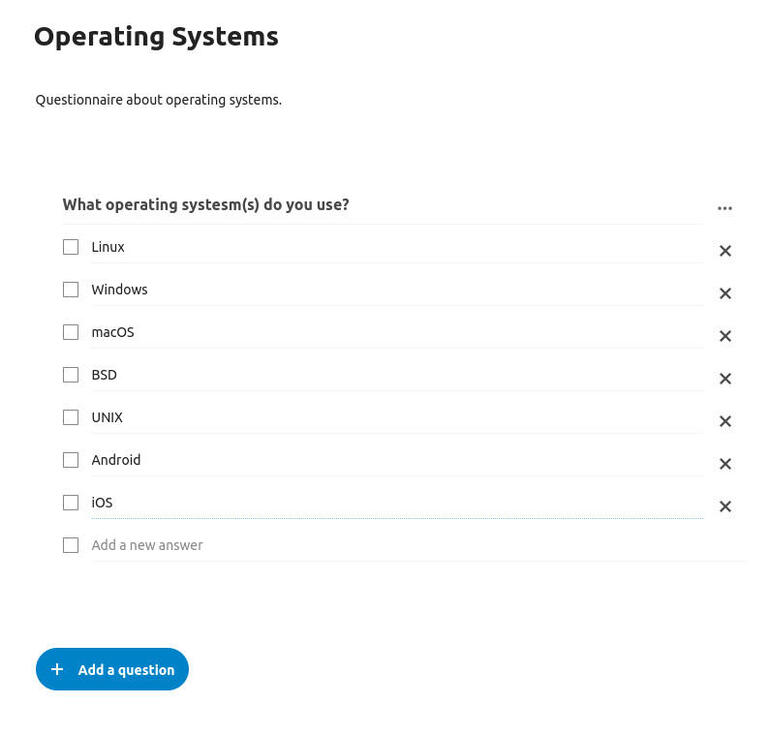
Our first question has been added to the form.
Your form is saved as you go, so there’s no need to manually save it. When you’ve finished adding your questions, you can then share the form by clicking the menu button associated with your new form–in the left sidebar (Figure D).
Figure D
” data-credit rel=”noopener noreferrer nofollow”>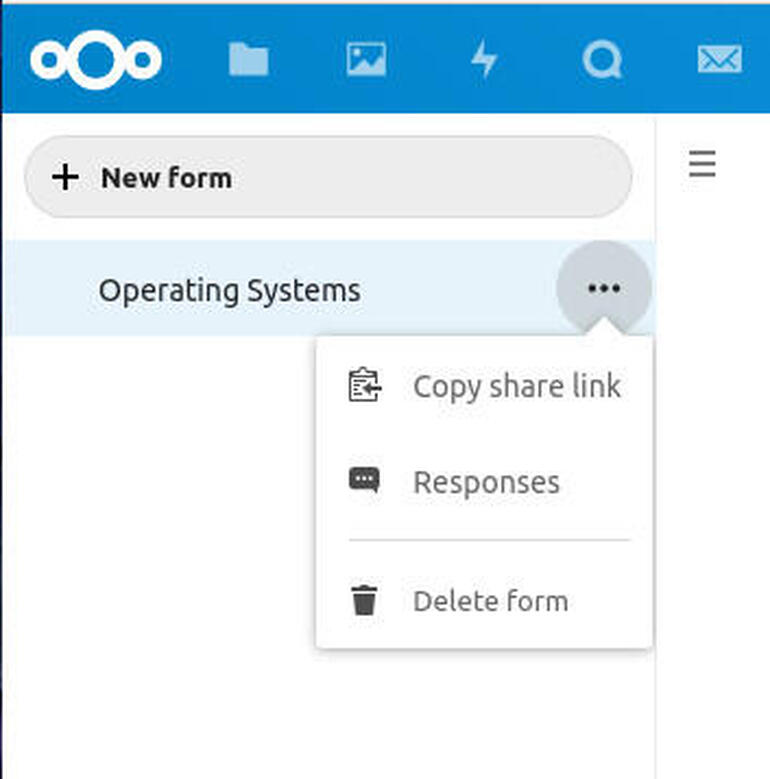
Sharing our new form is easy.
With the form link copied, you can then share that form link with anyone.
If, however, you want to share that form with other users on your Nextcloud instance, click the Form settings icon in the upper-right corner (to the right of the Responses button) (Figure E).
Figure E
” data-credit rel=”noopener noreferrer nofollow”>
The Forms settings button where you can enable your forms to be seen by other users.
In the Forms settings section, click Show To All Users Of This Instance and all users logged in to your Nextcloud instance will be able to see your form (Figure F).
Figure F
” data-credit rel=”noopener noreferrer nofollow”>
Configuring it so that all Nextcloud users can see your form.
Users will be notified of new forms to be answered via email. The developers are also working on a popup notification for forms that are shared. Hopefully this feature will arrive soon, otherwise you’ll have to count on users checking their emails to see a new form is available. Note: The only forms a user will see in their Forms app will be those they create.
You can also share only to specific Nextcloud users, if you don’t want every logged in user to view your form.
The Forms app should be a must-have for any Nextcloud user who wants to be able to collect data and house it in their on-premise solution. With the help of Nextcloud, you no longer have to turn to the likes of Google to create your forms. When keeping your data protected from third-parties is crucial, this could be a serious win for you and your business.

Cloud and Everything as a Service Newsletter
This is your go-to resource for XaaS, AWS, Microsoft Azure, Google Cloud Platform, cloud engineering jobs, and cloud security news and tips. Delivered Mondays
Also see
Source of Article