Learn how to install Gradle on a data center Linux server for project build automation and delivery.

Image: iStockphoto/Ralwel
Gradle is an open source build tool that can enable the automation of software building and delivery with a high level of efficiency. With Gradle you can write in Java, C++, Python, or just about any language you choose. You can package your applications for deployment on any platform and even scale out your builds with lightning-fast results.
Gradle can use either Kotlin or Groovy object-oriented programming language to define project configurations and supports many popular IDEs (such as Android Studio).
I’m going to walk you through the process of installing Gradle on one of your data center Ubuntu Server instances, so you can start adding automation to your application builds.
SEE: Telephone interview cheat sheet: Software developer (TechRepublic Premium)
What you’ll need
- An instance of Ubuntu Server
- A user with sudo privileges
How to update/upgrade Ubuntu
The first thing you want to do is make sure Ubuntu is updated and upgraded. One thing to be careful of is that, should the kernel get upgraded in the process, you’ll need to reboot the server for the changes to take effect. Because of this, make sure to run the update/upgrade process at a time when a reboot is feasible.
To run the update/upgrade, log in to your Ubuntu server and issue the following commands:
sudo apt-get update
sudo apt-get upgrade -y
Once the upgrade is complete, reboot the server (if necessary).
How to install Java
In order to install Gradle, you must first install Java. To do that, go back to the terminal window and issue the command:
sudo apt-get install default-jdk -y
Once Java is installed, you’re ready to install Gradle.
How to install Gradle
Before you can install Gradle, you must first install a few dependencies. To do that, issue the command:
sudo apt-get install apt-transport-https dirmngr wget software-properties-common -y
Once that completes, it’s time to add the necessary repository. To do this, first install the GPG key with the command:
sudo apt-key adv --keyserver keyserver.ubuntu.com --recv-keys D7CC6F019D06AF36
With the key successfully installed, add the repository with the command:
sudo add-apt-repository ppa:cwchien/gradle
Finally, install Gradle with the command:
sudo apt-get install gradle -y
Verify the installation with the command:
gradle -v
You should see all of the information about the version of Gradle installed (Figure A).
Figure A
” data-credit rel=”noopener noreferrer nofollow”>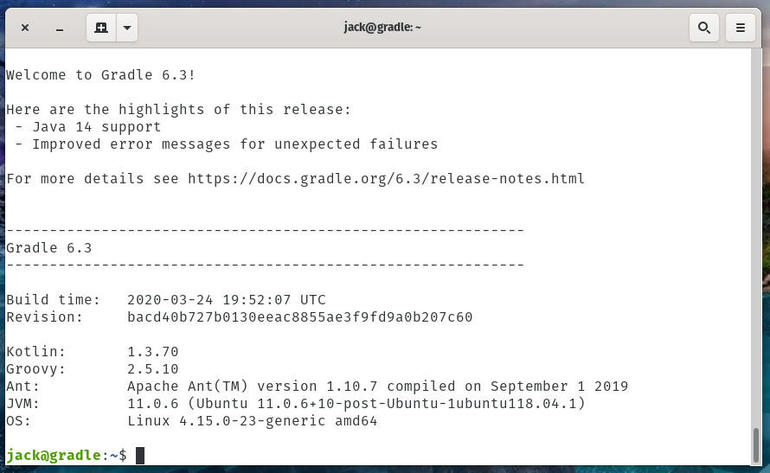
Gradle has been successfully installed.
How to initialize a new build
Let’s initialize a demo build with Gradle. To do this, create a demo directory with the command:
mkdir ~/demo
Change into that new directory with the command:
cd ~/demo
Once in that directory, initialize it with the command:
gradle init
You will eventually be greeted by a menu asking you to select the type of project to generate (Figure B).
Figure B
” data-credit rel=”noopener noreferrer nofollow”>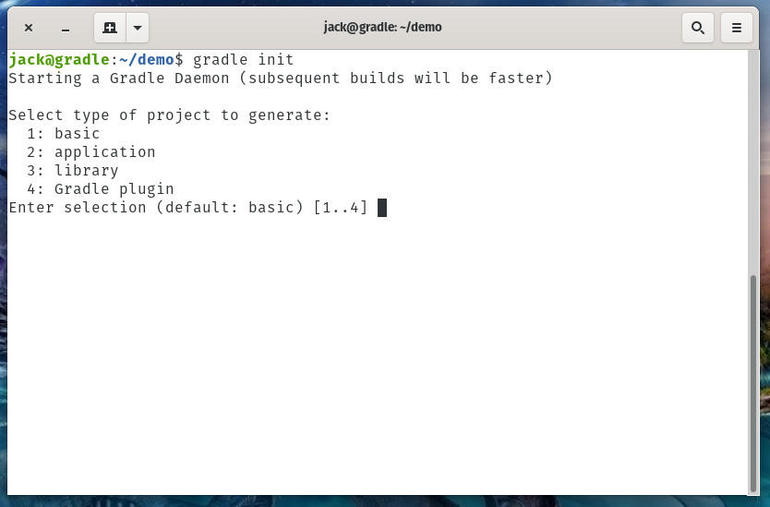
What type of Gradle project do you want to create?
To create a basic project, type 1 and hit Enter on your keyboard. Next, select the build script to use (Figure C).
Figure
” data-credit rel=”noopener noreferrer nofollow”>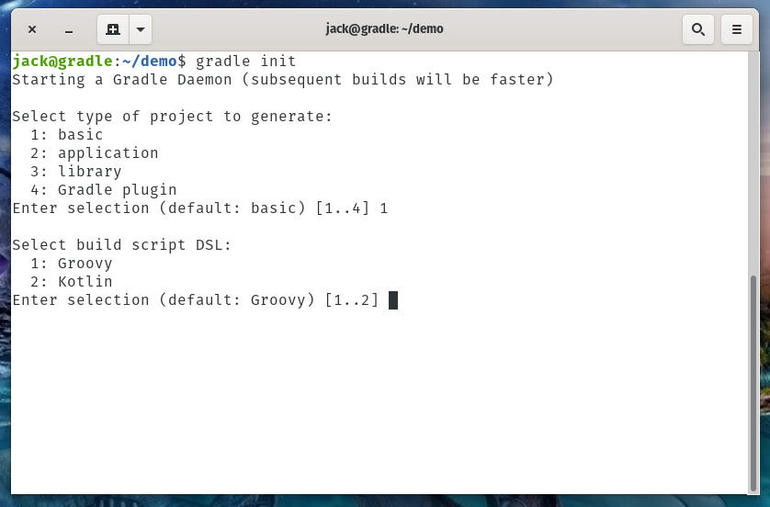
Choose between Groovy or Kotlin.
Next, give the project a name and the initialization will succeed (Figure D).
Figure D
” data-credit rel=”noopener noreferrer nofollow”>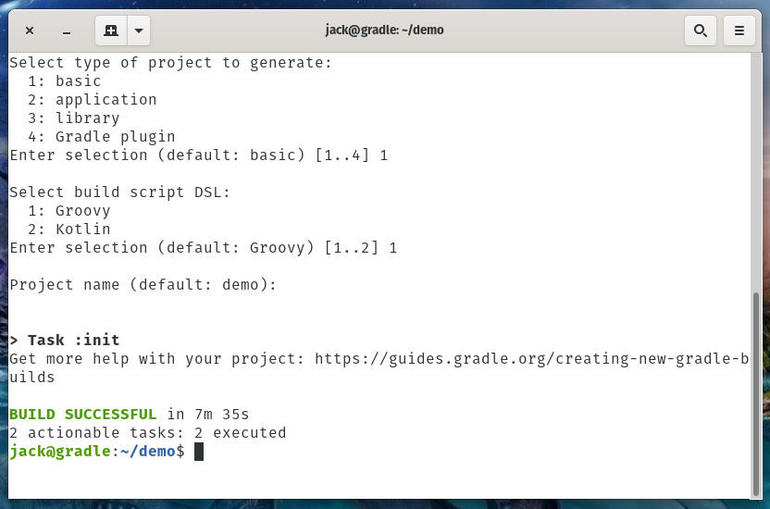
Our initialization has succeeded.
You are now ready to start building your project with Gradle. Congratulations, you’re one step closer to automation and faster build delivery.

Data Center Trends Newsletter
DevOps, virtualization, the hybrid cloud, storage, and operational efficiency are just some of the data center topics we’ll highlight. Delivered Mondays and Wednesdays
Also see
Source of Article