Ubuntu Server 20.04 has a new installer and Jack Wallen is here to walk you through the process of installing this exciting new offering from Canonical.

Image: Jack Wallen
Ubuntu Server 20.04 (Focal Fossa) has been out for a while now and it’s as solid a server operating system as you’ll ever use in your data center. The latest iteration of Canonical’s platform is a Long Term Support release, so it’ll enjoy support until 2025. Customers can also extend the support to 2030 through the Extended Security Maintenance plan.
The Focal Fossa server includes plenty of new features, such as hardware-based two-factor authentication support, built in WireGuard VPN, a more secure bootloader, Ubuntu Pro images for Public Cloud, kernel 5.4 (which is also an LTS release), improved support for IPv6 on MS Azure, AppArmor 3 for an even more secure system, plenty of toolchain upgrades (such as glibc 2.31, OpenJDK 11, rustc 1.41, GCC 9.3, Python 3.8.2, ruby 2.7.0, perl 5.30, and golang 1.13).
The latest release of Ubuntu Server also includes a new Live Installer, which provides the option to automatically update itself every time it boots. This provides users with immediate access to new features, bug fixes, and security patches–without having to wait for the point releases.
I want to walk you through the installation of Ubuntu 20.04 with this new installer.
SEE: Flash storage: A guide for IT pros (TechRepublic Premium)
What you’ll need
I’ll be demonstrating with the help of VirtualBox. You can either install Ubuntu 20.04 on bare metal, or using a virtual machine (VM). I would recommend a virtual machine to familiarize yourself with the process. Although the installation of Ubuntu Server is exceptionally easy, if you’re new to Linux, it will seem rather foreign at first.
You’ll also need the ISO image of Ubuntu Server 20.04. Once you have that, you can burn it to a flash drive with a tool like Unetbootin. If you’ll be using a VM, there’s no need to burn the image to a flash drive.
Once you have your method ready, boot the Ubuntu Server Live instance and get ready to install.
How to use the new installer
The first step is to select your language (Figure A). Using the arrow keys on your keyboard, select the language you wish to use for the installation, and hit Enter on your keyboard.
Figure A
” data-credit rel=”noopener noreferrer nofollow”>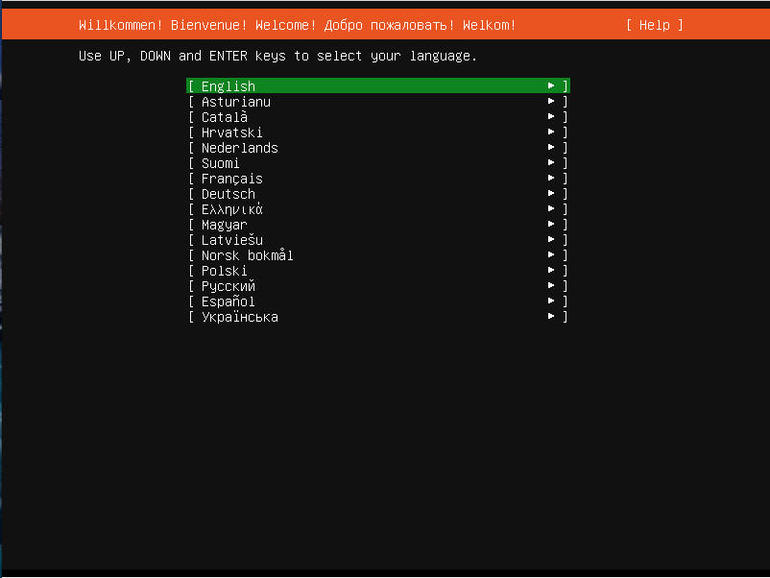
Selecting the installer language for Focal Fossa.
In the next screen, you can choose to work with the new installer (Figure B). Use your keyboard arrow keys to select Update To The New Installer and hit Enter on your keyboard.
Figure B
” data-credit rel=”noopener noreferrer nofollow”>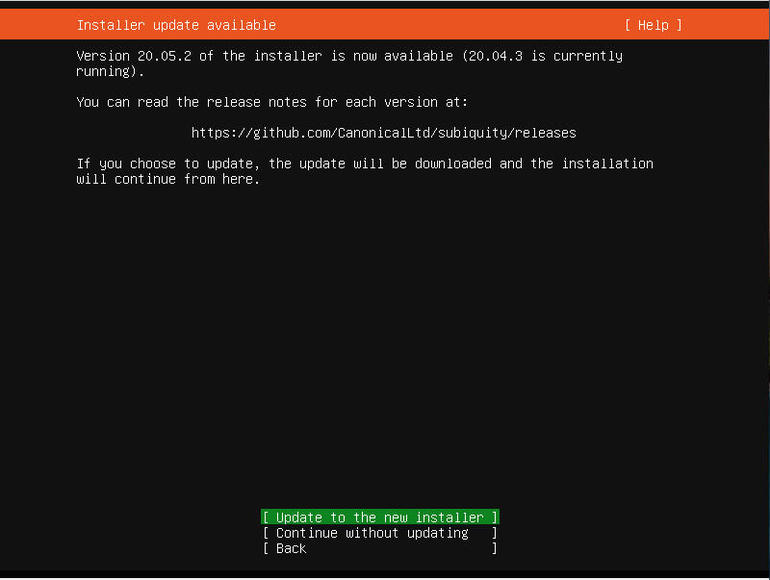
Updating to the new Live Installer.
Once you’ve made the update and the installer has downloaded the necessary files, you’ll be asked to select your keyboard layout (Figure C).
Figure C
” data-credit rel=”noopener noreferrer nofollow”>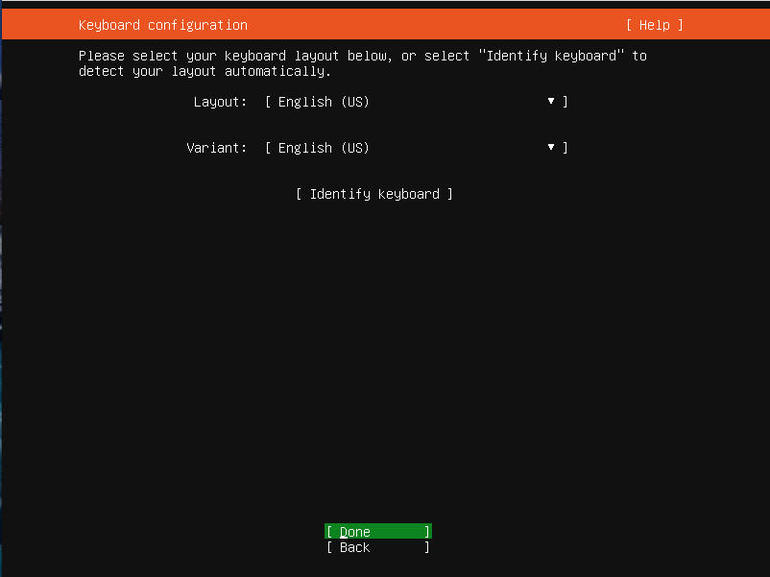
Selecting your keyboard layout for Ubuntu 20.04.
Once you’ve made your selections, make sure Done is highlighted and hit Enter on your keyboard.
The next step is to configure networking. Your networking device(s) will automatically be selected (Figure D).
Figure D
” data-credit rel=”noopener noreferrer nofollow”>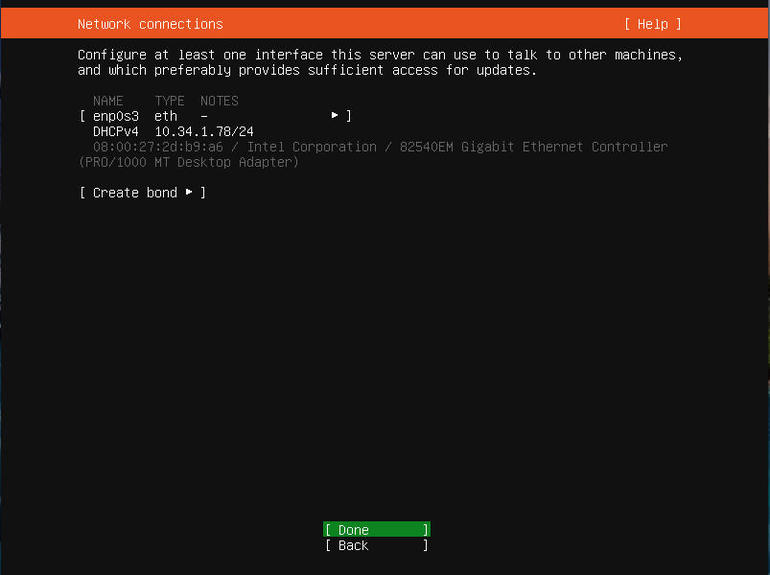
Configuring networking for Ubuntu Server 20.04.
Using your arrow keys, select the network adapter to be configured and hit Enter. A popup menu will appear (Figure E), where you can select what you’d like to configure (IPv4, IPv6, VLAN tags).
Figure E
” data-credit rel=”noopener noreferrer nofollow”>
Selecting what portion of the network configuration you want to change.
Say you want to configure a static IPv4 address. Select IPv4 and then, when prompted, use your arrow keys to highlight the IPv4 Method and hit Enter. From the popup, select Manual (Figure F).
Figure F
” data-credit rel=”noopener noreferrer nofollow”>
Opting for a static IP address for your Ubuntu server.
In the resulting window, fill out the necessary information for your network connection (Figure G).
Figure G
” data-credit rel=”noopener noreferrer nofollow”>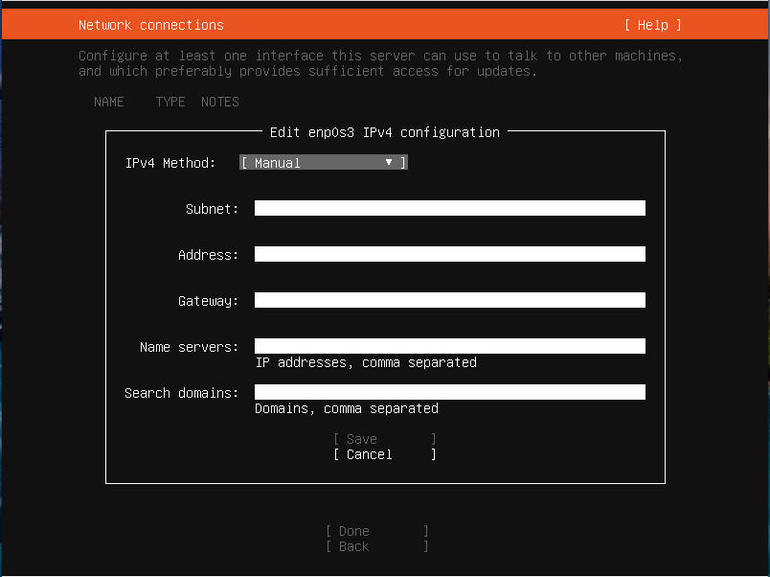
Setting a static IP in the Ubuntu Server 20.04 Live Installer.
After configuring the static IP address, tab down to Done and hit Enter on your keyboard. You’ll be returned to the Network Connections window, where you can tab down to Done and hit Enter on your keyboard.
In the resulting window, you can set a proxy (Figure H). If you don’t need one, tab down to Done and hit Enter on your keyboard.
Figure H
” data-credit rel=”noopener noreferrer nofollow”>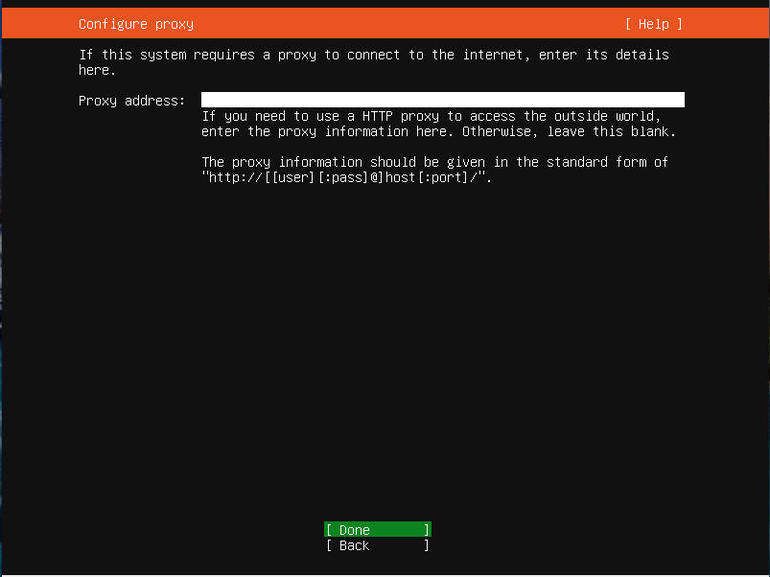
The option to set a proxy for Ubuntu Server 20.04.
Next, you must select a mirror for the Ubuntu installation (Figure I). You shouldn’t have to do anything here, so tab down to Done and hit Enter on your keyboard.
Figure I
” data-credit rel=”noopener noreferrer nofollow”>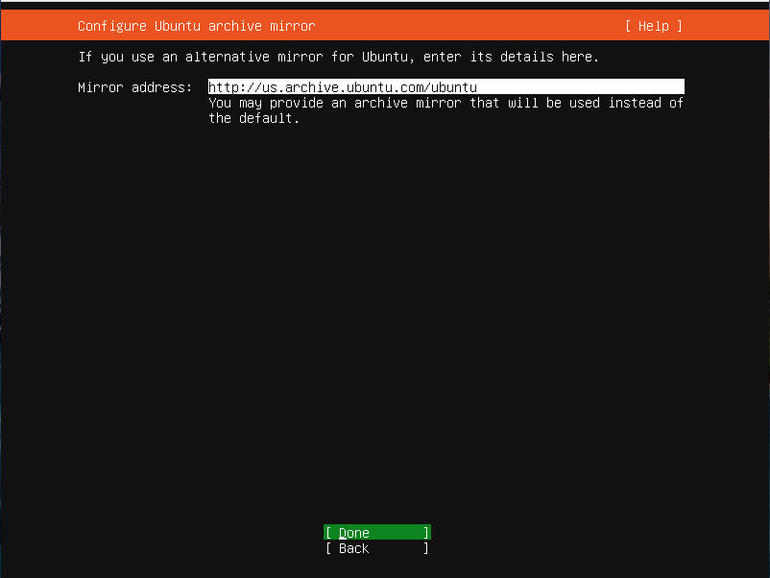
Selecting your Ubuntu mirror for the installation.
You now have to select the storage configuration (Figure J). Chances are good you can stick with the default (which is using the entire disk). In this same screen, you can opt to set the disk up as an LVM group.
Figure J
” data-credit rel=”noopener noreferrer nofollow”>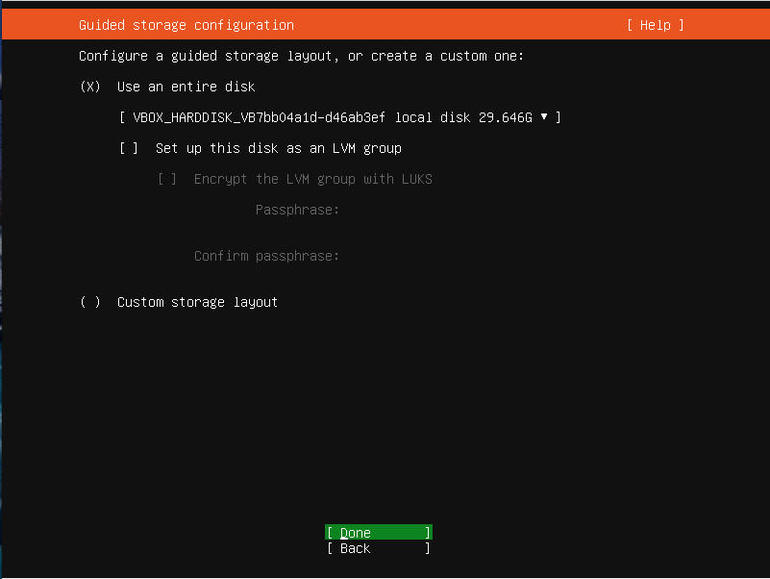
Customizing your storage configuration.
After you complete this section, tab down to Done and hit Enter on your keyboard.
The next screen offers a summary of your file system (Figure K). Give the summary a read and, if it’s acceptable, tab down to Done and hit Enter on your keyboard.
Figure K
” data-credit rel=”noopener noreferrer nofollow”>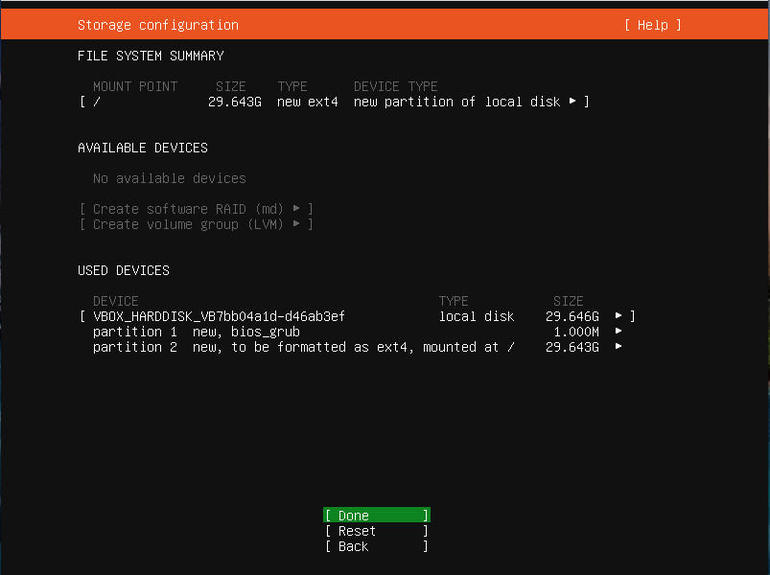
The file system summary for the installation of Ubuntu Server 20.04.
A popup will appear (Figure L), asking you if you want to continue. Tab down to Continue and hit Enter on your keyboard.
Figure L
” data-credit rel=”noopener noreferrer nofollow”>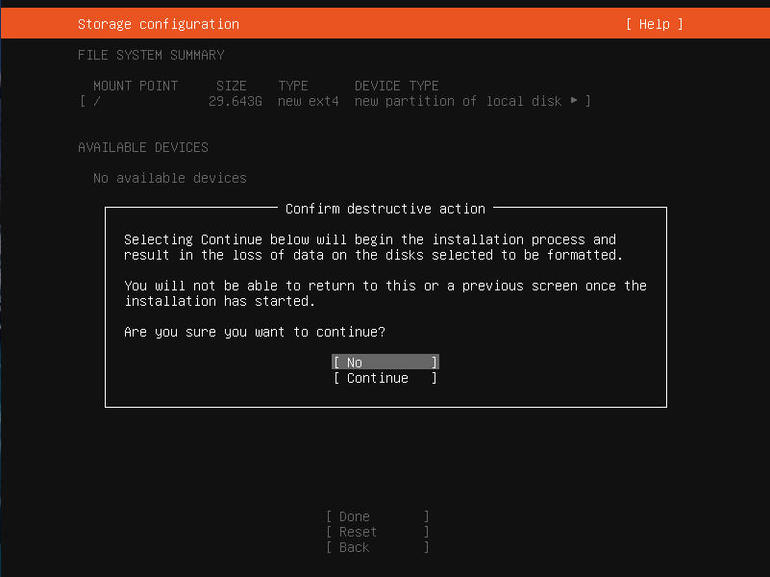
Continuing with the Ubuntu Server 20.04 installation.
In the resulting screen (Figure M), you are asked to create a new user and a name for the server.
Figure M
” data-credit rel=”noopener noreferrer nofollow”>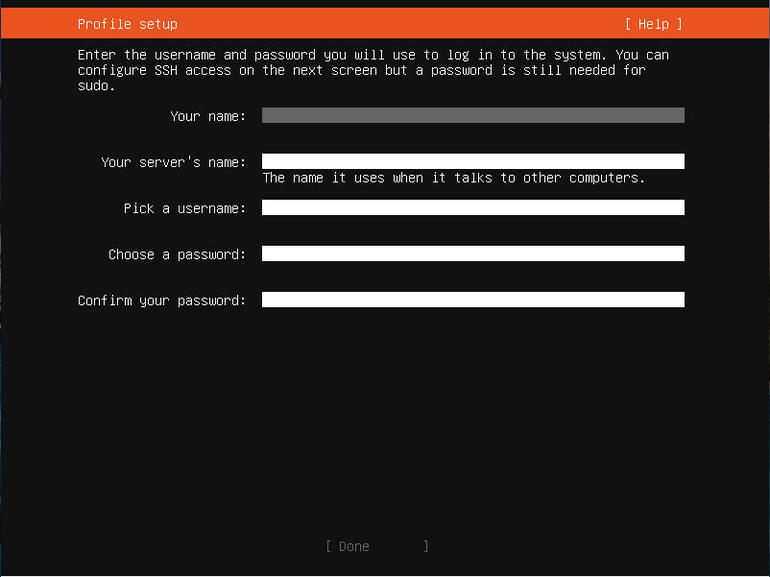
The Ubuntu Server 20.04 new user screen.
Fill out the necessary details for the new user and the server’s hostname, tab down to Done, and hit Enter on your keyboard.
You will then be prompted if you want to install the OpenSSH server (Figure N).
Figure N
” data-credit rel=”noopener noreferrer nofollow”>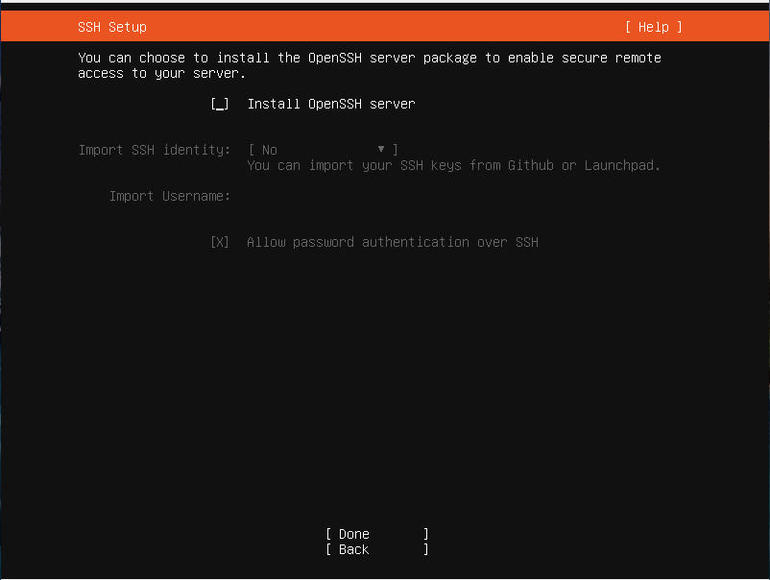
Installing the OpenSSH server on Ubuntu Server 20.04.
Tap the space bar on your keyboard, tab down to Done, and hit Enter on your keyboard.
You can now select all of the packages you want to include with the installation (Figure O).
Figure O
” data-credit rel=”noopener noreferrer nofollow”>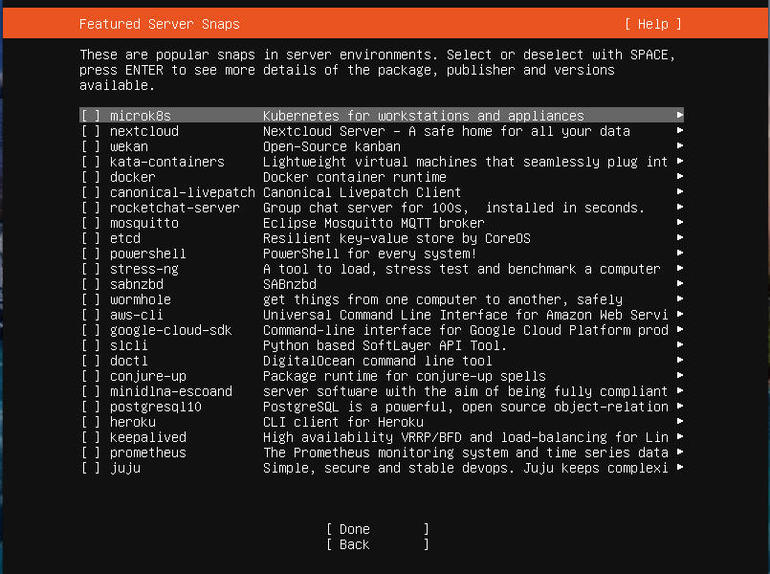
Choose from any number of packages to add to your installation of Ubuntu Server 20.04.
After making your selections, tab down to Done, and hit Enter on your keyboard.
At this point the installation will complete and you’ll be prompted to reboot to finish up (Figure P).
Figure P
” data-credit rel=”noopener noreferrer nofollow”>
It’s time for a reboot to complete the process.
Congratulations, in about five minutes time, you now have a running instance of Ubuntu Server 20.04. Your data center will thank you for it.

Data Center Trends Newsletter
DevOps, virtualization, the hybrid cloud, storage, and operational efficiency are just some of the data center topics we’ll highlight. Delivered Mondays and Wednesdays
Also see
Source of Article