
How many times have you been working on a Linux server (without a GUI) and wished you had the means to safely store passwords? Having such a feature available to your headless servers would be such a time saver.
SEE: Password breach: Why pop culture and passwords don’t mix (free PDF) (TechRepublic)
If you’ve worked with Linux long enough, you probably already know that doing this is actually quite simple. Thanks to the GnuPG application, you can create password stores that are GPG key protected for security (so only those with the key can gain access).
I’m going to show you how to use GnuPG and the pass command specifically for this purpose.
What you’ll need
To use GnuPG for this, you’ll need a running instance of Linux and a user with sudo privileges. With those things at the ready, let’s get creative.
How to install GnuPG and pass
The first thing we’ll do is install the GnuPG application. If you’re on a Ubuntu server, the installation command would be:
sudo apt-get install gnupg2 pass -y
On an RHEL-based machine, that would be:
sudo dnf install gnupg2 pass -y
If SUSE is your distro of choice:
sudo zypper install gpg2 pass -y
Arch Linux your jam? Then:
sudo pacman -S pass gnupg pass
How to create a GPG key for your store
We’re going to create a specific GPG key to use with our store. To create the GPG key, issue the command:
gpg2 --full-generate-key
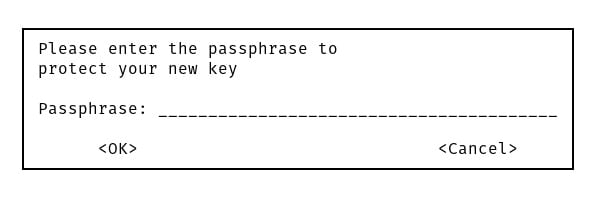
Select the default key type (RSA), the default key size (3072), a 0 expiration (which means it never expires), and answer Y that everything is correct. You will then add your name to the key, an email address, a comment (whatever you like), and finally, give the key a passphrase (Figure A).
Figure A
Now it’s time to start the new GPG store. Change into your home directory with:
cd ~/
Start the store with:
pass init EMAIL
Where EMAIL is the email address associated with GPG you generated. You should see the following two lines of output:
mkdir: created directory '/home/USER/.password-store/'
Password store initialized for EMAIL
Where USER is your username and EMAIL is the email address associated with your GPG key.
How to add a password to your store
With our store ready, we can add a password. Using the pass command, we can create directories to house related passwords. Let’s say you want to first create a directory to house passwords for websites and the first entry will be for TechRepublic. That command might look like this:
pass generate websites/techrepublic.com 12
The above command will generate a random password (of 12 characters and associate it with the entry TechRepublic in the directory website. You should see output similar to:
mkdir: created directory '/home/jack/.password-store/websites'
The generated password for websites/techrepublic.com is:
@Kh^B##<sP/R
If you already know the password you want to store, the command would be:
pass insert websites/techrepublic.com
You can edit a password with the command:
pass edit websites/techrepublic.com
Once stored, you can then view the password by entering the command:
pass websites/techrepublic.com
The caveat to using pass to store passwords
This is where one of the biggest problems with using pass as your password storage. If you’re using a distribution with a GUI, all is great. When you run pass websites/techrepublic.com, you’ll be prompted for the password you created for your key. However, when on a GUI-less server, it will simply print out the password, because the GTK pinentry dialog cannot be shown in an SSH session.
To get around that, we must install another application with the command:
sudo apt install pinentry-tty -y
Once that is installed, set it with:
sudo update-alternatives --config pinentry
Make sure to select pinentry-tty.
After taking care of this, when running the pass command, you will be prompted for the password associated with your GPG key. Upon successful authentication, you’ll see the password displayed.
One thing to keep in mind is that pass will cache the GPG key password for some time. So the next time you issue the pass command, it won’t prompt for your password. To get around that, you can immediately clear the stored password with the command:
gpg-connect-agent reloadagent /bye
The caveat is that you should always remember to run the gpg-connect-agent command before you log out of your SSH session, otherwise the password will remain cached for a while, and someone might be able to then log into your server with your credentials and steal your password. Better safe than sorry.
And that’s all there is to safely store passwords on a headless Linux server with GnuPG and the pass command.
Subscribe to TechRepublic’s How To Make Tech Work on YouTube for all the latest tech advice for business pros from Jack Wallen.
Source of Article


