If you’re looking for an open-source invoice system to deploy, Jack Wallen believes Invoice Plane might be just the solution to meet your needs.

Image: iStock/AndreyPopov
Recently, I realized I was having to work too hard to invoice all of my various clients. I’d been using the same old spreadsheets for years, but it was getting a bit too cumbersome to deal with. I could have turned to a commercial platform for this, but given open-source was my jam, I figured it would be even better to find a solid solution for my on-premise virtual data center. Turns out, there’s a rock-solid tool, called Invoice Plane, that’s just the ticket.
SEE: Kubernetes: A cheat sheet (free PDF) (TechRepublic)
Invoice Plane includes the necessary features for you to manage invoices, such as easy invoicing, customer management, payment tracking and quotations. It might not have all of the bells and whistles associated with larger, commercial tools, but of the open-source options I’ve found, this is (by far) the best.
Let’s walk through the process of deploying Invoice Plane.
What you’ll need
I’ll be demonstrating the installation on Ubuntu Server 20.04, so you’ll need a running, updated instance of that platform, as well as a user with sudo privileges. That’s it, let’s install.
How to install the necessary dependencies
The first thing we’ll do is install the necessary dependencies. Log into your Ubuntu Server and first install Apache with the command:
sudo apt-get install apache2 -y
When the installation completes, start and enable Apache with the commands:
sudo systemctl start apache2
sudo systemctl enable apache2
Next, we’ll install MariaDB as our database. This is done with the command:
sudo apt install mariadb-server mariadb-client -y
Once MariaDB is installed, secure it with the command:
sudo mysql_secure_installation
Make sure to give the database admin user a password and answer Y to the remaining questions.
Now, we can install PHP. First, install a helpful package with:
sudo apt-get install software-properties-common -y
Add the PHP repo with:
sudo add-apt-repository ppa:ondrej/php
Update apt:
sudo apt-get update
Finally, install the required PHP components with the command:
sudo apt-get install php7.1 libapache2-mod-php7.1 php7.1-common php7.1-mbstring php7.1-xmlrpc php7.1-soap php7.1-gd php7.1-xml php7.1-intl php7.1-mysql wget unzip php7.1-cli php7.1-zip php7.1-curl php7.1-mcrypt -y
How to create the database
Time to create a database. Log in to the MariaDB console with:
sudo mysql
Create the Invoice Plane database and user with the commands:
CREATE DATABASE invoice_plane_db;
CREATE USER 'invoiceplane'@'localhost' IDENTIFIED BY 'PASSWORD';
Grant the necessary privileges with:
GRANT ALL PRIVILEGES ON invoice_plane_db.* TO 'invoiceplane'@'localhost';
Flush the privileges and exit with:
FLUSH PRIVILEGES;
exit
How to download and install Invoice Plane
We are ready to download and install Invoice Plane. The latest version is 1.5.11.1 Make sure to check the official download page, so you’re downloading the correct version. To download Invoice Plane, issue the command:
wget https://www.invoiceplane.com/download/v1.5.11.1
When the download completes, create a new directory with the command:
mkdir invoiceplane
Extract the downloaded file with the command:
unzip v1.5.11.1 -d invoiceplane
Move the new directory into the Apache document root with:
sudo mv /invoiceplane /var/www/html/invoiceplane
Change into the new directory:
cd /var/www/html/invoiceplane
Copy the config and htaccess files with the commands:
sudo cp ipconfig.php.example ipconfig.php
sudo cp htaccess .htaccess
Give the directory the correct permissions and ownership:
sudo chown -R www-data:www-data /var/www/html/invoiceplane/
sudo chmod -R 755 /var/www/html/invoiceplane/
Create the required Apache host file with:
sudo nano /etc/apache2/sites-available/invoiceplane.conf
In that file, paste the following contents:
<VirtualHost *:80> ServerAdmin admin@example.com DocumentRoot /var/www/html/invoiceplane ServerName example.com ServerAlias www.example.com
<Directory /var/www/html/invoiceplane/> Options +FollowSymlinks AllowOverride All Require all granted </Directory> ErrorLog ${APACHE_LOG_DIR}/error.log CustomLog ${APACHE_LOG_DIR}/access.log combined
</VirtualHost>
Save and close the file.
Enable the site with the following command:
sudo a2ensite invoiceplane.conf
Enable the rewrite module with:
sudo a2enmod rewrite
Restart Apache:
sudo systemctl restart apache2
How to run the Invoice Plane setup wizard
Open a web browser and point it to http://SERVER/invoiceplane/index.php/welcome (where SERVER is the IP address of the hosting server). At this point, you’ll walk through a very simple GUI to complete the installation. The steps in the wizard are:
- Choose a Language
- Prerequisite check
- Database details (Figure A)
- Create User Account
Figure A
” data-credit>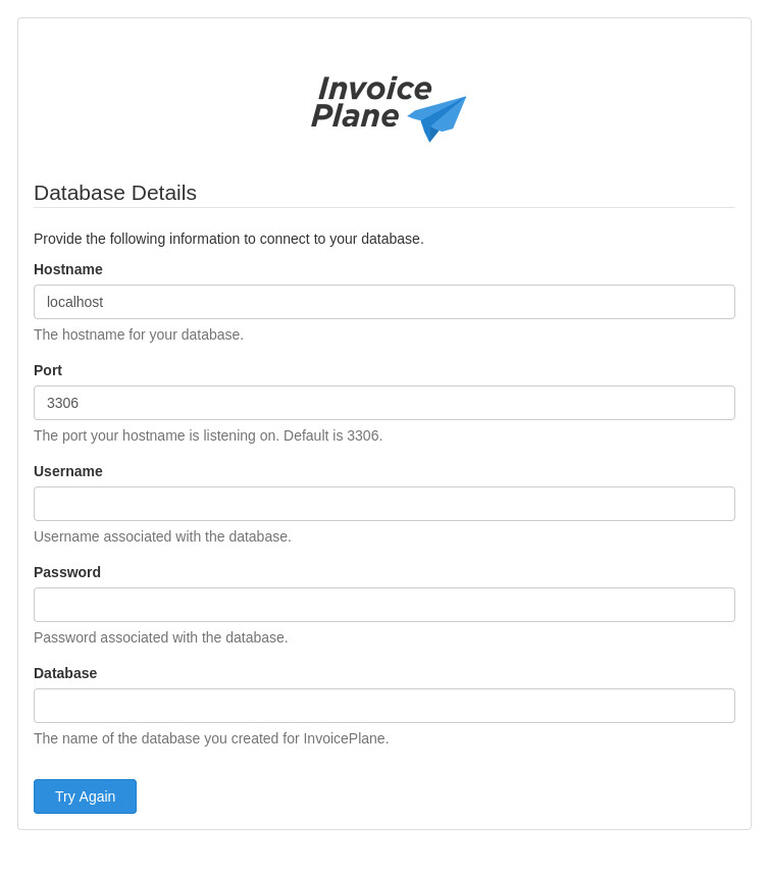
Configuring the database details for Invoice Plane.
When configuring the database details, you’ll use:
- Hostname—localhost
- Port—3306
- Username—invoiceplane
- Password—the password you set in the MariaDB console for PASSWORD
- Database—invoice_plane_db
After you’ve created the user account, you’ll be presented with the Login screen. Upon successful authentication, you’ll find yourself on the Invoice Plane main window (Figure B), where you can start setting up clients and creating invoices.
Figure B
” data-credit>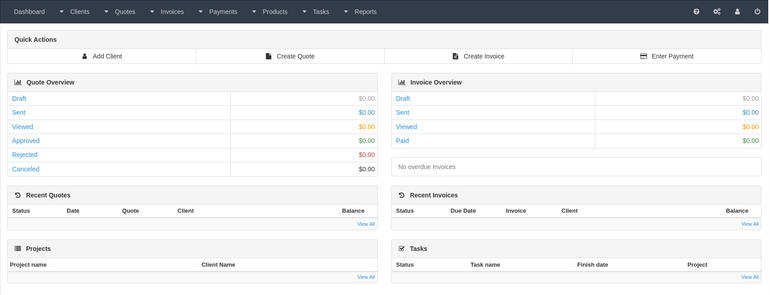
The Invoice Plane main window is ready to go.
Congratulations, you now have an easy-to-use invoicing system running in your on-premise data center. Hopefully, this will be a big improvement over your old spreadsheet method.
Subscribe to TechRepublic’s How To Make Tech Work on YouTube for all the latest tech advice for business pros from Jack Wallen.

Data Center Trends Newsletter
DevOps, virtualization, the hybrid cloud, storage, and operational efficiency are just some of the data center topics we’ll highlight. Delivered Mondays and Wednesdays
Also see
Source of Article