If you’re not using Categories with your WordPress sites, you should be. Jack Wallen shows you how to associate Pages to Categories in the new WordPress editor.

Image: Jack Wallen
WordPress is one of the most widely-used website frameworks on the market. WordPress makes it possible for individuals and businesses across the globe to deploy a professional website with ease.
When most consumers think of WordPress, they’re thinking about the hosted service, wordpress.com. When admins, developers, and designers think about WordPress, they are most often thinking of the open source wordpress.org, where the source for the platform can be downloaded and installed on either your data center or a cloud-hosted provider.
Either way you go, you’re looking at a flexible, reliable tool that allows you to make some serious magic with your website.
SEE: MSP best practices: Server deployment checklist (TechRepublic Premium)
However, with recent iterations, everything has changed. To be specific, the page and post editor has undergone a radical transformation. Gone is the tried and true WYSIWYG editor. In its place is a block editor that, although far from familiar, is quite easy to use.
There are certain aspects of the new editor that will confound a lot of users. One, in particular, tripped me up for a half a minute just this morning. On my author site, I had to add a few new books that I’d neglected to include. It had been a while since I’d added a page (which is quite different from a post). Pages on my site are dedicated to book listings, because they are products which are linked to categories; everything else is a Post. Previously, I’d create the Page for the book, add it to the My Books category, and all was good.
This morning, however, I go to create a new page and realized the Category option was gone. I poked around the page editor, expanded every option in the right sidebar, and found nothing. I even went so far as to search for a plugin to add (assuming they’d stripped the Category feature from the framework).
Nada.
It wasn’t until something in the back of my mind said to me, “This seems very familiar,” that I remembered I’d had to jump through a hoop or two once before in order to assign a category to a Page.
Then it hit me. I remembered how to do it. Before all of you WordPress admins wind up pulling your hair out in fistfuls, I thought I’d share with you how this is done.
What makes a category important?
You might be wondering why a category is important enough to warrant an entire tutorial. It’s quite simple. By categorizing your Pages, you make it possible for customers and clients to more easily locate your products and services. You could even create multiple categories, which will be represented by menus, or other sections on your site, and then assign different products or services to those categories.
You could have categories for:
-
Products
-
Services
-
Help
-
Company Information
You get the idea. Categories are quite important to how you use WordPress effectively.
How to assign a Page to a category
This is the tricky part. As I said, you used to be able to assign a category from the right sidebar of the Page editor. That is no longer the case. To assign a category, here’s what you must do:
- Create your Page as you normally would. Of course, by “normally,” I do mean using the new WordPress editor.
- Save your new Page.
- Go to the Pages listing by clicking Pages in the left navigation of the admin panel (Figure A).
Figure A
” data-credit rel=”noopener noreferrer nofollow”>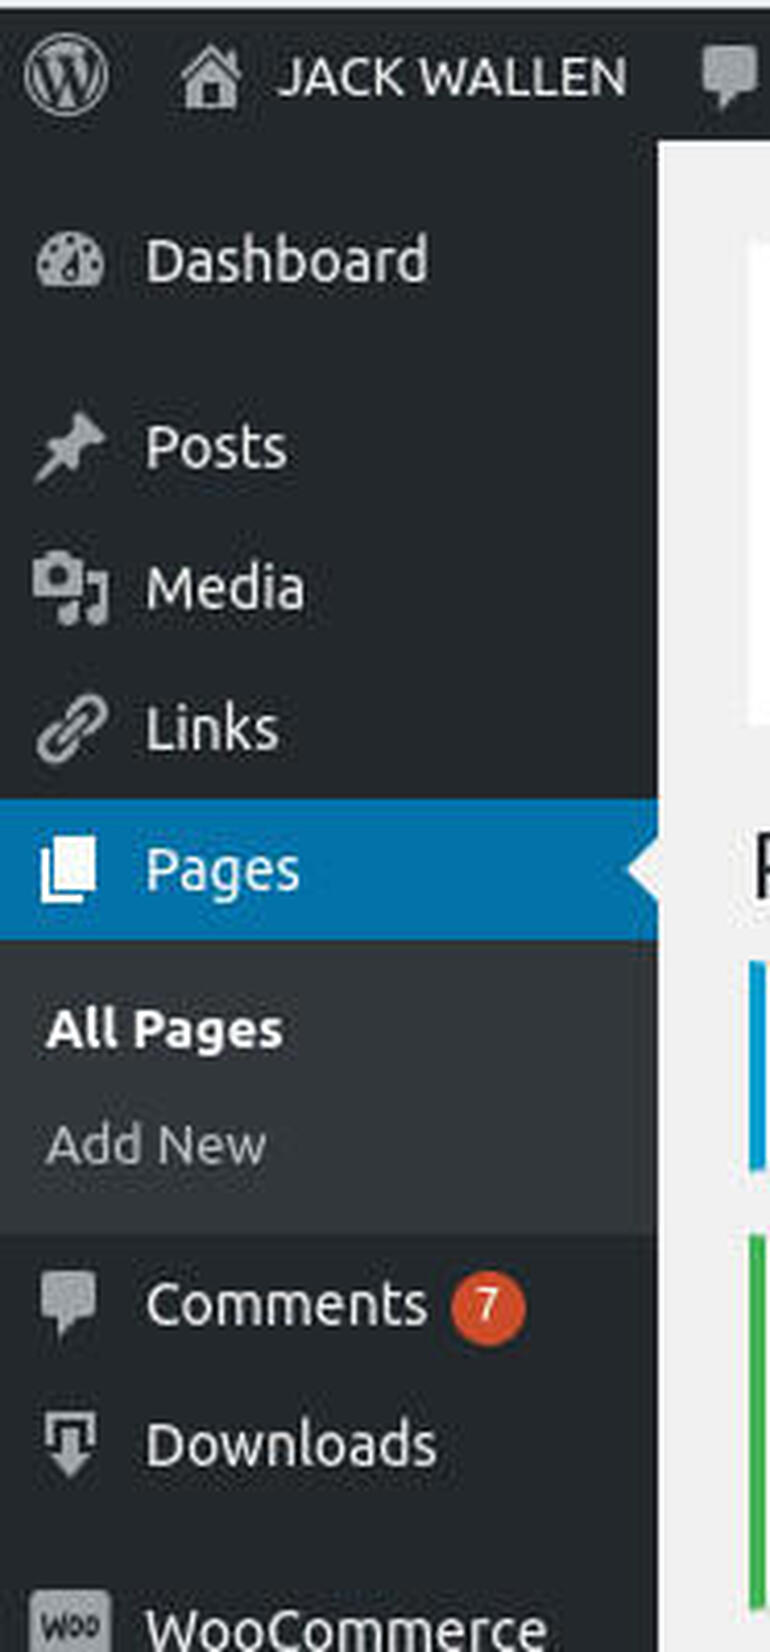
The left sidebar of the WordPress admin panel should be familiar to any admin.
4. Search for the Page you just created by typing the Page title in the Search field.
5. When the Page in question appears, hover your mouse over it and click Quick Edit (Figure B).
Figure B
” data-credit rel=”noopener noreferrer nofollow”>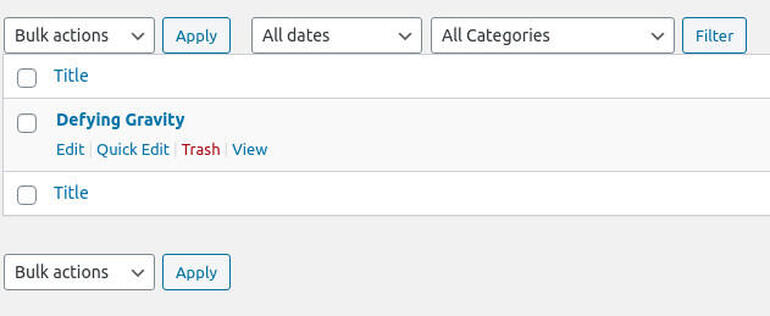
You’ll want to make sure to click Quick Edit and not Edit.
6. In the resulting pop out editor, locate the category to be assigned (from the Categories selector) and check the associated box (Figure C).
Figure C
” data-credit rel=”noopener noreferrer nofollow”>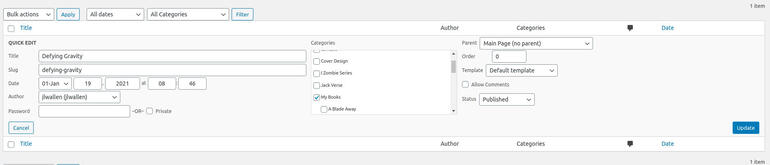
Assigning a category to the newly-created Page.
7. Click Update.
At this point, your Page is now associated with the category in question.
You should also notice, in that same pop out editor, that you can assign a password to the Page. This makes it really easy if you have content you want to limit to certain clients, customers, staff, etc. Add a password to the Page and the only way the content of that page can be accessed is by first typing the password (Figure D).
Figure D
” data-credit rel=”noopener noreferrer nofollow”>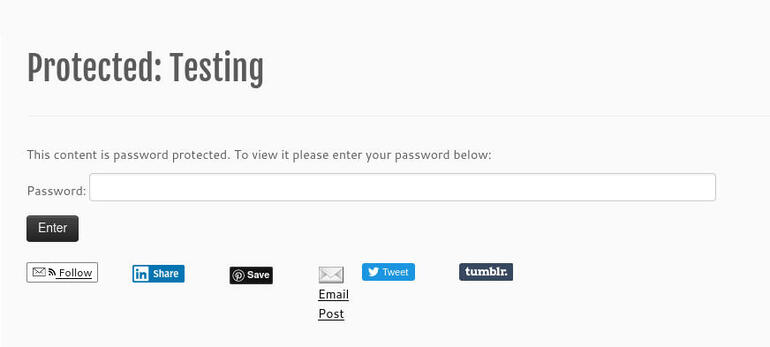
A WordPress page protected by a password.
And that’s how you add your WordPress Pages to categories. Although it may not be quite as simple as it once was, it’s nothing that will challenge any IT pro. If you’re not already taking advantage of Categories on your WordPress sites, make sure to start implementing them now.
Subscribe to TechRepublic’s How To Make Tech Work on YouTube for all the latest tech advice for business pros from Jack Wallen.

Open Source Weekly Newsletter
You don’t want to miss our tips, tutorials, and commentary on the Linux OS and open source applications. Delivered Tuesdays
Also see
Source of Article