
If you admin websites, you know how important data analysis can be. You might need to keep abreast of things like visitors, search engines and keywords used, languages spoken, pages liked, downloaded files and more. That data can be an important part of growing and optimizing your sites and the content you provide.
SEE: Hiring Kit: JavaScript Developer (TechRepublic Premium)
One tool for this is the open-source Matomo (formerly Piwik). Not only can Matomo keep you informed, but it also works with Google AdWords, Facebook Ads, Yahoo, and features cost-per-click analysis, search marketing and a tracking and reporting API.
If this sounds like something you and/or your company could benefit from, let’s get it installed.
What you’ll need
I’m going to demonstrate on Ubuntu Server 20.04, so you’ll need a running instance of that platform, along with a user account that has sudo privileges.
Ready? Let’s do this.
How to install the dependencies
The first thing we’ll do is install the necessary dependencies. Log into your Ubuntu instance and install those packages with the command:
sudo apt-get install apache2 mariadb-server php libapache2-mod-php php-cli php-fpm php-fpm php-json php-json php-common php-mysql php-zip php-gd php-mbstring php-curl php-xml php-pear php-bcmath curl unzip -y
Once that installation completes, you’re ready to take care of the database.
How to create the database
Before we create the database, let’s start and enable MariaDB with:
sudo systemctl enable --now mariadb
Next, we need to secure MariaDB. Issue the command:
sudo secure_mysql_installation
Create a new password for the admin user and then answer ‘y’ for the remaining questions.
Log in to the MariaDB console with:
sudo mysql
Create the database with:
CREATE DATABASE matomodb;
Create a new user with:
MariaDB [(none)]> CREATE USER 'matomo'@'localhost' IDENTIFIED BY 'PASSWORD';
Where PASSWORD is a strong/unique password.
Grant the necessary privileges to the user with:
GRANT ALL ON matomodb.* TO 'matomo'@'localhost' WITH GRANT OPTION;
Flush all privileges and exit the database console with:
FLUSH PRIVILEGES;
exit
How to download and unpack Matomo
Download the latest version of Matomo with the command:
wget http://builds.matomo.org/matomo-latest.zip
Unpack the file with:
unzip matomo-latest.zip
Move the newly created directory into the Apache document root with:
sudo mv matomo /var/www/html/
Change the permissions and ownership with:
sudo chown -R www-data:www-data /var/www/html/matomo
sudo chmod -R 755 /var/www/html/matomo
How to configure Apache
We now turn to the configuration of Apache. Create a new .conf file with:
sudo nano /etc/apache2/sites-available/matomo.conf
In that file, paste the following (modifying as needed):
<VirtualHost *:80>
ServerAdmin admin@example.com
ServerName matomo.example.com
DocumentRoot /var/www/html/matomo/
<Directory /var/www/html/matomo>
DirectoryIndex index.php
Options FollowSymLinks
AllowOverride All
Require all granted
</Directory>
<Files "console">
Options None
Require all denied
</Files>
<Directory /var/www/html/matomo/misc/user>
Options None
Require all granted
</Directory>
<Directory /var/www/html/matomo/misc>
Options None
Require all denied
</Directory>
<Directory /var/www/html/matomo/vendor>
Options None
Require all denied
</Directory>
ErrorLog ${APACHE_LOG_DIR}/matomo_error.log
CustomLog ${APACHE_LOG_DIR}/matomo_access.log combined
</VirtualHost>
Save and close the file.
Enable the site with:
sudo a2ensite matomo.conf\
Enable the rewrite module with:
sudo a2enmod rewrite
Restart Apache with:
sudo systemctl restart apache2
How to finish the installation
Open a web browser and point it to http://SERVER/matomo. You will be greeted with the Matomo installation wizard (Figure A).
Figure A
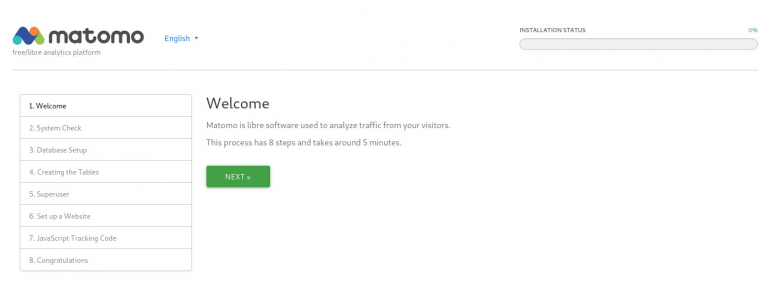
Click NEXT and the system check will complete. Scroll to the bottom and click NEXT. In the resulting window (Figure B), fill out the necessary information for the database. The login is matomo, the database name is matomodb, and the password is what you set in the MariaDB console. Click NEXT when finished.
Figure B
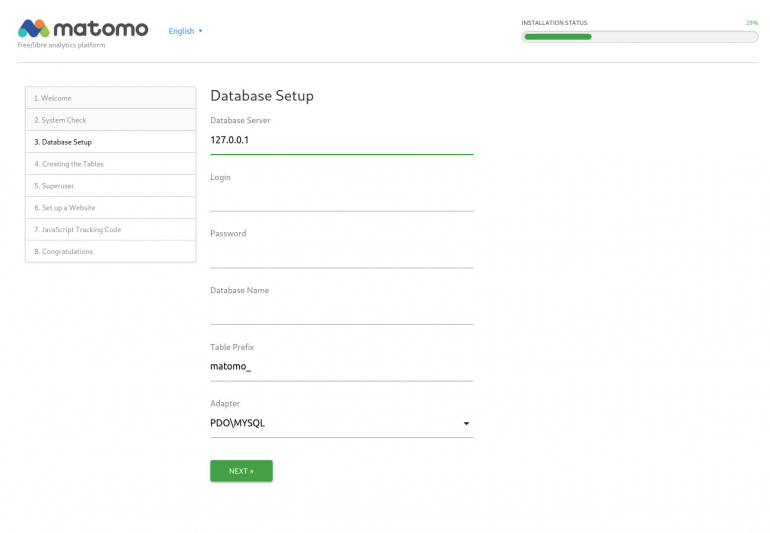
Once the tables are created, click Next and you’ll then be prompted to create a superuser to serve as the site administrator (Figure C).
Figure C
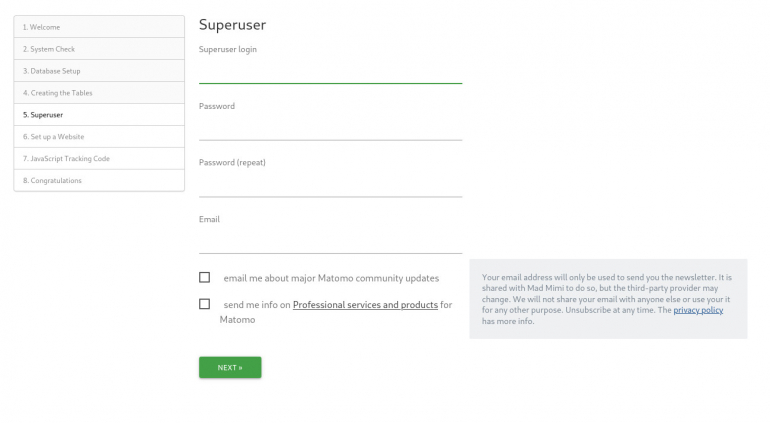
Click Next and, in the next window (Figure D), you’ll be prompted to set up a website to analyze.
Figure D
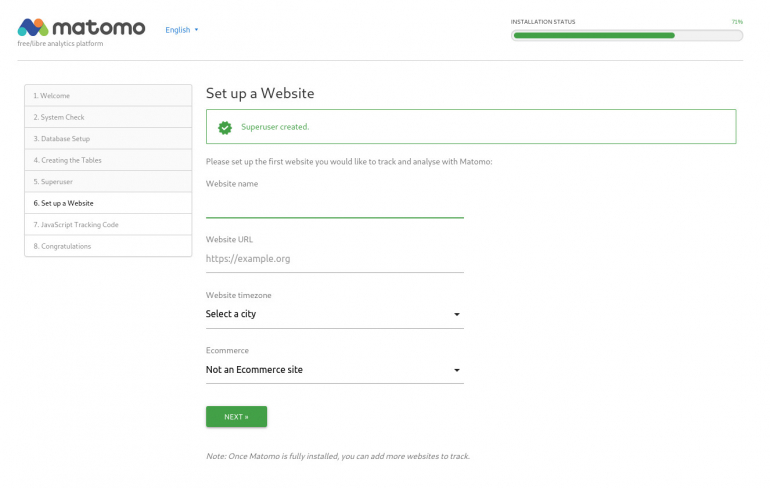
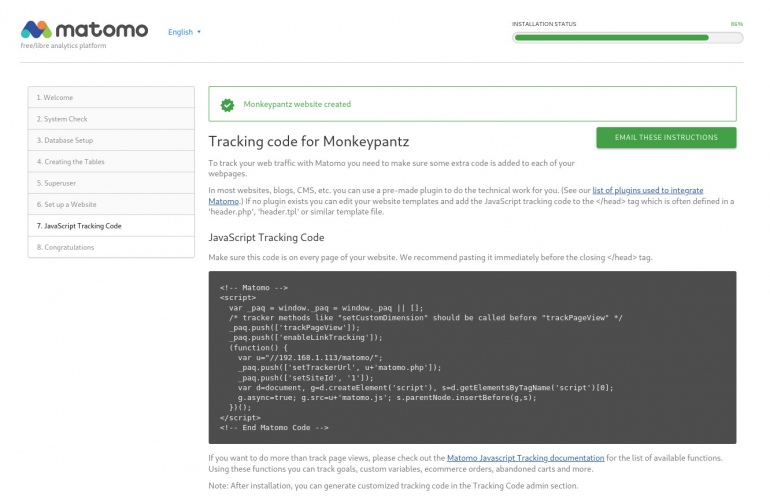
Click Next and you’ll then be prompted to add the necessary JavaScript tracking code to your website. You’ll need to add the script before the closing </head> tag on those web pages you want to be analyzed. The tracking code page in the wizard gives you plenty of instructions for doing this. The process will vary, depending on how your websites were built and who hosts the sites.
Before you click NEXT, make sure to click EMAIL THESE INSTRUCTIONS (Figure E) so you have a reference copy for when you actually start adding the tracking code to pages.
Figure E
Click Next and then click CONTINUE TO MATOMO to finally reach the actual site, where you’ll be prompted to log in with the admin account you created. You’ll then be presented with even more instructions on how to get the tracking code added to your sites.
And that’s all there is to getting the Matomo web analysis platform installed. After this platform is up and running, you’ll probably spend more time adding tracking code to sites than you did installing the platform. But if data is important to you and your business, the effort will pay off.
Subscribe to TechRepublic’s How To Make Tech Work on YouTube for all the latest tech advice for business pros from Jack Wallen.
Source of Article