Looking for a system audit and compliance tool? Look no further than the open source Rudder platform. Jack Wallen shows you how to get this up and running on Ubuntu Server 20.04.

Image: NicoElNino, Getty Images/iStockphoto
Rudder is one of those tools that, once you start using it, you’ll wonder how you got along without it. With Rudder you can audit systems and automate low-level system configuration across your entire IT landscape. Rudder offers an outstanding web-based GUI that can help ease the burden on your IT staff a bit.
SEE: How to install Ubuntu Server 20.04 with the new Live Installer
With Rudder you can deal with things like:
- Continuous growth, availability, and threat.
- Managing base systems.
- Installing, configuring, and updating middleware and applications.
- Guaranteeing compliance and security of systems.
- Correctly applying configurations to operating systems from a single, web-based, point of entry.
- Viewing the state of systems with easy-to-read graphs.
It is important to note, however, that Rudder is not a tool for deployment and integration, network management, or monitoring.
I want to walk you through the process of installing Rudder on Ubuntu Server 20.04.
What you’ll need
The only things you’ll need to make this work are:
- A running, updated instance of Ubuntu 20.04.
- A user with sudo privileges.
That’s it. Let’s make some magic.
How to install the dependencies
The first thing we must do is install a few dependencies. To do that, log in to your Ubuntu Server instance and issue the command:
sudo apt-get install apt-transport-https ca-certificates wget dirmngr gnupg software-properties-common -y
With the dependencies installed, it’s time to install Rudder.
How to install Rudder
Before we can add the necessary repository, we must download and install the GPG key. To do that, issue the command:
wget --quiet -O- "https://repository.rudder.io/apt/rudder_apt_key.pub" | sudo apt-key add -
When that command completes, add the repository with the command:
sudo sh -c 'echo "deb http://repository.rudder.io/apt/6.0/ bionic main" > /etc/apt/sources.list.d/rudder.list'
Finally, update apt and install Rudder with the following commands:
sudo apt-get update
sudo apt-get install rudder-server-root -y
During the installation you’ll be asked to configure rsyslog-pgsql. When prompted (Figure A), make sure Yes is selected and hit Enter on your keyboard.
Figure A
” data-credit rel=”noopener noreferrer nofollow”>
The first step in configuring the database for rsyslog.
In the next window (Figure B), make sure localhost is selected, tab down to OK, and hit Enter on your keyboard.
Figure B
” data-credit rel=”noopener noreferrer nofollow”>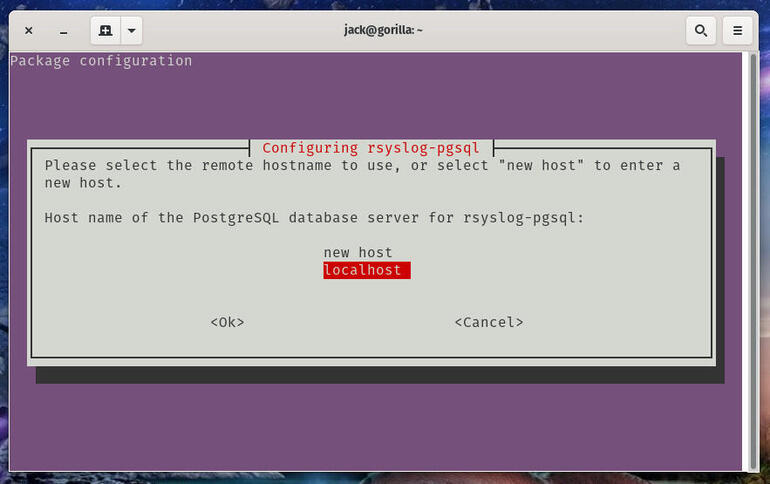
Our database host will live on the local system.
Next you’ll need to type and verify a new password for the rsyslog-pgsql admin user (Figure C).
Figure C
” data-credit rel=”noopener noreferrer nofollow”>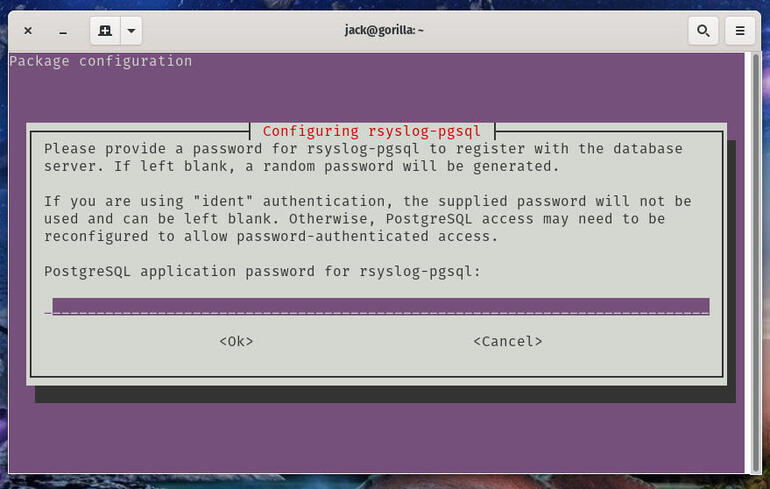
Creating a password for the rsyslog-pgsql user.
How to access Rudder
When the installation completes, point a web browser to https://SERVER_IP/rudder (Where SERVER_IP is the IP address of your hosting server). You will be greeted by a login window (Figure D).
Figure D
” data-credit rel=”noopener noreferrer nofollow”>
The Rudder login window.
Enter admin as the user and admin as the password (change this ASAP). Click SIGN IN and you’ll find yourself on the Rudder main window (Figure E), where you can start configuring and using the Rudder platform.
Figure E
” data-credit rel=”noopener noreferrer nofollow”>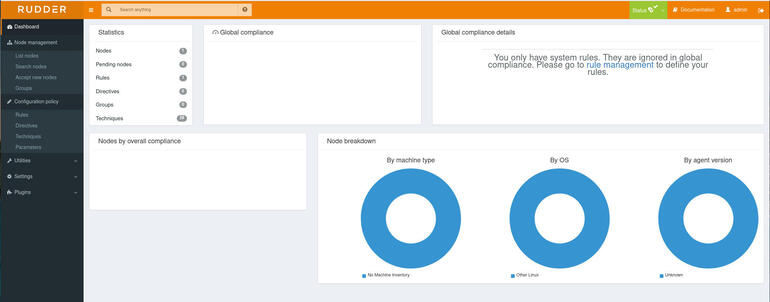
The Rudder main page is ready for use.
How to install Rudder agent
With the Rudder server up and running, let’s install the Rudder agent on another Ubuntu server. To do that, log in to the other machine and add the GPG key for the repository with the command:
wget --quiet -O- "https://repository.rudder.io/apt/rudder_apt_key.pub" | sudo apt-key add -
Next, change to the root user with the command:
sudo -s
Add the repository with the command:
echo "deb http://repository.rudder.io/apt/6.1/ $(lsb_release -cs) main" > /etc/apt/sources.list.d/rudder.list
Exit out of the root user with the command:
exit
Update apt and install the agent with the commands:
sudo apt-get update
sudo apt-get install rudder-agent -y
When the Rudder agent is installed, make it aware of the Rudder server with the command:
sudo rudder agent policy-server RUDDER_SERVER
Where RUDDER_SERVER is the IP address of the machine hosting the Rudder server.
Give the Rudder server a few minutes and then look at Node Management | Accept new nodes. You should see the new node listed (Figure F).
Figure F
” data-credit rel=”noopener noreferrer nofollow”>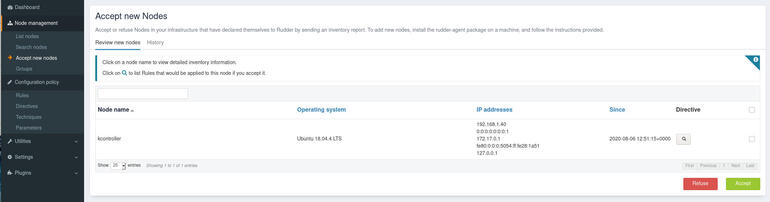
Our new node appears and is ready to be accepted to the server.
Select the node to be added, click Accept, and then confirm the addition of the node to the server.
That’s all there is to it. You now have Rudder installed and a new node added. Enjoy the power of this open source system audit and compliance tool.

Open Source Weekly Newsletter
You don’t want to miss our tips, tutorials, and commentary on the Linux OS and open source applications. Delivered Tuesdays
Also see
Source of Article