Jack Wallen walks you through the process of setting up a game server with the OVH cloud provider.

If you’re a gamer, you might feel the need to set up a private, dedicated game server that gives you plenty of raw power for all the games you want, along with the security you need to keep everything running smoothly.
One such route for this is the French cloud computing company, OVH Cloud. As of 2016, OVH laid claim to the largest cloud data center surface area, and as of 2019, it became the largest hosting provider in Europe. OVH offers plenty of options for hosting just about anything you need. One such feature is the Linux game server.
SEE: Hiring Kit: Cloud Engineer (TechRepublic Premium)
I want to show you how easy it is to set up such a server on OVH. Once you have the server and OS ready, you can then do things like deploy a Minecraft server or any of the Linux Game Server Managers.
Without further ado, let’s get started.
What you’ll need
To set up this game server, you’ll need an OVH account and you’ll need to purchase a dedicated server. Once the server is ready — you’ll be notified of this via email — you’re ready to install Linux.
How to install the operating system
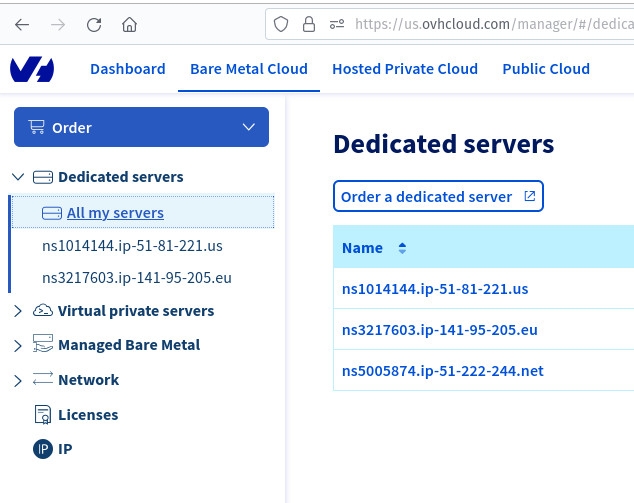
Once your dedicated server is ready, you’ll need to then install the operating system. Log in to your account and expand the Dedicated Servers section to reveal your server (Figure A).
Figure A
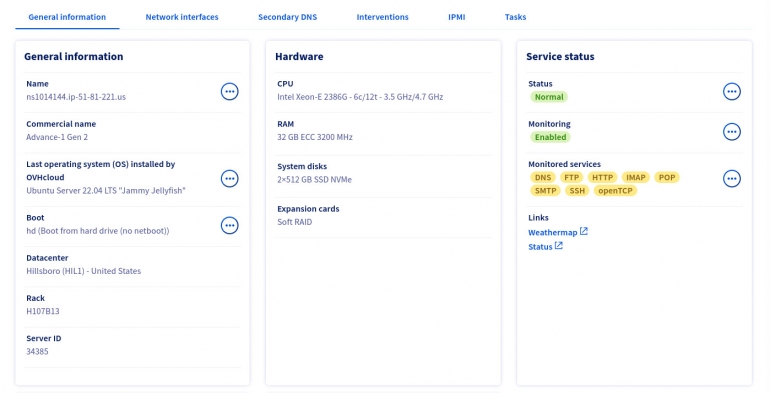
Click on the server you want to work with to open the management console, where you’ll see a section for Operating System (Figure B).
Figure B
Click the three-dot menu entry associated with the operating system and then click Install (Figure C).
Figure C

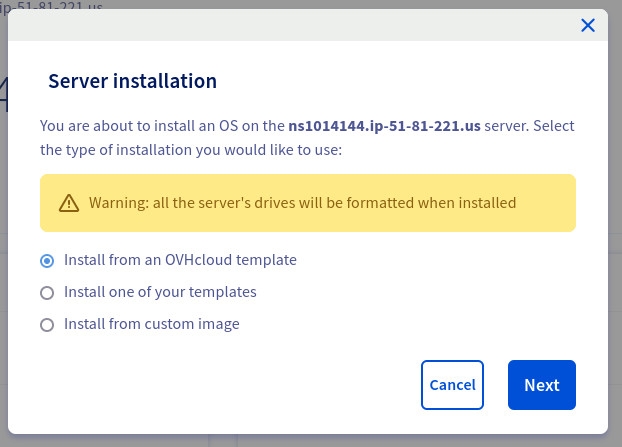
In the resulting pop-up, select Install From An OVHcloud Template and click Next (Figure D).
Figure D
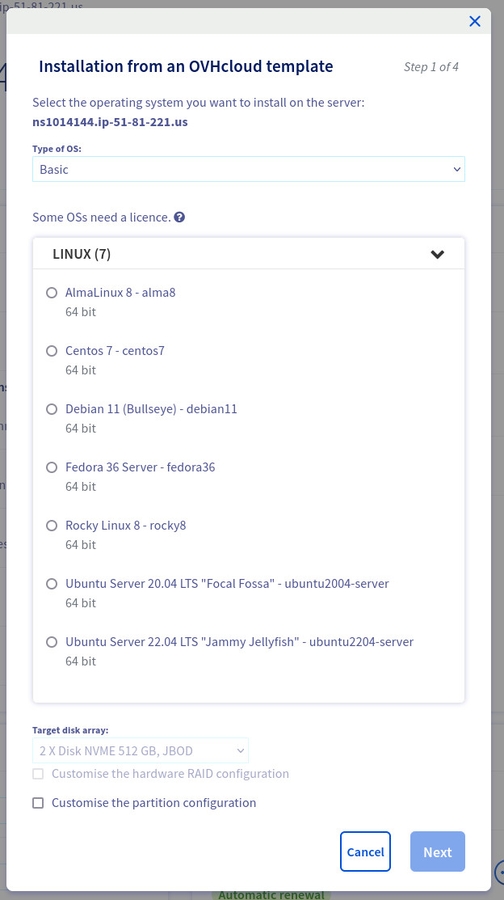
In the next window (Figure E), you can then select the OS you want to use. First, select the Type of OS drop-down and select Basic, Administration Interface or Virtualization (I chose Basic), select which supported Linux distribution you want to use (I selected Ubuntu Server 22.04), choose your language and disk options, and then click Next.
Figure E
In the final window (Figure F), give the new guest a hostname.
Figure F
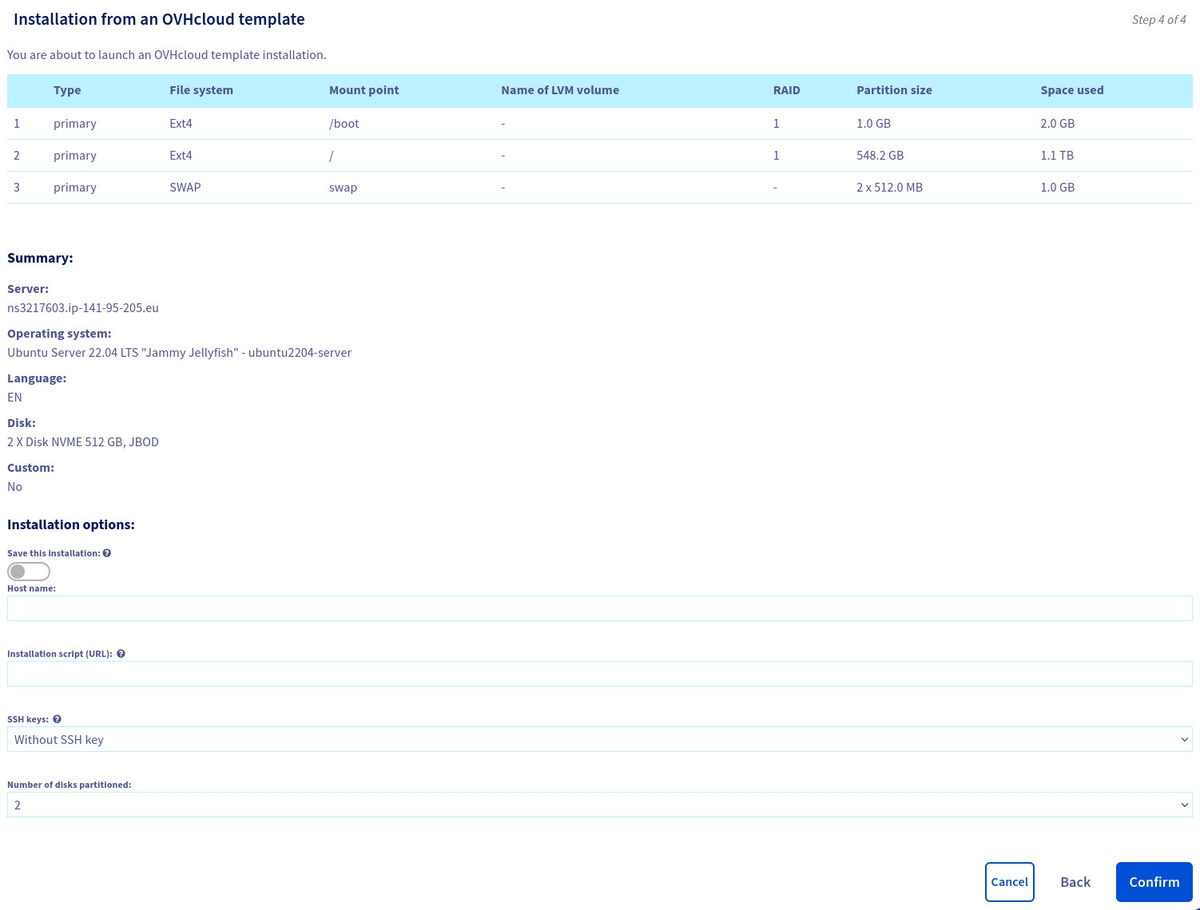
Before you click Confirm, I would highly recommend you add SSH host keys to the OS. To do this, you’ll need to make sure to create a new SSH key on the machine you’ll be logging in with, using the command:
ssh-keygen
Once the key is generated, issue the command:
cat ~/.ssh/id_rsa.pub
Copy and paste the output into the SSH Key section of your new guest and then click Confirm.
Once you confirm the installation, you’ll then have to wait until you receive a confirmation email indicating the guest is up and running. In that email, you’ll find the username and IP address that will allow you to use SSH to remote into the guest, where you can then begin the steps to install your game server of choice. For example, if you want to install the Don’t Starve Together game server, you could log in to your new guest and issue the following commands:
sudo adduser dstserversu - dstserverwget -O linuxgsm.sh https://linuxgsm.sh && chmod +x linuxgsm.sh && bash linuxgsm.sh dstserver./dstserver install
You might find the installation script errors out depending on the server you’re installing and the OS used for the guest. The LGSM game servers are pretty good at indicating what dependencies you’ll need to install to solve the problems, so if you find the installation does tank, install the recommended dependencies and run the installer again.
And that’s all there is to set up a game server with the OVH cloud service. Enjoy that fresh gaming experience with plenty of horsepowers to keep you playing without problems.
Subscribe to TechRepublic’s How To Make Tech Work on YouTube for all the latest tech advice for business pros from Jack Wallen.
Source of Article


