This kind of tool really enhances your toolbox when realizing an attack surface analysis against a desired target. Additionally, it provides a development interface that enables you to create your own modules and expand the tools’ capabilities even further.
Getting to know Recon-ng
This OSINT tool has plenty of features that come “out of the box” for you to enable and use. These features differ as do their sources of information, from domain name discovery and credentials gathering to repository scrapping with additional integrations like Masscan. In this post, we’ll take a look at installing Recon-ng, examine the different options available, and explore displaying scan results.
Also, its CLI usability deserves a special mention. Merely pressing the tab key twice will display the already-typed command, which is especially helpful when you’re not too familiar with the tool and need extra information to see what you can do with it.
[recon-ng][default][pen] > goptions set NAMESERVER PROXY THREADS TIMEOUT USER-AGENT VERBOSITYIn the following sections, we’ll delve into each of the different options available, to show you just how painless it is to use Recon-ng.
Recon-ng installation
Installing is a simple process. Simply clone all the repository files using git, and it’s ready for execution:
$ git clone https://github.com/lanmaster53/recon-ng.git Cloning into 'recon-ng'... remote: Enumerating objects: 9503, done. remote: Total 9503 (delta 0), reused 0 (delta 0), pack-reused 9503 Receiving objects: 100% (9503/9503), 3.05 MiB | 3.61 MiB/s, done. Resolving deltas: 100% (4955/4955), done.We recommend that you check all requirements beforehand, using a PIP version that uses Python3:
$ cd recon-ng $ pip3 install -r REQUIREMENTSOnce all of this is done, you’re ready to launch the application. There are three executables in this folder that allow you to run Recon-ng for different purposes:
- recon-ng: This is the command-line interactive interpreter. With it you can run all commands within the internal command prompt:

You’ll notice with the first run the “No modules enabled/installed” message. That’s because there isn’t one yet—we need to install the ones we intend to use before putting the software to work.
$ ./recon-cli -G Name Current Value Required Description ---------- ------------- -------- ----------- NAMESERVER 8.8.8.8 yes default nameserver for the resolver mixin PROXY no proxy server (address:port) THREADS 10 yes number of threads (where applicable) TIMEOUT 10 yes socket timeout (seconds) USER-AGENT Recon-ng/v5 yes user-agent string VERBOSITY 1 yes verbosity level (0 = minimal, 1 = verbose, 2 = debug)- recon-cli: This is the correspondent command-line script. It allows you to execute modules and different features as a single line command.
- recon-web: This process starts a web daemon so you can enter the dashboard to visualize all activities:
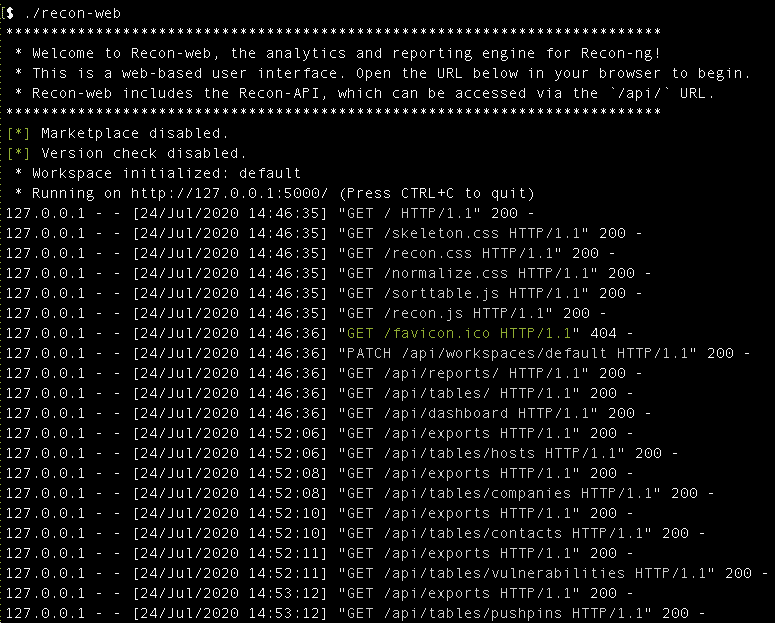
To access by default, you can enter the following address http://127.0.0.1:5000/ on your browser. The web interface looks like this:
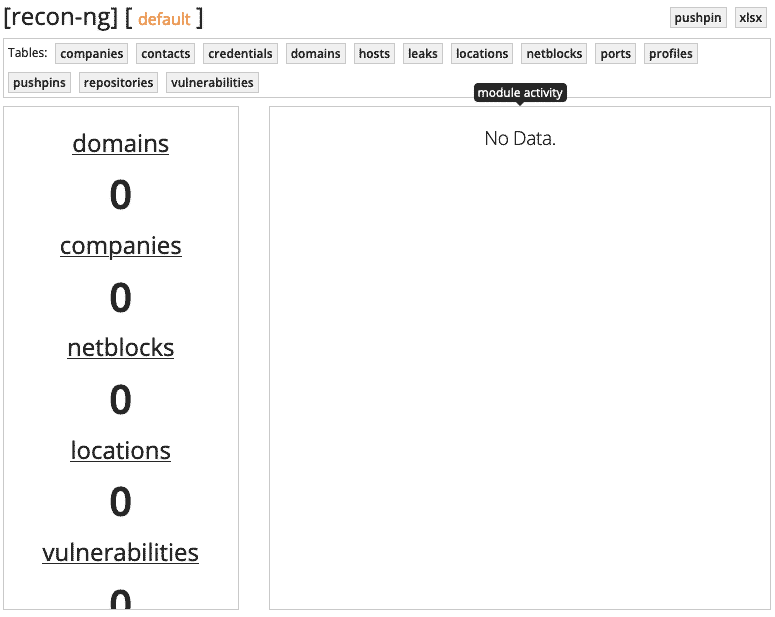
While web visualization is very simple, it provides you with a quick overview of what is being done and the status of different processes in conjunction with the obtained information.
Recon-ng usage
This information gathering tool comes with many options that can be tricky to use. The modules don’t come installed by default so you have to bring them in as needed. This will be done with the marketplace option:
[recon-ng][default] > help Commands (type [help|?] <topic>): --------------------------------- back Exits the current context dashboard Displays a summary of activity db Interfaces with the workspace's database exit Exits the framework help Displays this menu index Creates a module index (dev only) keys Manages third party resource credentials marketplace Interfaces with the module marketplace modules Interfaces with installed modules options Manages the current context options pdb Starts a Python Debugger session (dev only) script Records and executes command scripts shell Executes shell commands show Shows various framework items snapshots Manages workspace snapshots spool Spools output to a file workspaces Manages workspacesA simple marketplace search will show all available modules, along with their different characteristics. Some of them require the use of API keys, others have dependencies to be satisfied, and others have both.
[recon-ng][default] > marketplace search +-----------------------------------------------------------------------------------------------+ | Path | Version | Status | Updated | D | K | +-----------------------------------------------------------------------------------------------+ | discovery/info_disclosure/cache_snoop | 1.0 | installed | 2019-06-24 | | | | discovery/info_disclosure/interesting_files | 1.1 | installed | 2020-01-13 | | | | exploitation/injection/command_injector | 1.0 | installed | 2019-06-24 | | | | exploitation/injection/xpath_bruter | 1.2 | installed | 2019-10-08 | | | | import/csv_file | 1.1 | installed | 2019-08-09 | | | | import/list | 1.1 | installed | 2019-06-24 | | | | import/masscan | 1.0 | installed | 2020-04-07 | | | | import/nmap | 1.0 | installed | 2019-06-24 | | | | recon/companies-contacts/bing_linkedin_cache | 1.0 | installed | 2019-06-24 | | * | | recon/companies-contacts/censys_email_address | 1.0 | disabled | 2019-08-22 | | * | | recon/companies-contacts/pen | 1.1 | installed | 2019-10-15 | | | | recon/companies-domains/censys_subdomains | 1.0 | disabled | 2019-08-22 | | * | | recon/companies-domains/pen | 1.1 | installed | 2019-10-15 | | | | reporting/proxifier | 1.0 | installed | 2019-06-24 | | | | reporting/pushpin | 1.0 | installed | 2019-06-24 | | * | | reporting/xlsx | 1.0 | installed | 2019-06-24 | | | | reporting/xml | 1.1 | installed | 2019-06-24 | | | +-----------------------------------------------------------------------------------------------+ D = Has dependencies. See info for details. K = Requires keys. See info for details.When you find the desired module, you can install it with the marketplace install command followed by the designated path to reach the module. In the case below we’re installing the migrate_contacts module:
[recon-ng][default] > marketplace install contacts-domains/migrate_contacts [*] Module installed: recon/contacts-domains/migrate_contacts [*] Reloading modules... [recon-ng][default] > modules load migrate_contactsYou can also search the marketplace for a particular type of category, such as a repository search using different techniques:
[recon-ng][default] > marketplace search repos [*] Searching module index for 'repos'... +------------------------------------------------------------------------------------------------+ | Path | Version | Status | Updated | D | K | +------------------------------------------------------------------------------------------------+ | recon/companies-multi/github_miner | 1.1 | not installed | 2020-05-15 | | * | | recon/profiles-contacts/dev_diver | 1.1 | not installed | 2020-05-15 | | | | recon/profiles-repositories/github_repos | 1.1 | not installed | 2020-05-15 | | * | | recon/repositories-profiles/github_commits | 1.0 | not installed | 2019-06-24 | | * | | recon/repositories-vulnerabilities/gists_search | 1.0 | not installed | 2019-06-24 | | | | recon/repositories-vulnerabilities/github_dorks | 1.0 | installed | 2019-06-24 | | * | +------------------------------------------------------------------------------------------------+ D = Has dependencies. See info for details. K = Requires keys. See info for details.If you want to take a deeper look at what the module does, you can use the marketplace info module followed by the module name or path, in this case Github Dorks:
[recon-ng][default] > marketplace info github dorks +------------------------------------------------------------------------------------------------------------------------------------+ | path | recon/repositories-vulnerabilities/github_dorks | | name | Github Dork Analyzer | | author | Tim Tomes (@lanmaster53) | | version | 1.0 | | last_updated | 2019-06-24 | | description | Uses 0the Github API to search for possible vulnerabilities in source code by | | | leveraging Github Dorks and the 'repo' search operator. Updates the 'vulnerabilities' | | | table with the results. | | required_keys | ['github_api'] | | dependencies | [] | | files | ['github_dorks.txt'] | | status | installed | +------------------------------------------------------------------------------------------------------------------------------------+API configuration
As mentioned before, some modules will require an API key to the associated service they run on to work properly. You’ll need to provide this key after its installation, as demonstrated in the message below:
[recon-ng][default] > marketplace install github_dorks [*] Module installed: recon/repositories-vulnerabilities/github_dorks [*] Reloading modules... [!] 'github_api' key not set. github_dorks module will likely fail at runtime. See 'keys add'.You’ll need to use the keys command to operate with the mentioned tokens. The command options are:
[recon-ng][default] > keys Manages third party resource credentials Usage: keys <add|list|remove> [...] [recon-ng][default] > keys list +--------------------+ | Name | Value | +--------------------+ | github_api | | +--------------------+So in this case, for the github_dorks module to work we need to execute the keys add command followed by the module name and the API key, as showcased below:
[recon-ng][default] > keys add github_api 987sdfs8[...]dsdf0980
[*] Key 'github_api' added.
Afterward, you may check that the key is installed by typing keys list, which will output all keys installed at that moment:
[recon-ng][default] > keys list +-------------------------------------------------------+ | Name | Value | +-------------------------------------------------------+ | github_api | 987sdfs8[...........]dsdf0980 | +-------------------------------------------------------+For keys removal, just execute the keys remove command followed by the module name:
[recon-ng][default] > keys remove Removes a third party resource credential Usage: keys remove <name>Preparing the ground
You can conduct a search on specific modules that do exactly what you intend to accomplish. For this example, we’ll take a look at how to obtain information from IANA’s private enterprise number (PEN)
[recon-ng][default] > modules search pen [*] Searching installed modules for 'pen'... Recon ----- recon/companies-contacts/pen recon/companies-domains/pen recon/domains-companies/pen recon/domains-contacts/penOnce you’ve decided which module you want to use, just proceed with loading it using the modules load command:
[recon-ng][default] > modules load recon/companies-contacts/penAs every module is independent from each other from a configuration standpoint, you’ll need to configure each one accordingly with the options command:
[recon-ng][default][pen] > options list Name Current Value Required Description ------ ------------- -------- ----------- SOURCE default yes source of input (see 'info' for details)As shown above, the options list command will display the configurable variables for the module. Then you can configure it using the options set command:
[recon-ng][default][pen] > options set SOURCE google.com SOURCE => google.comExtra information about the module can be seen by using the info within the already loaded module:
[recon-ng][default][pen] > info Name: IANA Private Enterprise Number Contact Getter Author: Jonathan M. Wilbur <jonathan@wilbur.space> Version: 1.1 Description: Given a company name, gathers the registered IANA Private Enterprise Number (PEN) contact from the PEN registry and adds the contacts's full name and email address to the 'contacts' table. Options: Name Current Value Required Descriptio ------ ------------- -------- ----------- SOURCE default yes source of input (see 'info' for details) Source Options: default SELECT DISTINCT company FROM companies WHERE company IS NOT NULL <string> string representing a single input <path> path to a file containing a list of inputs query <sql> database query returning one column of inputsExecuting Recon-ng
Putting the module to work is easy. Once it’s configured properly simply execute the command run and watch the displayed results:
[recon-ng][default][pen] > run [*] Country: None [*] Email: benl@google.com [*] First_Name: Ben [*] Last_Name: Laurie [*] Middle_Name: None [*] Notes: None [*] Phone: None [*] Region: None [*] Title: None [*] -------------------------------------------------- [*] Country: None [*] Email: gies@google.com [*] First_Name: Gary [*] Last_Name: Gies [*] Middle_Name: None [*] Notes: None [*] Phone: None [*] Region: None [*] Title: None [*] --------------------------------------------------Removing modules
You can also remove modules at any time. If they’re malfunctioning, or you just want to save resources, the marketplace command allows you to delete them from the disk:
[recon-ng][default] > marketplace remove recon/ports-hosts/ssl_scan [*] Module removed: recon/ports-hosts/ssl_scan [*] Reloading modules...After deletion, the module will show as disabled, as shown:
[recon-ng][default] > marketplace search ssl_scan [*] Searching module index for 'ssl_scan'... +----------------------------------------------------------------------+ | Path | Version | Status | Updated | D | K | +----------------------------------------------------------------------+ | recon/ports-hosts/ssl_scan | 1.0 | disabled | 2020-04-13 | | | +----------------------------------------------------------------------+ D = Has dependencies. See info for details. K = Requires keys. See info for details.Global configurations
Similarly to Metasploit, there are some global configurations that affect every module you intend to use. You can work with these variables using the goptions command:
[recon-ng][default][github_dorks] > goptions list Name Current Value Required Description ---------- ------------- -------- ----------- NAMESERVER 8.8.8.8 yes default nameserver for the resolver mixin PROXY no proxy server (address:port) THREADS 10 yes number of threads (where applicable) TIMEOUT 10 yes socket timeout (seconds) USER-AGENT Recon-ng/v5 yes user-agent string VERBOSITY 1 yes verbosity level (0 = minimal, 1 = verbose, 2 = debug)Configurations in Recon-ng are fairly straightforward. Just place the desired variable and value after the goptions set command to change the software behavior:
[recon-ng][default][pen] > goptions set NAMESERVER 1.1.1.1 NAMESERVER => 1.1.1.1Changes take effect immediately:
[recon-ng][default][pen] > goptions list Name Current Value Required Description ---------- ------------- -------- ----------- NAMESERVER 1.1.1.1 yes default nameserver for the resolver mixin PROXY no proxy server (address:port) THREADS 10 yes number of threads (where applicable) TIMEOUT 10 yes socket timeout (seconds) USER-AGENT Recon-ng/v5 yes user-agent string VERBOSITY 1 yes verbosity level (0 = minimal, 1 = verbose, 2 = debug)In some cases, and depending on what module you’re using, the results are going to be saved in the hard drive. In that event, you’ll need to manually search for the results in the tool’s configuration folder.
Additional tooltips
If you want to exit a loaded module, you have two options. The first is to load another module instead:
[recon-ng][default][pen] > modules load recon/domains-hosts/ssl_san [recon-ng][default][ssl_san] > modules search ssl [*] Searching installed modules for 'ssl'... Recon ----- recon/domains-hosts/ssl_san recon/hosts-hosts/ssltools [recon-ng][default][ssl_san] > modules load recon/hosts-hosts/ssltools [recon-ng][default][ssltools] > infoThe second option is to press a CTRL + C key combination and this will take you to the default prompt. This is especially useful if you don’t want to exit the CLI (by typing exit) and need to use commands that are only available in the main prompt (such as the marketplace command).
[recon-ng][default][ssltools] > [recon-ng][default] >The dashboard command displays the activity of the modules and some statistics on results:
[recon-ng][default][ssltools] > dashboard +--------------------------------------------------------+ | Activity Summary | +--------------------------------------------------------+ | Module | Runs | +--------------------------------------------------------+ | discovery/info_disclosure/interesting_files | 1 | | recon/domains-contacts/pen | 2 | | recon/domains-contacts/wikileaker | 1 | | recon/domains-credentials/pwnedlist/leak_lookup | 2 | | recon/domains-hosts/findsubdomains | 1 | | recon/hosts-hosts/ssltools | 1 | | recon/profiles-profiles/twitter_mentioned | 1 | +--------------------------------------------------------+ +----------------------------+ | Results Summary | +----------------------------+ | Category | Quantity | +----------------------------+ | Domains | 0 | | Companies | 0 | | Netblocks | 0 | | Locations | 0 | | Vulnerabilities | 0 | | Ports | 0 | | Hosts | 0 | | Contacts | 6 | | Credentials | 0 | | Leaks | 0 | | Pushpins | 0 | | Profiles | 0 | | Repositories | 0 | +----------------------------+To solve dependency issues, and have the whole software “ready to go”, you may find it useful to install every module available in one single command, to avoid having to do so individually every time you need to use one of them. This is done with the marketplace install all command:
[recon-ng][default] > marketplace install all [*] Module installed: discovery/info_disclosure/cache_snoop [*] Module installed: discovery/info_disclosure/interesting_files [*] Module installed: exploitation/injection/command_injector [*] Module installed: exploitation/injection/xpath_bruter [*] Module installed: import/csv_file [*] Module installed: import/list [*] Module installed: import/masscan [*] Module installed: import/nmap [*] Module installed: recon/companies-contacts/bing_linkedin_cache [*] Module installed: recon/companies-contacts/censys_email_address [*] Module installed: recon/companies-contacts/pen [*] Module installed: recon/companies-domains/censys_subdomains [*] Module installed: recon/companies-domains/pen [*] Module installed: recon/companies-domains/viewdns_reverse_whois [*] Module installed: recon/companies-domains/whoxy_dns [*] Module installed: recon/companies-hosts/censys_org [*] Module installed: recon/companies-hosts/censys_tls_subjects [*] Module installed: recon/companies-multi/github_miner [*] Module installed: recon/companies-multi/shodan_org [...]You can run different reconnaissance campaigns and keep results isolated from each endeavor by using the built-in workspaces. At the start, you’ll encounter the default workspace called “default”, but you can change this at any time by creating a new workspace and conducting commands inside it as shown below:
[recon-ng][default] > workspaces list +----------------------------------+ | Workspaces | Modified | +----------------------------------+ | default | 2020-08-04 09:03:46 | +----------------------------------+ [recon-ng][default] > workspaces create Creates a new workspace Usage: workspace create <name> [recon-ng][default] > workspaces create SecurityTrails [recon-ng][SecurityTrails] > dashboard [*] This workspace has no record of activity. [recon-ng][SecurityTrails] > workspaces list +--------------------------------------+ | Workspaces | Modified | +--------------------------------------+ | SecurityTrails | 2020-08-04 09:34:24 | | default | 2020-08-04 09:03:46 | +--------------------------------------+You can also run all of this using the command-line tool by selecting the module, the workspace plus the desired module options:
$ ./recon-cli -w SecurityTrails -m recon/companies-contacts/pen -O WORKSPACE => SecurityTrails MODULE => recon/companies-contacts/pen Name Current Value Required Description ------ ------------- -------- ----------- SOURCE default yes source of input (see 'info' for details)You may find it interesting to explore every module and choice available for this tool to discover what you can accomplish.
Summary
As you’ve seen today, these tools add extra power to your reconnaissance endeavors. It may complement the tools you already have, and possibly bring in some extra functionality that your current tools lack.
Checking out different OSINT software always helps to explore how things are being done by other developers who try to extract the most information with the least exposure and use of computational resources possible.
Despite these facts, Recon-ng feels short on the modules documentation side. Trying to figure out how every module should work is not as easy as executing the info command or reading a guide, so be prepared for a few head-scratching moments. Additionally, the hard limit of running one check at a time could make this tool less attractive than others that run multiple checks in one single run.
Apart from this, Recon-ng should be definitely taken into account as a helpful information gathering resource!

Source of Article