WireGuard has yet to arrive in the Linux kernel, but you can still start testing how this new feature will work.

Image: Getty Images/iStockphoto
When the Linux kernel 5.6 is released, the Wireguard VPN will be built in. Distributions like Ubuntu 20.04 will be adding this service into their platform even earlier (with kernel 5.4). If you’re looking to get a head start on the WireGuard experience, I want to walk you through the process of getting it up and running.
I’ll be demonstrating on Ubuntu 20.04 daily. As of this writing, WireGuard has yet to make it into the daily release. Fortunately, the developers have made WireGuard available to the standard Universe repository, so installation is simple.
SEE: Resolve IT issues quickly with these 10 PowerShell cmdlets (TechRepublic download)
What you’ll need
How to install WireGuard
The installation of WireGuard is actually quite simple. Open a terminal window and issue the command:
sudo apt-get install wireguard -y
Once the VPN service is installed, you’re ready to configure it.
How to configure WireGuard
One of the best things about WireGuard is that it’s security is based on SSH-like key pairs. So, the first thing to be done is to generate the necessary private and public key pair. To do this, go back to the terminal window and issue the following commands:
mkdir ~/.wireguard
cd ~/.wireguard
umask 077
wg genkey | tee privatekey | wg pubkey > publickey
Next, you need to copy the contents of newly-generated private key with the command:
cat privatekey
The above command will print out a string of characters. You’ll need to do this on both the server and the client (as you’ll need the server private key and the client public key). Copy that string to your clipboard and then create a new WireGuard configuration file with the command:
sudo nano /etc/wireguard/wg0.conf
In that file, paste the following:
[Interface]
Address = SERVER_IP
SaveConfig = true
ListenPort = 51820
PrivateKey = SERVER_PRIVATE_KEY [Peer]
PublicKey = CLIENT_PUBLIC_KEY
AllowedIPs = CLIENT_IP
Where SERVER_PRIVATE_KEY is the string of characters you copied to your clipboard from the server, SERVER_IP is the IP address of the hosting server, CLIENT_PUBLIC_KEY is the client public key, and CLIENT_IP is the IP address of the client.
Save and close the file.
How to configure the firewall
Now it’s time to configure the firewall, so connections can enter the server. Back at the terminal window, create the firewall rules with the following commands:
sudo ufw allow 22/tcp
sudo ufw allow 51820/udp
sudo ufw enable
How to start the WireGuard VPN
You’re now ready to start your VPN. To do this, issue the command:
sudo wg-quick up wg0
Enable the service to start at boot with the command:
sudo systemctl enable wg-quick@wg0
To make sure your new WireGuard VPN is up and running, issue the command:
sudo wg show
You should see the public key listed and the listening port (Figure A).
Figure A
” data-credit rel=”noopener noreferrer nofollow”>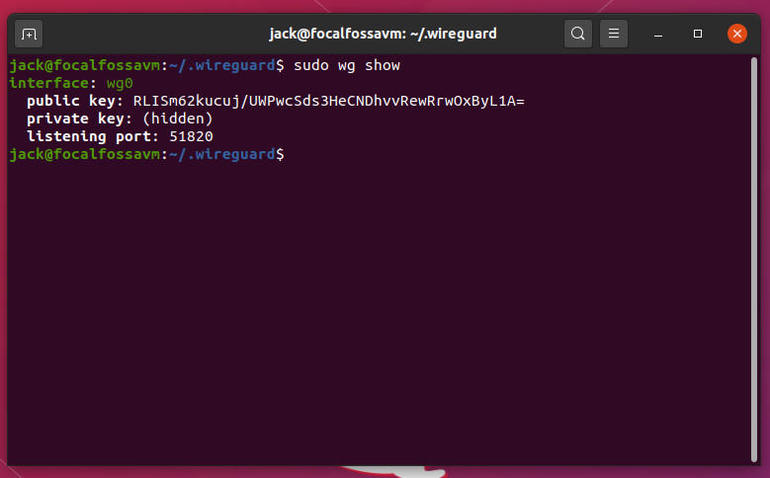
Our WireGuard VPN is up and running.
How to configure the client
Now we’re going to configure a Ubuntu client to connect to the VPN server. Of course, you have to have WireGuard installed on the client as well, so follow the same steps you did for the server. Once installed, generate the key for the client in the same method you did for the server.
Next, create the configuration file with the command:
sudo nano /etc/wireguard/wg0.conf
In this file, paste the following:
[Interface]
Address = CLIENT_IP
SaveConfig = true
PrivateKey = CLIENT_PRIVATE_KEY [Peer]
PublicKey = SERVER_PUB_KEY
Endpoint = SERVER_IP:51820
AllowedIPs = 0.0.0.0/0, ::/0
Where CLIENT_PRIVATE_KEY is the client’s private key, SERVER_PUB_KEY is the public key of the server, SERVER_IP is the IP address of the WireGuard VPN server, and CLIENT_IP is the IP address of the client.
Save and close the file.
Activate the client with the command (run on the client):
sudo wg-quick up wg0
On your client, issue the command:
sudo wg
You should see the server endpoint listed and a bit more information (Figure B).
Figure B
” data-credit rel=”noopener noreferrer nofollow”>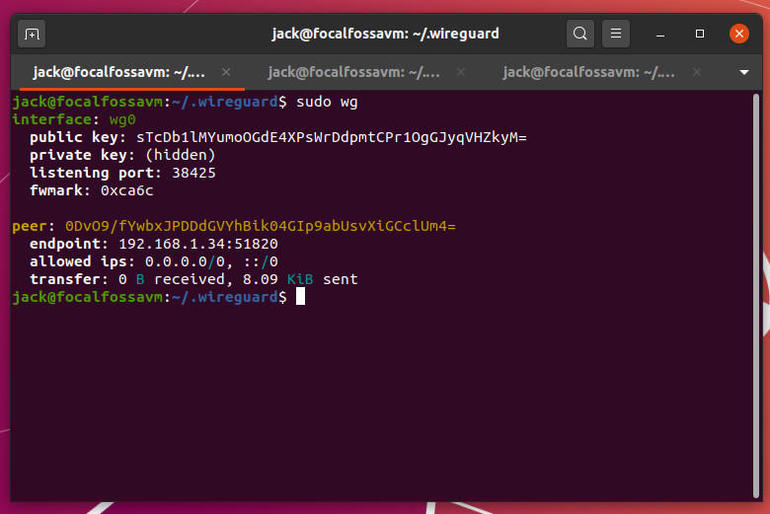
Our VPN is now connected.
And that’s it. You should now have a VPN connection between client and server.

Cybersecurity Insider Newsletter
Strengthen your organization’s IT security defenses by keeping abreast of the latest cybersecurity news, solutions, and best practices. Delivered Tuesdays and Thursdays
Also see
Source of Article