Jack Wallen walks you through the process of installing the latest release of the on-premise cloud server, Nextcloud 20.

Image: Jack Wallen
Nextcloud is everywhere these days. There’s a good reason for that–of all the on-premise cloud solutions on the market, the open source Nextcloud is the easiest to install, most flexible, scales from a single user to an enterprise environment and makes using the cloud as easy as any other tool.
With the release of Nextcloud 20, there are a few new features you’ll want to take advantage of such as the new Dashboard and Talk integrations. Instead of upgrading Nextcloud 19 to Nextcloud 20, why not go for a fresh installation. Let’s do just that. I’ll demonstrate on Ubuntu Server 20.04.
SEE: Cloud data storage policy (TechRepublic Premium)
What you’ll need
Note: You can install Nextcloud on distributions other than Ubuntu Server. I prefer Ubuntu because it’s one of the most widely used server platforms (it’s the most used Linux distribution on Azure) and it’s incredibly user-friendly.
How to install the necessary dependencies
The first thing to be done is the installation of the necessary dependencies. We’ll break this into two sections. Log in to your server and access a terminal window. Install the first set of dependencies with the command:
sudo apt-get install apache2 mysql-server -y
When that completes, install the second group of dependencies with the command:
sudo apt-get install php zip libapache2-mod-php php-gd php-json php-mysql php-curl php-mbstring php-intl php-imagick php-xml php-zip php-mysql php-bcmath php-gmp -y
How to secure the MySQL database
With the dependencies out of the way, the next thing to be taken care of is securing the database server. Back at the terminal window, issue the command:
sudo mysql_secure_installation
Give MySQL a new admin password and answer the remaining questions with y (for yes).
How to create the database
Now we’ll create the Nextcloud database and a database user. Log in to the MySQL console with the command:
sudo mysql -u root -p
Create the new database with the command:
CREATE DATABASE nextcloud;
Create a new user with the command:
CREATE USER 'nextcloud'@'localhost' IDENTIFIED BY 'PASSWORD';
Where PASSWORD is a unique and strong password.
Give the new user the necessary permissions with the command:
GRANT ALL PRIVILEGES ON nextcloud.* TO 'nextcloud'@'localhost';
Flush the privileges and exit the console with the commands:
FLUSH PRIVILEGES;
exit
How to download and unpack the Nextcloud file
In order to install Nextcloud, we have to first download the necessary zipped file. To do that, issue the command:
wget https://download.nextcloud.com/server/releases/nextcloud-20.0.0.zip
Unpack that file with the command:
unzip nextcloud-20.0.0.zip
Move the newly-created nextcloud file to the Apache document root with the command:
sudo mv nextcloud /var/www/html/
Next, we’ll give the Nextcloud folder the necessary ownership with the command:
sudo chown -R www-data:www-data /var/www/html/nextcloud
How to configure the web server
With the Nextcloud directory in place, we now have to make Apache aware of it. For that, we have to create a .conf file with the command:
sudo nano /etc/apache2/sites-available/nextcloud.conf
In that file, paste the following:
Alias /nextcloud "/var/www/html/nextcloud/"
<Directory /var/www/html/nextcloud/> Options +FollowSymlinks AllowOverride All <IfModule mod_dav.c> Dav off </IfModule> SetEnv HOME /var/www/html/nextcloud SetEnv HTTP_HOME /var/www/html/nextcloud
</Directory>
Save and close the file.
Enable the new site with the command:
sudo a2ensite nextcloud
We’ll now enable the necessary Apache modules by issuing the command:
sudo a2enmod rewrite headers env dir mime
Finally, we’ll change the PHP memory limit with the command:
sudo sed -i '/^memory_limit =/s/=.*/= 512M/' /etc/php/7.4/apache2/php.ini
Restart Apache with the command:
sudo systemctl restart apache2
How to finish the installation
Your venture into the command line is complete. Now you can open a browser and point it to http://SERVER_IP/nextcloud (where SERVER_IP is the IP address of the hosting server). You’ll first be greeted by the web-based installer (Figure A).
Figure
” data-credit rel=”noopener noreferrer nofollow”>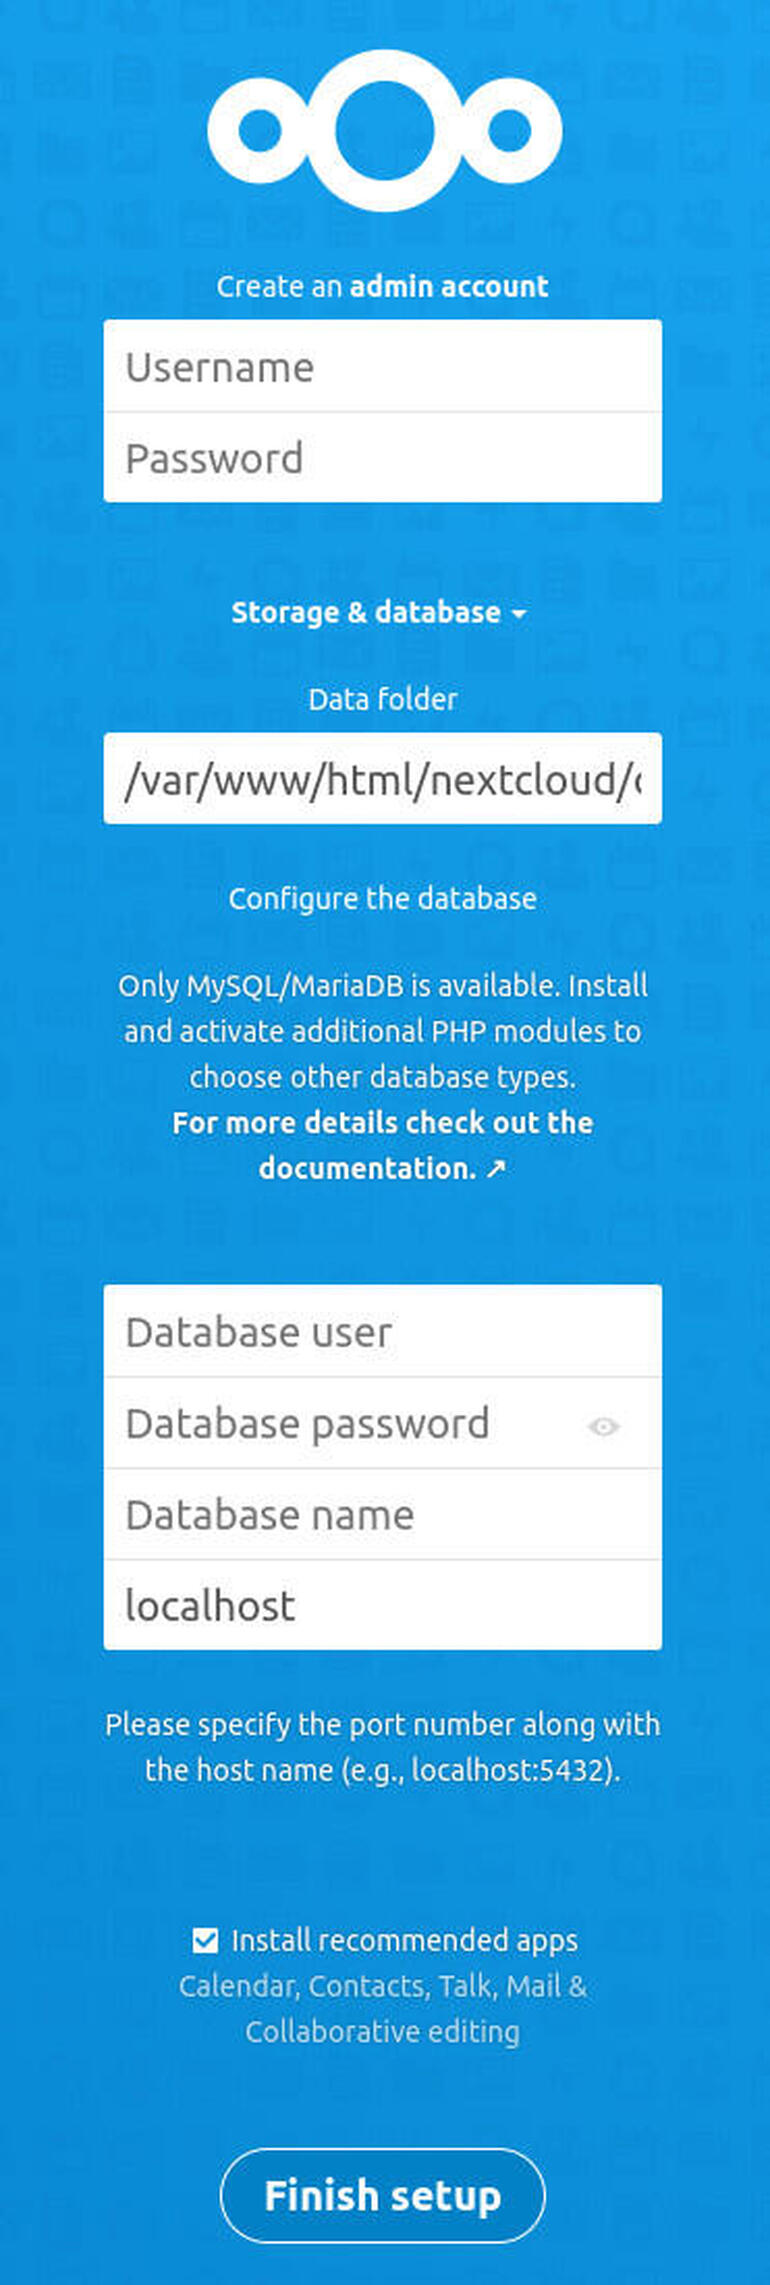
The Nextcloud web-based installer.
Create a new admin user and fill out the details for the database, which will be:
Leave localhost as is and leave Install Recommended Apps checked.
After you’ve entered the information, click Finish Setup. When the installation completes, you’ll find yourself logged in with the Admin user and on the new Nextcloud Dashboard (Figure B).
Figure B
” data-credit rel=”noopener noreferrer nofollow”>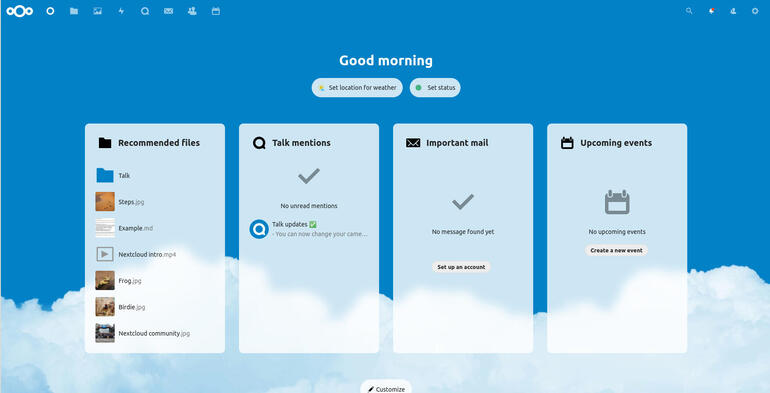
The new Nextcloud Dashboard awaits customization.
And that’s all there is to installing your very own, on-premise cloud solution. Nextcloud 20 is an amazing piece of technology that can serve just about anyone’s private or hybrid cloud needs.

Cloud and Everything as a Service Newsletter
This is your go-to resource for XaaS, AWS, Microsoft Azure, Google Cloud Platform, cloud engineering jobs, and cloud security news and tips. Delivered Mondays
Also see
Source of Article