If you’re looking to deploy a Network Attached Storage solution, look no further than XigmaNAS. Learn how to get it up and running.

Getty Images/iStockphoto
Your business is constantly expanding. In order to meet those ever-growing needs, you must deploy more and more technology. In this world of cloud-first landscapes, it’s very easy to forget the tried and true Network Attached Storage (NAS). But, you shouldn’t turn your back on a piece of technology that has stood the test of time and served up files on-premise like a champ.
When you consider deploying an NAS, you should turn to open source. Why? Most of the NAS devices you purchase use open source to get the job done, so why not cut out the middle man, save some cash, and deploy your NAS with the help of XigmaNAS?
XigmaNAS is an open source storage solution that can be installed on virtually any hardware or platform (bare metal or virtual). XigmaNAS offers features like:
-
OpenZFS support
-
Software RAID 1,2,5 and mix (such as 1+0,1+1)
-
UFS, Ext2/3, FAT, exFAT (read only), and NTFS support
-
Encryption
-
SMB/CIFS
-
NFS
-
FTP/TFTP
-
RSYNC
-
SCP
-
Wake On Lan
-
Bridge networking
-
Real-time stats
-
Email alerts
XigmaNAS might be an ideal solution for anyone looking to beef up their local storage options. I’m going to walk you through getting XigmaNAS up and running.
SEE: Resolve IT issues quickly with these 10 PowerShell cmdlets (TechRepublic download)
What you’ll need
XigmaNAS isn’t a piece of software you install; it’s a full-blown Linux distribution that you install on either bare metal or as a virtual machine (VM). How you deploy is up to you.
I’ll be demonstrating the install process via a VirtualBox VM. I won’t walk you through the process of creating the VM, as that’s a fairly rudimentary process. Just remember: If you opt to go the virtual route, you’ll want to make sure you give it plenty of drive space or be able to create new drives to be added later.
Download the latest stable version of XigmaNAS from Sourceforge. Once you’ve downloaded the ISO, create your virtual machine, or burn the ISO onto a USB drive (with a tool like Unetbootin), and boot the machine from the attached drive.
How to configure XigmaNAS
When the boot process completes, you’ll find yourself at the console menu (Figure A).
Figure A
” data-credit rel=”noopener noreferrer nofollow”>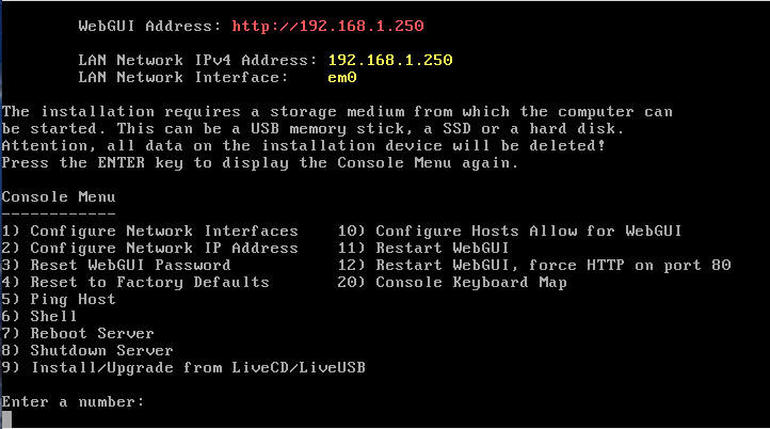
The XigmaNAS console menu, ready for your configuration.
At this point, you could simply point your browser to the IP address displayed on the console. The problem with that is XigmaNAS has configured that address by way of DHCP and you certainly don’t want to leave your NAS without a static IP address.
To configure a static IP, type 2 and then, when prompted, use your cursor keys to select No (Figure B).
Figure B
” data-credit rel=”noopener noreferrer nofollow”>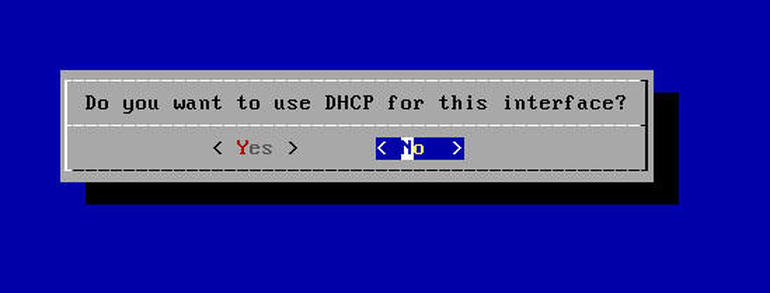
Opting for a static IP address on XigmaNAS.
In the next window, type the IP address you want to use for XigmaNAS (Figure C).
Figure C
” data-credit rel=”noopener noreferrer nofollow”>
Configuring a static IP address for XigmaNAS.
Once you type the address, hit Enter on your keyboard to save the changes.
Next, you need to enter a new LAN subnet mask (Figure D). The configuration tool will default to 255.255.255.0 (aka 24). If that’s okay for your network, hit Enter on your keyboard.
Figure D
” data-credit rel=”noopener noreferrer nofollow”>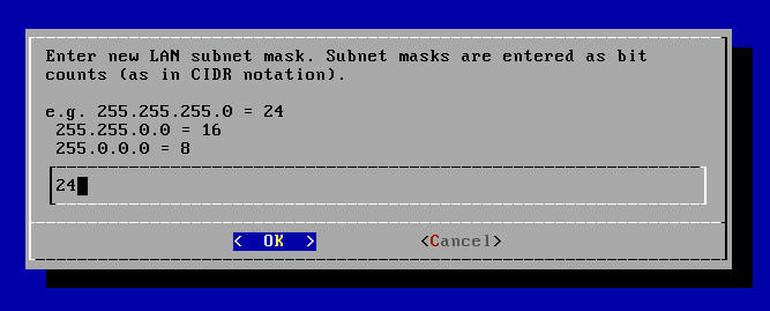
Configuring the subnet mask for XigmaNAS.
In the next window, you must configure a default gateway (Figure E). Type the gateway address and hit Enter on your keyboard.
Figure E
” data-credit rel=”noopener noreferrer nofollow”>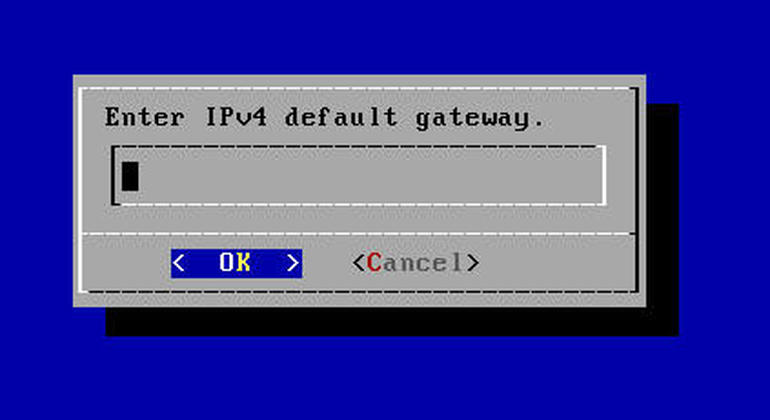
Adding a default gateway for XigmaNAS.
In the resulting window, type a primary DNS address and hit Enter on your keyboard (Figure F).
Figure F
” data-credit rel=”noopener noreferrer nofollow”>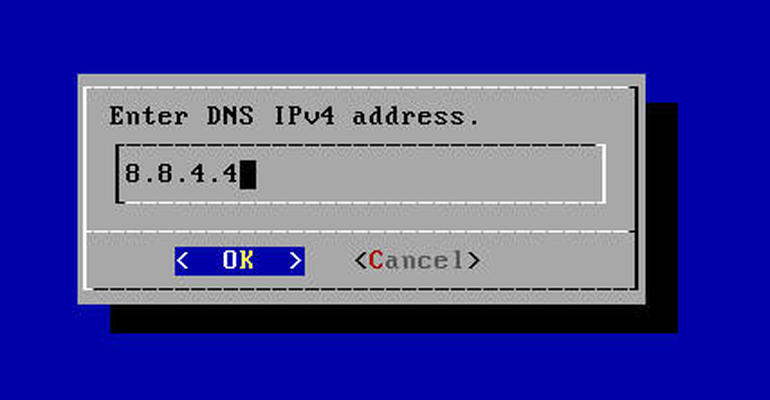
Adding DNS into the XigmaNAS configuration.
You will then be asked if you want to configure IPv6 for the interface (Figure G). If your network requires IPv6, select Yes and complete the configuration, otherwise accept the default by hitting Enter on your keyboard.
Figure G
” data-credit rel=”noopener noreferrer nofollow”>
To IPv6 or not to IPv6 is the question at hand.
You will then be presented with the IP address for which you will access your XigmaNAS device. Point a browser to that address and you’ll be prompted to enter the default login credentials (admin/xigmanas).
How to change the default password
The first thing you must do, after getting XigmaNAS up and running, is to change the default password. To do this, click System | General in the main window (Figure H).
Figure H
” data-credit rel=”noopener noreferrer nofollow”>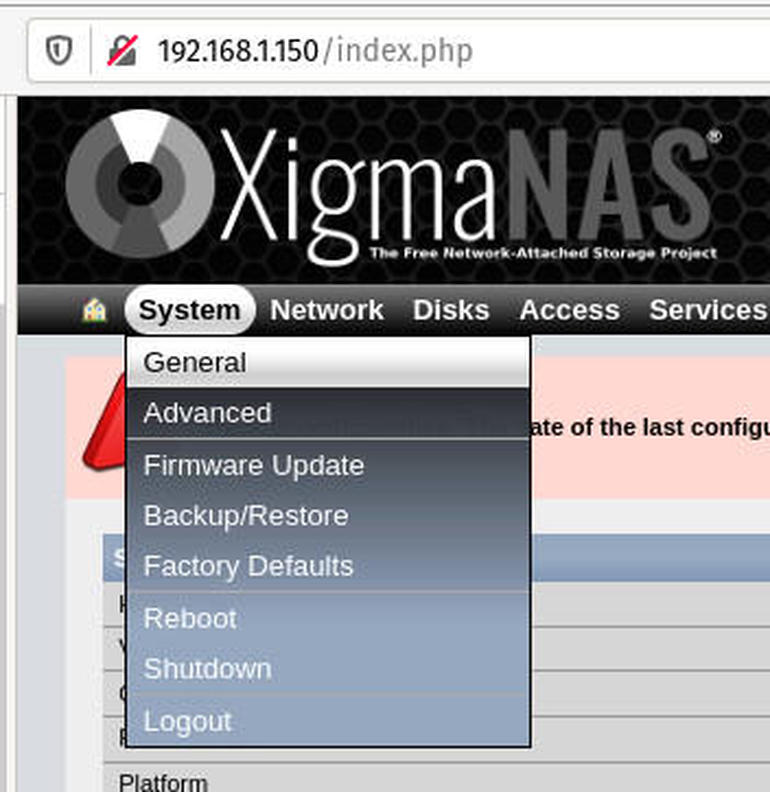
The System menu from the XigmaNAS main window.
In the resulting window, type the current password (xigmasnas) and then type/retype a new (secure and unique) admin password (Figure I).
Figure I
” data-credit rel=”noopener noreferrer nofollow”>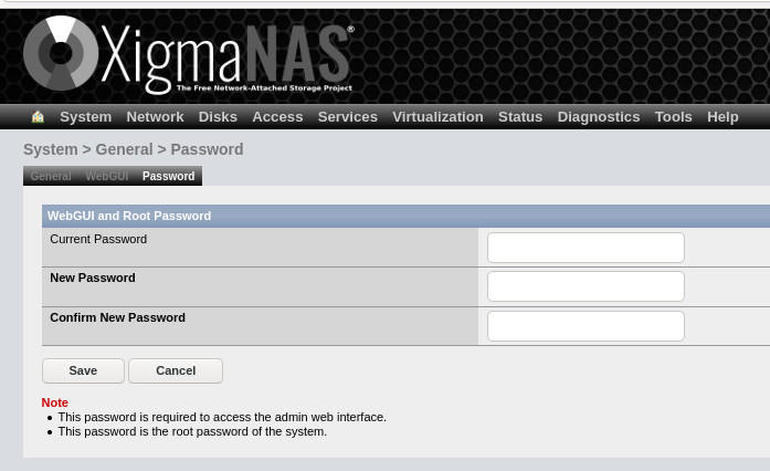
Changing the XigmaNAS default admin password.
After typing and verifying the new password, click Save and you’re ready to start configuring XigmaNAS to work for your company.
And that’s all there is to getting XigmaNAS up and running to the point where you can reliably access the user interface. Next time around, we’ll discuss how to add disks and mount points to this open source NAS solution.

Open Source Weekly Newsletter
You don’t want to miss our tips, tutorials, and commentary on the Linux OS and open source applications. Delivered Tuesdays
Also see
Source of Article